Intro, A look back into the past #
So a while ago, I posted this rundown of my Plex server and storage setup for media, and it got some traction, which is nice. In that post I mentioned that my storage setup left a lot to be desired and I had issues with it, let me explain.
I started collecting media when I was about 13, starting off with a small HTPC custom build with 2 hard drives, over time this grew but I was still just adding disks randomly to create a pool, this is why I used FlexRAID at the time. The ability to add random disks at will and still have a protected pool was ideal for teenage muffin and his limited funds. Over the years I have continued this setup due to the price benefits and it’s pinched me in the ass a few times.
FlexRAID is awful. I’m dubious as to whether it’s working at all to be honest, but long story short, I’ve come close to total data loss a few times, and these days I am constantly losing data and having it randomly pop up due to the software not working how it should, so I decided it was finally time to drop some dough and create a proper storage server to migrate this one over to.
This post will be about that build, and how I managed to talk myself into buying a motherfucking 60 bay chassis.
The plan #
My plan was to build a completely new machine to go into MuffNet and recycle nothing but disks from the existing system, once I had moved stuff over.
This storage server was primarily used for my media, and at the time of writing had about 80TB which I planned to cut down a lot when moving data over. This machine was the last of my legacy storage servers as all my important prod data lives offsite on a beastly 200TB RAW machine, but more on that some other time.
I wanted to build something (relatively) new so it would be efficient, and something solid that was tried and tested. I had also pretty much decided on FreeNAS at this point, because it’s solid, works well and is something I can trust. Also, ZFS is dope.
The following are the parts I chose for the build:
- SuperMicro X9SRL-F
- E5-2630L
- 8x 8GB ECC DDR3
- 3x LSI 9211-8i
- XCASE 4U 24 Bay
SuperMicro X9SRL-F #
The reason for choosing this motherboard was the price point, at it was a pretty good deal in my book and had plenty of PCIE expansion for any future endeavours and the cards I was using. The board supported 2011 socket processors, which I find is a nice balance of power and efficiency. The board has 2x 1GB intel NICs, which is a must and some remote management which is nice as well. Supporting large amounts of memory is also a plus too.
E5-2630L & 64GB Memory #
The E5-2630L seemed like the perfect processor for this build. 60W TDP is on the lower end of the power scale for these line of chips, which is cool, and 6 cores 12 threads @ 2GHz should provide more than enough oomph for a file server. I went all out and got 64GB of memory for this build as I wanted things to work properly, and ZFS likes memory.
XCASE 4U 24 Bay & 9211-8i #
As you’ll read below, I didn’t end up getting either of these items but originally, this case seemed like the best I was going to get here in the UK. The fileserver I’m replacing is actually already in a 24bay case but I need that one up and running for the file transfer, so buying another one made sense. I could work around this obviously, but well and truly, fuck that.
The case doesn’t have an expander built in so requires 1x SFF8087 per row of 4x drives, which is why I bought 3x 9211’s. That was actually cheaper than getting an expander and why I chose a board which so many PCIE slots.
So far in the build, this was all I was concerned with, disks required a whole other train of thought with many back and forths with myself.
So at this point, I had ordered the ‘core’ components and was slightly in the hole, but that’s okay I was planning to spend a bit to get this out of the way, thankfully I hadn’t ordered the case yet, but the rest were on their way.
60 reasons why I shouldn’t be allowed on eBay #
So there I was, living my life day to day, planning what disk arrangement to use (coming up in the next chapter) and all of a sudden I stumble across a rare find, a ‘reasonably’ priced DAS selling in the UK.
The HGST 60 bay seemed too good to be true at just a few hundred quid, and I had an internal struggle with myself. Could this be the chassis to end my expansion needs once and for all? Yes, as it turns out.
I ended up pulling the trigger on this beautiful thing and before I knew it I had a giant box in my living room with nothing else to show for it. (Review coming soon, I had to actually finish this post and use the thing before I could do a proper write-up.)
This changed my plans a little bit and I was very thankful I hadn’t bought the 24 bay chassis yet. So now, I no longer had any need for the 3x 9211-8i’s (fuck) and needed to work out how to integrate this chassis into my storage build that was already underway.
I decided I would keep the parts that I had already ordered, as they are still valid, and as luck would have it I had a shitload of LSI 9200-8E cards in one of my part boxes, great! Now I needed a way to get the QSFP+ connector on the HGST to connect to the HBA, after some looking it appeared the only solution was to buy a 2m QSFP > SFF8088 cable, which cost me 90 fucking quid.
You can find out more about the HGST 60 bay chassis in a separate blog post here, along with some pretty photos.
Okay, so back on track now, and my plans for new storage was defiantly coming together, slowly but surely.
Disks. Motherfucking disks #
Now, as much as I would love to explain my hardships you about my decision making regarding disks, I actually want to keep this readable, so after literally months of deciding, I finally decided on getting 8x 8TB drives to start with in a RAIDZ2.
The drives were going to be these 8TB Seagate archive drives. Was this ideal for a FreeNAS ZFS array? Probably not. But at the price per GB I really wasn’t getting anything better, and this would give me about 43.7 TB of usable storage off the bat, which isn’t to be sniffed at. I would later add another 8 either as a separate pool or addition vDev to expand the pool when I had more money to do so.
This was deemed sufficient enough to move some of my media over to free up some of the older disks, and I didn’t worry too much about them being archive drives as the data was pretty static.
So, as with all things ‘me’ that ended up being a bust too as I got a deal that I couldn’t pass up. I was offered 18x 4TB SAS disks, these exact disks in fact, for around the same as I was paying anyway. I preferred this deal due to the smaller disks making rebuilds a tad bit more realistic if things were to hit the fan, and the disks themselves are better suited to 24/7 work. I also grabbed some of these for my hypervisors, but more on that some other time.
So the plan was to use 16x 4TB SAS disks in 2x vDevs of 8 disks with RAIDZ2 redundancy, adding the other two disks in as a hot spare. I know I am veering off what people would call ideal, a Z2 for 8 disks seems dangerous but it’s what I’m doing, I can essentially loose 2 disks per vDev before everything is fucked, which is fine for this data in my eyes.
The plan (again) #
So there’s been a lot of text thus far, and if you’ve read this far then you have my gratitude, there are some pretty build pictures coming up real soon, I promise.
So the plan now had changed a bit, but I am finally at a point where everything is planned and ordered, and now all I need to do is execute said plan and hope I haven’t spent far too much money just to troubleshoot stupid issues. So, the full list of parts are as follows:
- SuperMicro X9SRL-F
- E5-2630L
- 8x 8GB ECC DDR3
- LSI 9200-8E
- PCIE Extension Cables
- HGST 60 Bay
- SFF8644 > SFF8088
- be quiet! BK002 Shadow Rock LP CPU
- Cruzer Fit 16 GB
- Chenbro RM24100-L 2u Chassis & Rails
- Seasonic 350ES Atx Psu
- 18x 4TB SAS WD4001FYYG
All in all, I’m looking at over £4k being spent here, I was prepared to spend this much but I won’t lie and say it didn’t hurt me inside. It has been a very costly few months with this and my new 2016 MBP, but the life of a labber is never complete, it seems.
Some of you may have noticed a fuckup in my parts list, and yes, I am an idiot but more on that very soon….
The build #
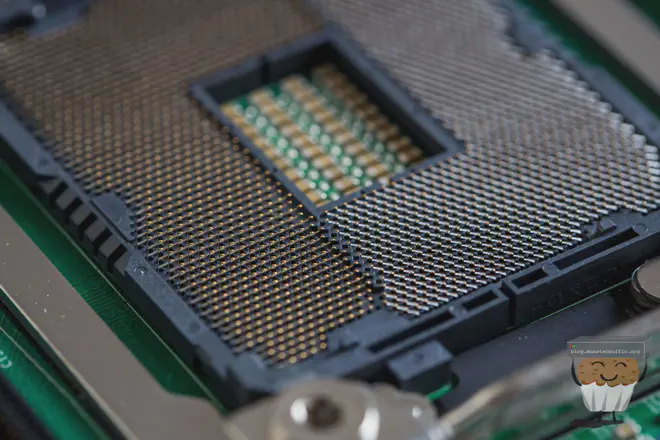
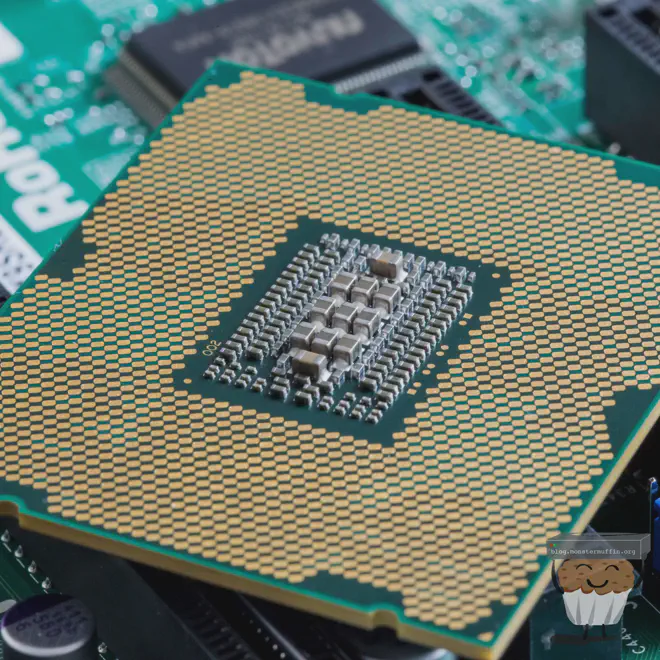
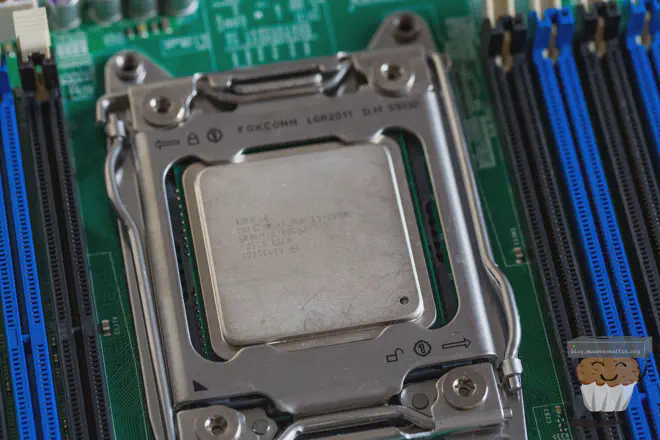
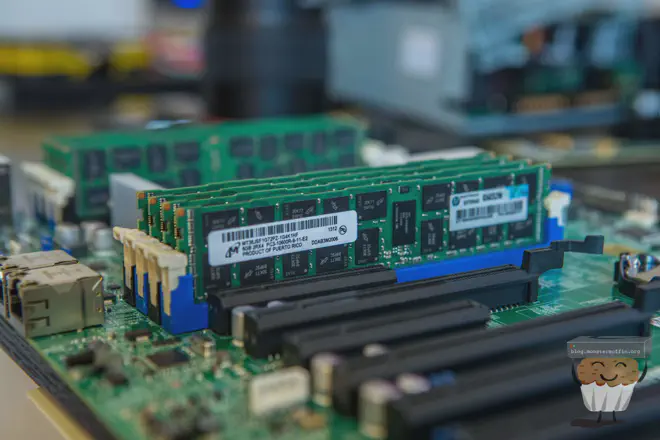
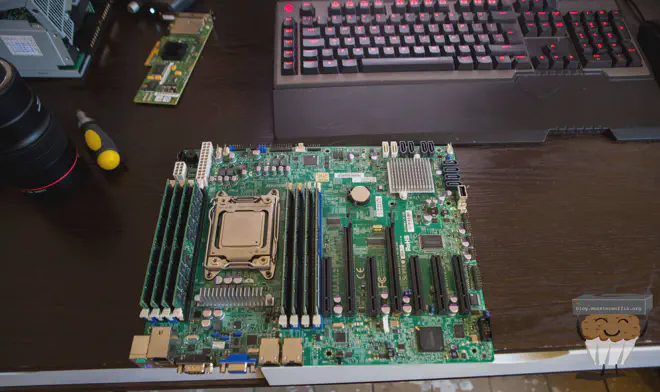
This one was feeling a bit left out so she came to see what was happening and gave me some company.

Narrow ILM. Intel, why? #
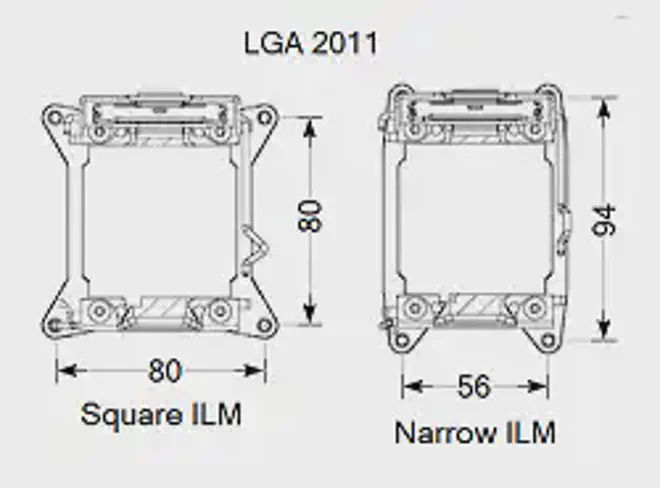
So the mistake I made was completely forgetting that narrow ILM was a thing. I’d been so busy making sure everything was going to work and planning other things that it completely went over my head. For those of you that don’t know, socket 2011 has 2 mounting points, these are known as square ILM, used in pretty much everything, and narrow ILM, used on server boards for space restrictions.
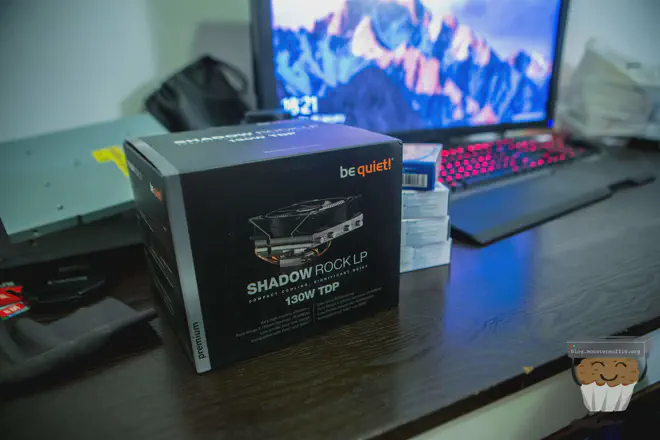
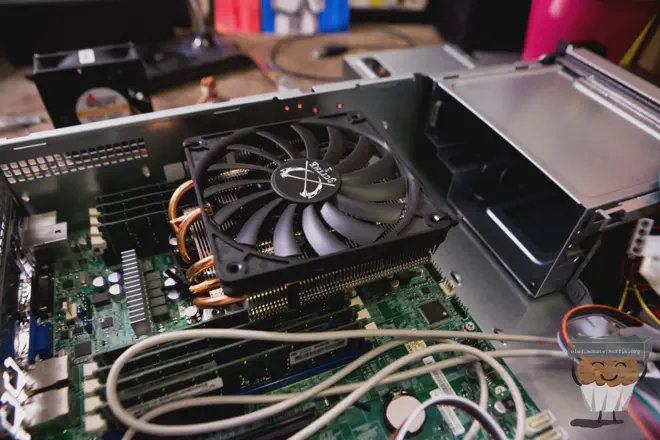
This put me in a bit of a pickle when I realised my cooler wasn’t going to mount, as getting decent, low profile narrow ILM mountable coolers is not an easy task, most third party options were just too tall for what I need. So in the spirit of, well, me, I decided to mount the thing anyway, please do not hate me for what you are about to see.
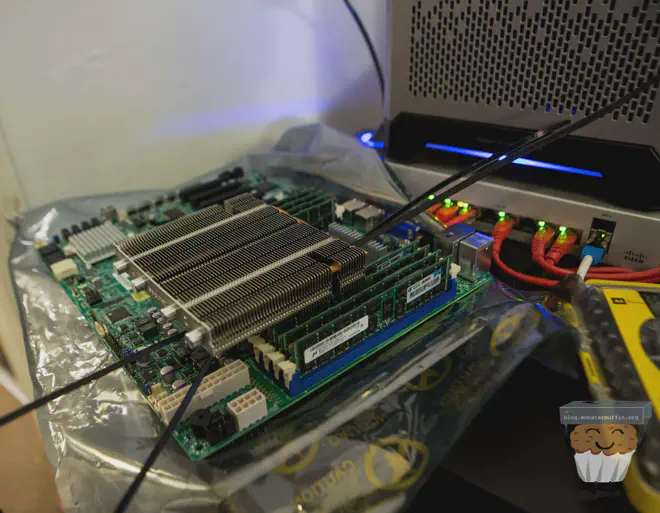
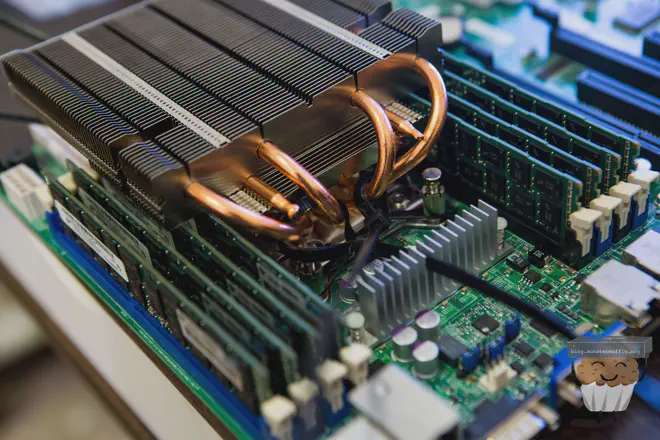
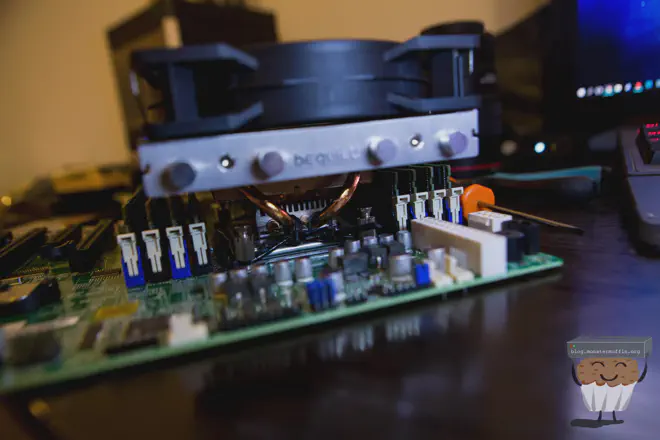
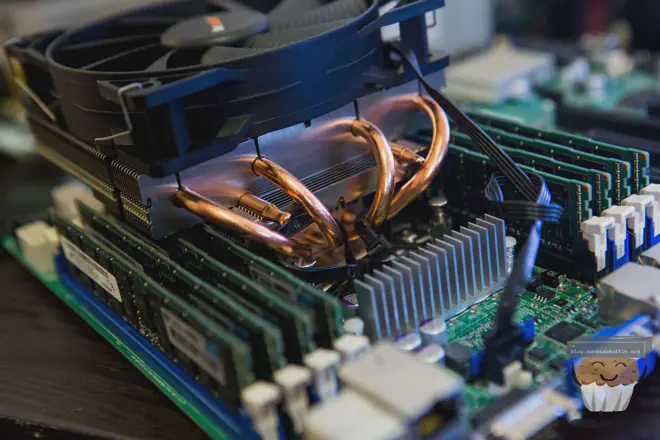
Now, as horrible as this looks I assure you it works. The heatsink is perfectly aligned with the CPU heatspreader and is pushing down with enough force that me pulling up on the cooler does not do anything. Obviously, the proof is in the pudding and this by no means will perform how it should but the CPU will not be anywhere near 100% utilisation for very long.
EDIT: So a lot of people have asked me why on earth I bothered with this, and besides the reasons I already explained I feel it’s important to state that the method I used to mount the cooler did not add stress to the motherboard, the zip ties were using the mounting pins that the cooler came with and applying pressure between themsleves, not the motherboard itself.
Moving onto other issues… #
So with that done I continued onto what I found out would lead to even more issues…
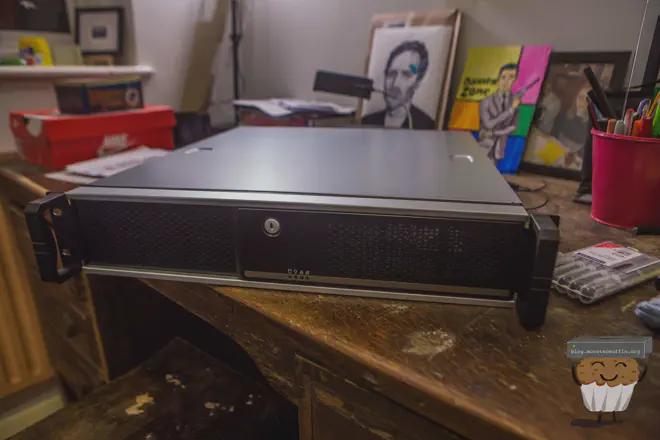
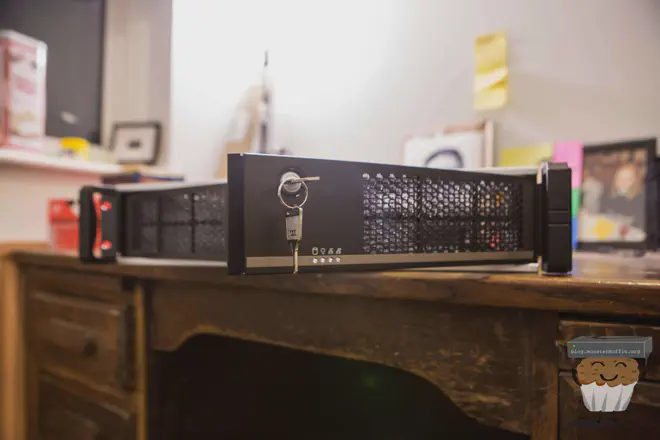
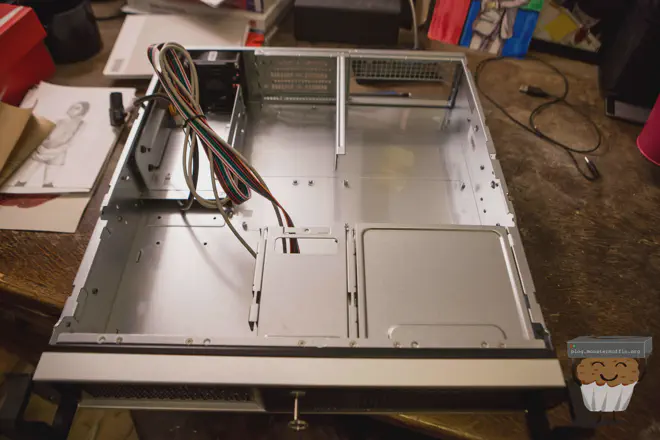
The case seemed just fine for what I needed, as you can see the version I got, the only version I could get, was one with 3x full sized slots which is why I bought some PCIE extension cables
The PSU in this case gets installed in the front, with an internal extension lead. It took me a bit longer that I would like to admit to work out that this bracket was needed to do the mounting:
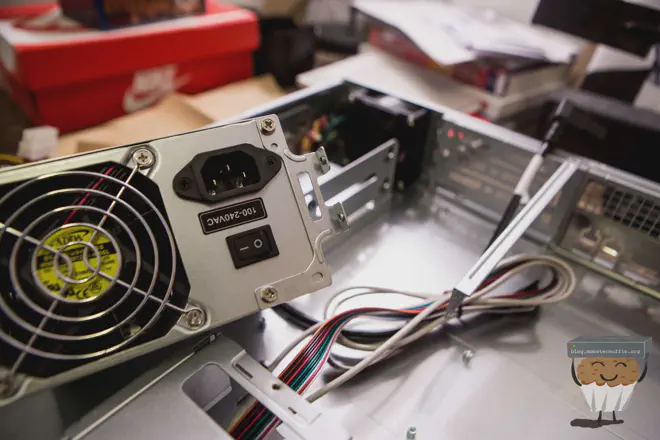
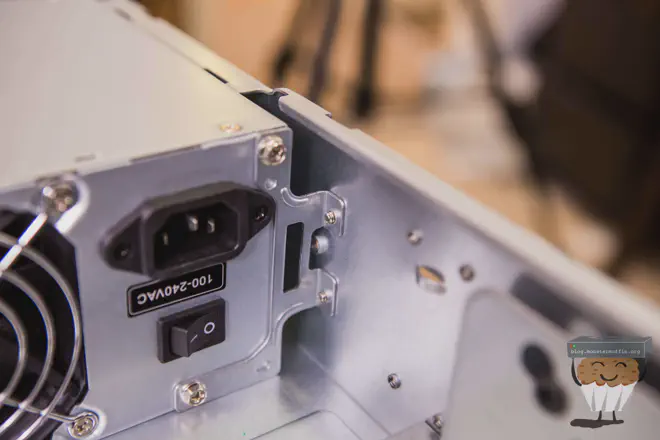
I also went ahead and replaced the tornado simulator at the back of the chassis to a much quieter fan whilst still haveing acceptable airflow.
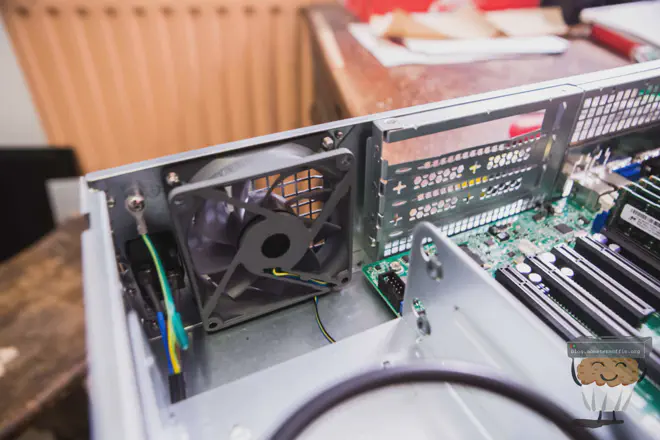
It turns out the standard BeQuiet! fan was a hair too tall for the lid to go on properly, like, 3mm to tall, so I had to improvise. I found a slim 120mm fan by Sythe in my spare parts and this was perfect. In fact, I didn’t even think about restrictive airflow when building in a 2U with this type of cooler, so this fan not only allows the top to go on but allows some space to channel air, much better.
Supermicro, What a bunch of Wankers. #
So after all this fucking around I was having to do to accommodate this build I felt like I was at least getting somewhere, solving issues one at a time as they cropped up. At this point I was ready to boot the thing, setup IPMI and rack it up, so it would be tucked away and I could do the FreeNAS install and config without having loads of parts sprawled everywhere.
When I turned it on I was greeted by a “System Initialising” screen, awesome! ….5 minutes later and it was still initialising. Hmm. Went to have dinner, came back, and it was still stuck, at this point I had to look online.
Turns out, after some troubleshooting, that one of my DIMM slots was bad and halting the system. I could put memory in any other slot and it would boot, but not this one.
Fuck #
The issue here is that I live in the UK, and had to get this board bought for me from the US and delivered over, which cost a pretty penny, and now I was in a bit of a pickle. Supermicro would only accept an RMA if it was done via the reseller, so off the message went and I started waiting.
I hate waiting.
Disks, Glorious disks #
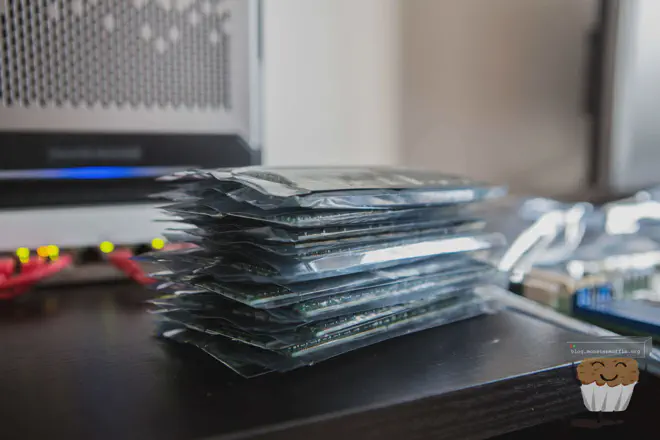
Whilst I was waiting for the bullshit with the board to be sorted, my disks arrived which made me very excited. Pictured here are 16x 1TB 2.5 SAS drives that were in the same order, these are for my VM hosts and will be covered some other time.
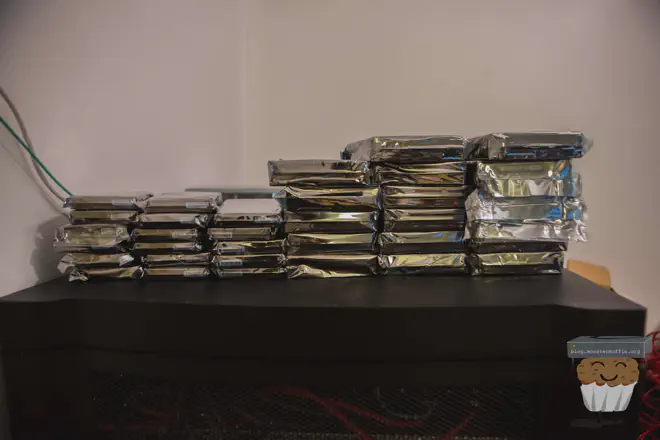
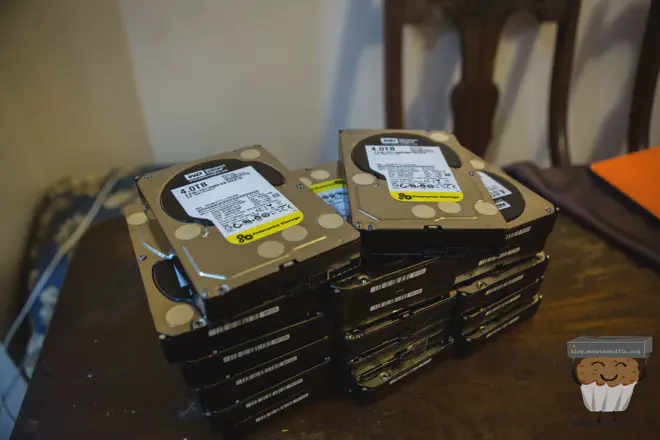
They’re beautiful, aren’t they?
I wanted to start moving some of the data from MUFFSTORE01, even without the dedicated FreeNAS box setup yet it would save me a shitload of time whilst I waited for the RMA to complete. I went ahead and grabbed a spare Dell workstation from my shelf of machines, this thing has 16GB of memory and an i7, which will do for this. I slapped in a HBA and got to work.
At this point, my transfer speeds were pretty slow but I wasn’t worried about this, this was not, by any means, an optimal setup and was purely to move the data onto this array as I have 0 patience.
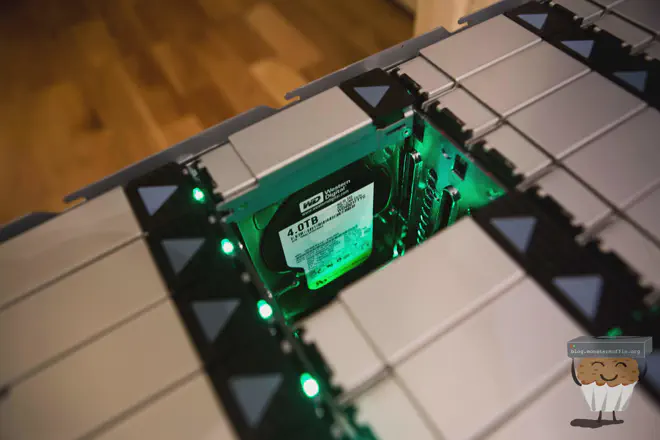
Obligatory blinkes:


The plan (again, again) #
So I finally got the motherboard back after waiting 12+ fucking weeks and paying £75 for everything.
At this point, I’ve been running FreeNAS on the aforementioned Dell workstation machine pretty well and as my main storage waiting for this thing to return, and now the plan has changed, again.
The changes are the following:
- New Case - I am no longer using that 2U case that I bought specifically for this project, instead I will be using my trusty 24 bay case since I have already moved the data off the disks in there and can build this thing to be an 84 bay with this DAS, nice right? The 24 bay is also a 4U which gives me more room for cooling….
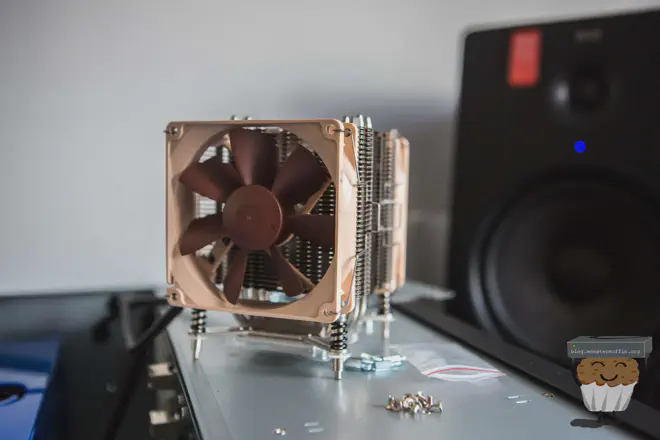
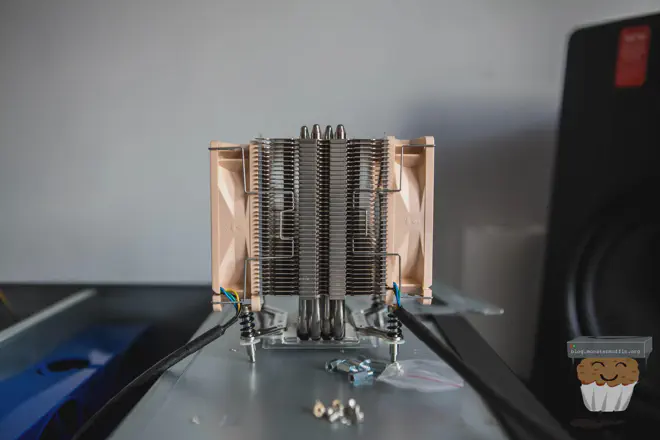
- New Cooling - I decided to not dick around with the bullshit hackery I was doing before and just ponied up for a proper CPU cooler that would fit a narrow ILM socket, now I have 4U to play with I grabbed a Noctua NH-U9DX i4 which is probably way overkill but is one of the only narrow ILM coolers that looked like it would fit.
So the parts list now looks like this:
- SuperMicro X9SRL-F
- E5-2630L
- 8x 8GB ECC DDR3
- LSI 9200-8E
- LSI 9211-8i x3
- HGST 60 Bay
- SFF8644 > SFF8088
- SFF8087 > SFF8087 x6
- Noctua NH-U9DX i4
- Cruzer Fit 16 GB
- Current 24 bay Chassis
- Be Quiet! 400w Atx Psu
Let’s try this again, shall we? #
So, picking up where I left off before let me show you some pretty build photos and racking the thing.
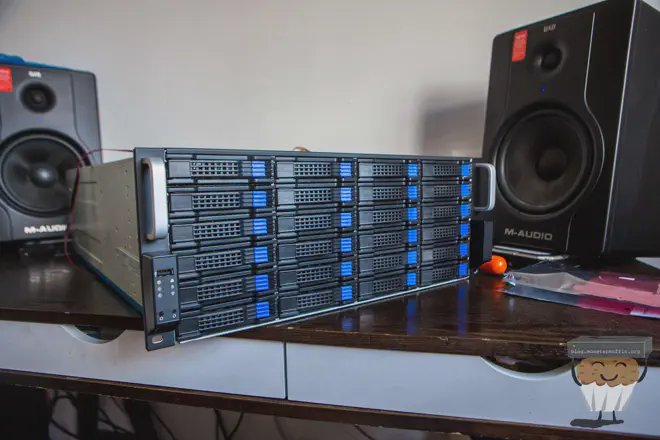
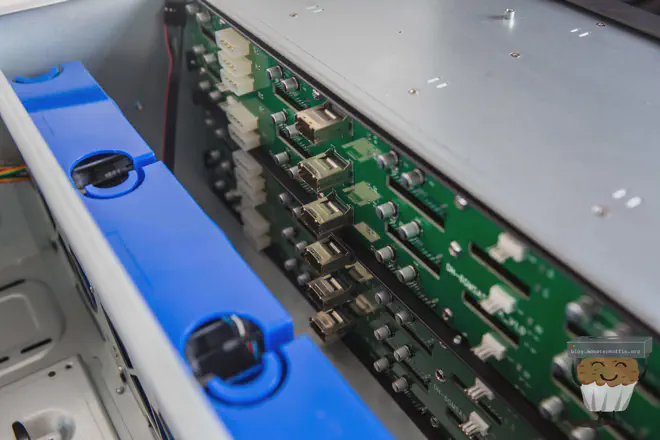
I’m very happy I opted to buy a compatible cooler as thing is a beast, and as expected fits extremely well in the 4U whilst providing very good cooling. Switching from standard ILM to narrow ILM was as simple as replacing the two brackets on the bottom then just screwing the thing in. Dope.
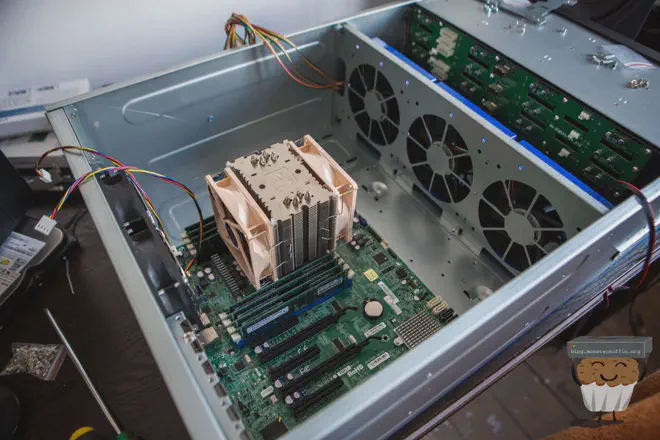
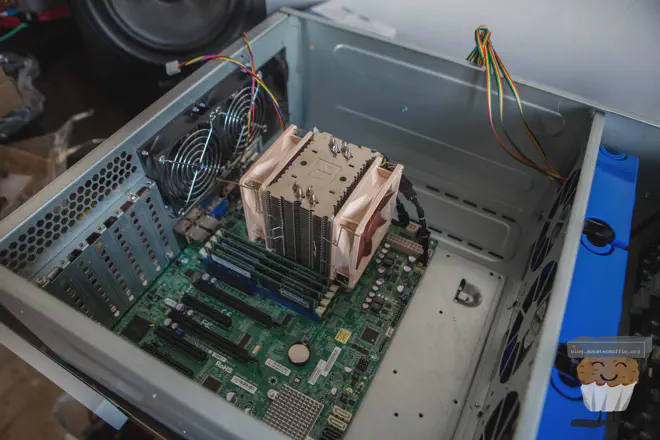
After this I added the PSU, SAS Cables, and HBA cards. Unfortunately, I need 3x to make use of all 6 backplane connectors and only have 2x 6Gbps cards as my others are in use, this isn’t an issue right now.
I connected the SAS cabled regardless, ready for connection when I source another card. With that all done, I installed FreeNAS, configured the IPMI with a monitor connected and went to rack the thing.
Just a word of warning to anyone that wants to build similar systems, these things are heavy. Even without disks it’s a giant PITA to rack when there are components inside the case and the rails are shitty, cheap generic ones. If you can, have another person to help you, my girlfriend normally helps me out.
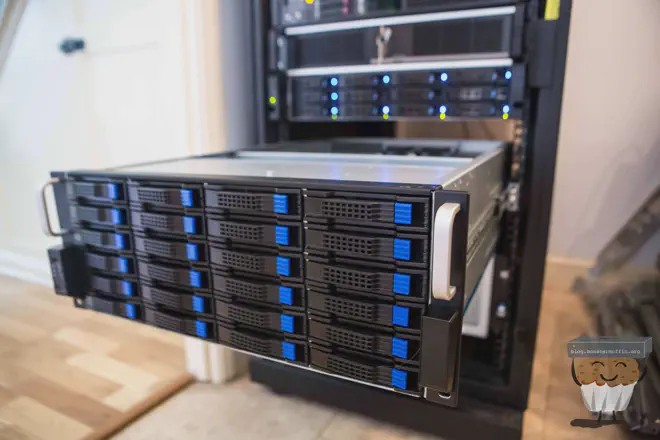
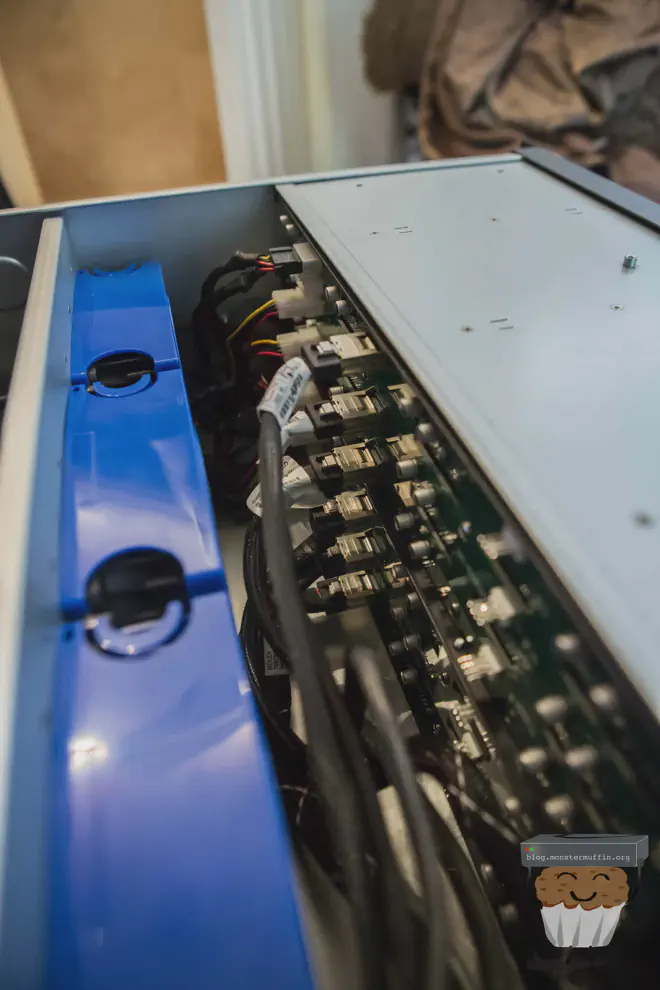
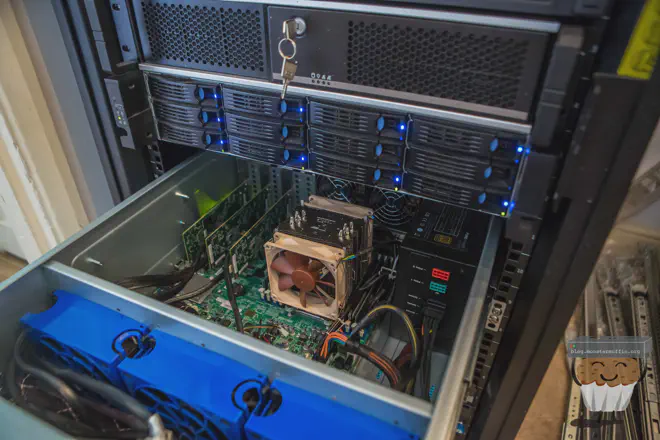
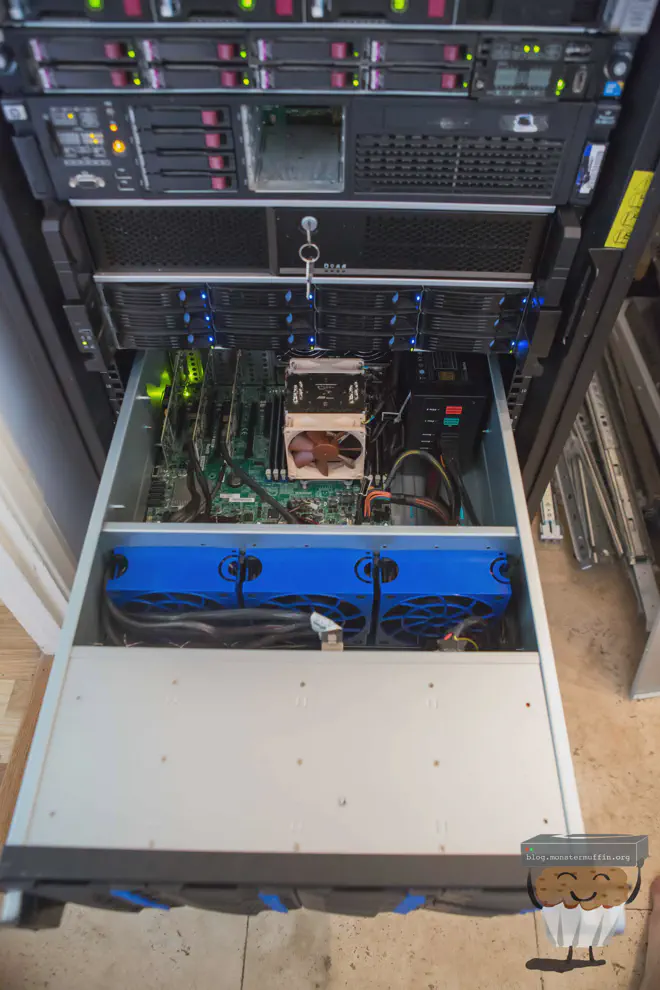
So, after booting FreeNAS and setting up some basic settings I went ahead and detached the 2 arrays I have living on the Dell workstation and moved the cable over to this new box.
Here’s the old box that was serving me well for a long time, it’s been pretty solid but far from ideal, I even had to disable frequent scrubs because I didn’t want anything to go tits up with it’s inferor RAM capacity, and non ECC at that.
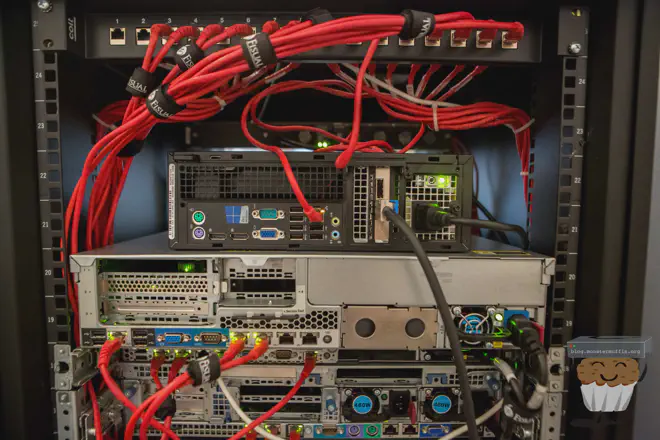
After detaching the arrays and shutting the machine down I re-routed the cable to the new machine, plugged it in, imported and everything was just how I left it.
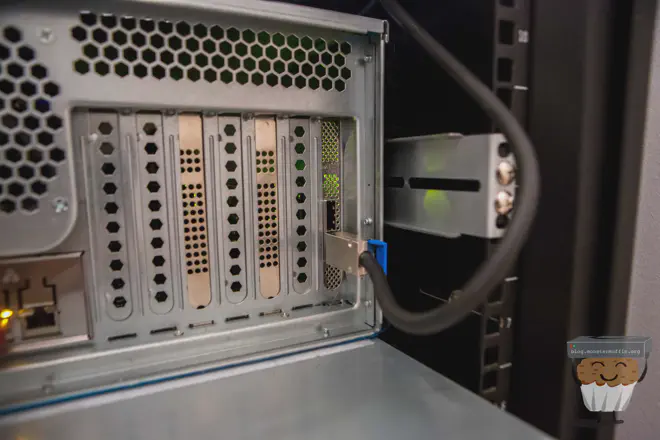
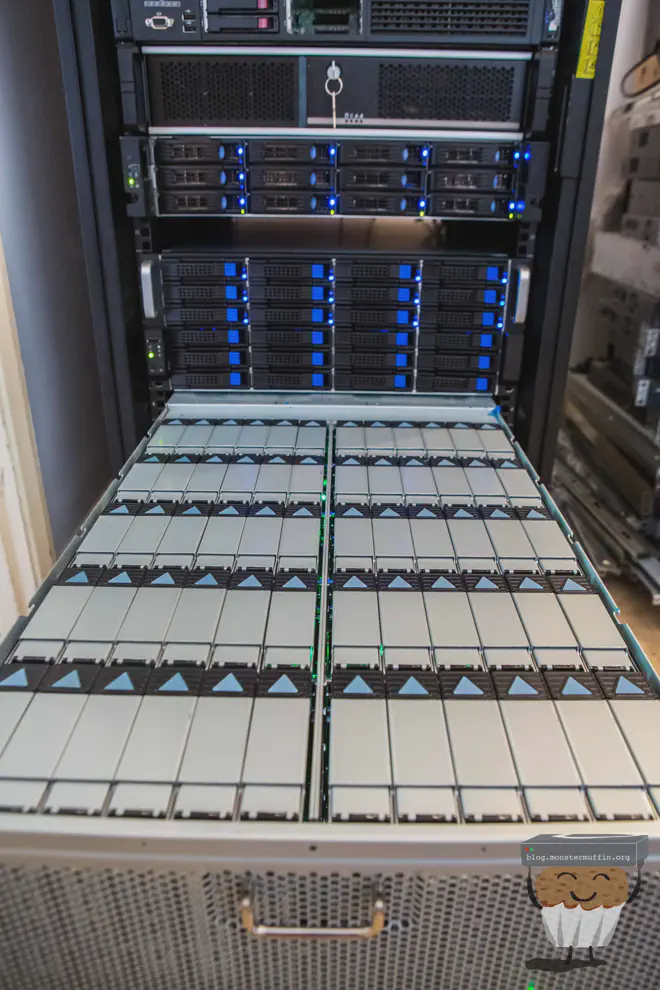
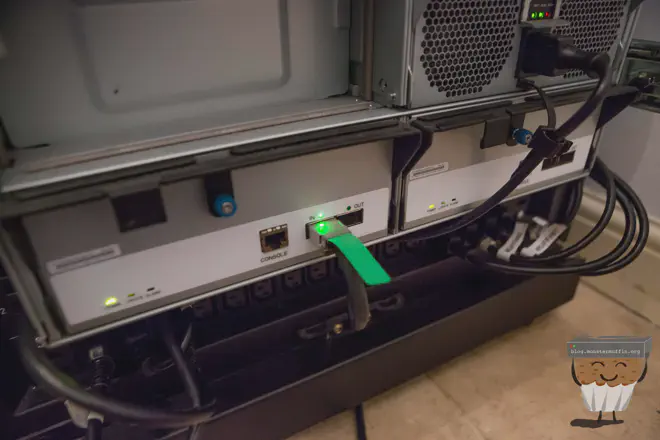
Here’s the 60 bay side of things. I have the cables configured so that I can slide the entire thing out whilst everything is active for adding/removing disks. It works really well and I’m happy with the purchase.
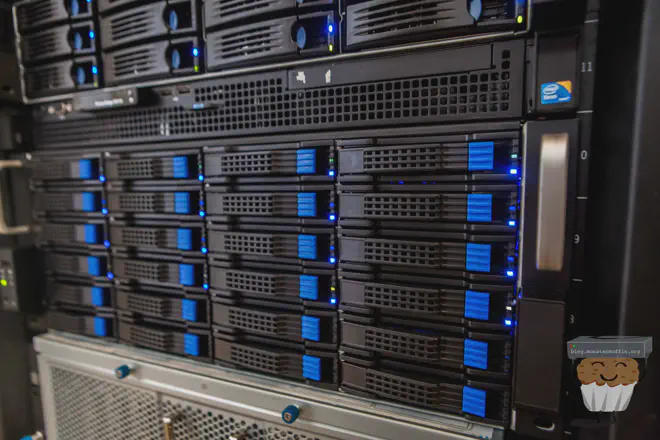
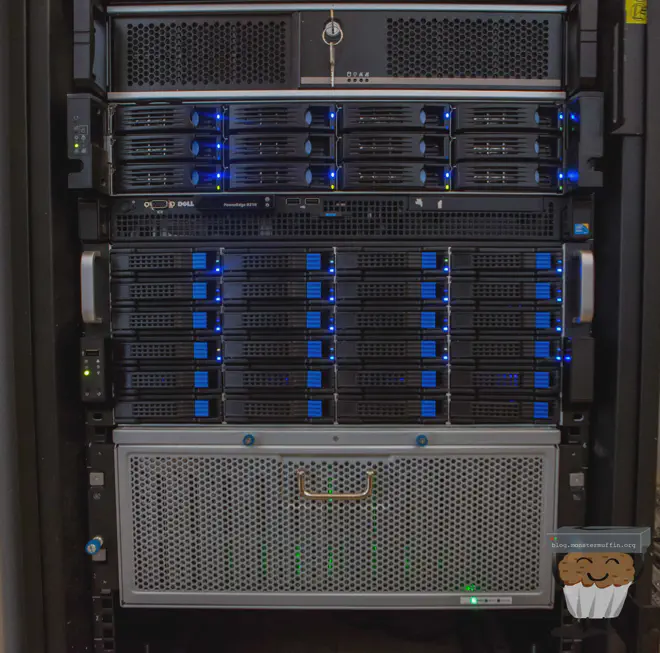
The storage server sits above the 60 bay, as that thing is a beast and below MUFFSTORE02 which is currently filling up with 8TB disks. Here’s a look at it from the back:
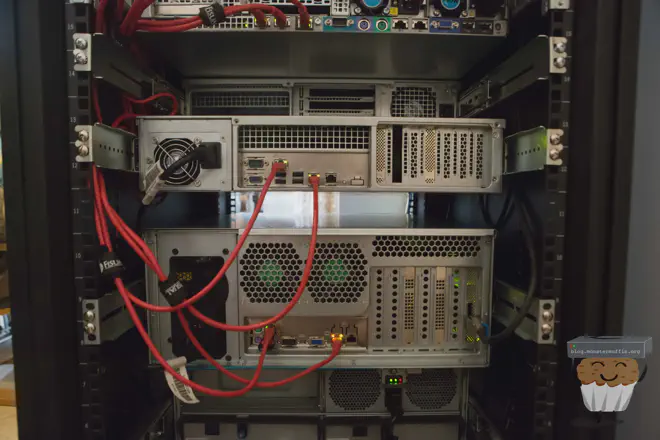
Everything fits in quite nicely and I try to keep things as neat as I can.
So, here is what the 60 bay looks like at the time of writing.
|
|
So before doing anything else I went ahead and ran a scrub of the main array and things came back normal, with some fixes having been made. The other two arrays in the 60 bay would follow soon.
|
|
After a day of testing, things were looking good so I went ahead and added some of my older SATA disks into the 24 bay.
Unfortunately, I could only add 16 out of the 24 bays due to my lack of HBAs, but that will be fixed soon.
|
|
All in all, I’m very happy with the build. The CPU was also a good choice in my book as it seems to be handling everything I need it to with ease. Here is a 24 hour overview of the CPU usage with my render farm dumping to the disks and scrubs taking place, with Plex reading files:
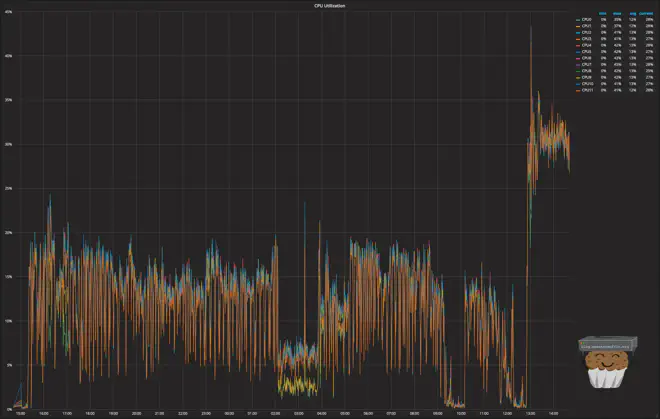
Unfortunately, I overlooked checking the power usage of the server, and I don’t fancy turning it off right now but I will measure and post this the next time it turns off, so if you’re seeing power stats below this then lucky you!
« Power Stats Placeholder »
File transfer speeds seem to be rather good too, here’s moving a 10GB file from one array to another:
|
|
Conclusion #
So this, in the true Muffin fashion, has been one giant cluster-fuck. From hardware failure to changing plans multiple times I’m actually happy how things have turned out.
I’ve gotten everything I wanted out of this upgrade, a powerful, unified storage server with room to grow backed by a proper filesystem and proven software.
If you actually read through all of this post, then I commend you, and I hope you found it even somewhat interesting to follow this journey.
I’m not even sure how much I spent in total due to the amount of time I spent waiting and buying parts I didn’t use, you can still see the 2U case in my rack which is currently empty, but I have plans for it…. The total cost analysis would simply be too depressing to calculate, so we’ll just leave it at ‘a lot’.
So, finally, I can put this project to bed.
muffin~~
