Get fucked HP. #
So there I was, moving VMs off of my main host (DL380 G7, 2x x5690’s, 192GB RDIMM), getting ready to replace the 8x 300GB RAID10 array I’ve been using for a while now with some 1TB disks and SSDs, awesome, right?
So the host was powered down, ready for an upgrade, and being the logical guy I am I decided to do some software upgrades.
I used the latest SPP and ran that through, for some reason I was using a BIOS from 2010? Once that was done I had updated firmware, so I moved onto ESXi. I’ve been running 6.0.0U2 for the longest time and thought this would be the ideal time to upgrade.
I got the HPE official ISO, ran through the upgrade, waited for it to boot annnddd….
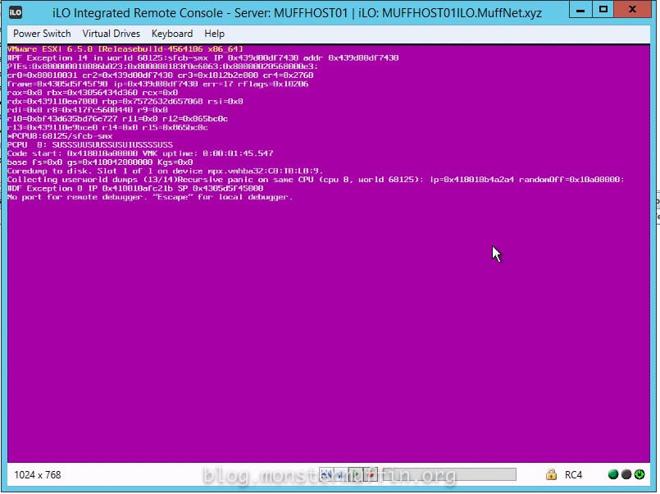
PSOD #
After some digging, it would appear this is actually a known issue with most G7 servers (unsure about G6).
The issue #
It would appear that one driver is causing this in the 6.5 image, hpe-smx-provider (650.03.11.00.17-4240417). Installing the standard ESXI 6.5 ISO does allow the server to boot, but is missing a lot of drivers and does not give the pretty all-inclusive system stats that the HPE ISO does.
So what now? I didn’t want to settle for the standard image, so I did the following to bundle the U2 hpe-smx-provider into the 6.5 image.
For the lazy: There is a link at the end of this post with a download to the compiled ISO.
Using PowerCLI Image Builder. #
The first thing you want to do is download PowerCLI for Windows.
Once that is all installed, grab both of the following files and put it somewhere easy, I just shoved them in C:\HPE.
VMware-ESXi-6.5.0-OS-Release-4564106-HPE-650.9.6.0.28-Nov2016-depot.zip\
VMware-ESXi-6.0.0-Update2-3620759-HPE-600.9.6.5.7-Dec2016-depot.zip\
I also renamed them to make it easier for myself, “ESXIHP65” “ESXIHP6U2”.
Once that is done, fire up PowerCLI, and do the following commands:
- Add the 6.5 image bundle:
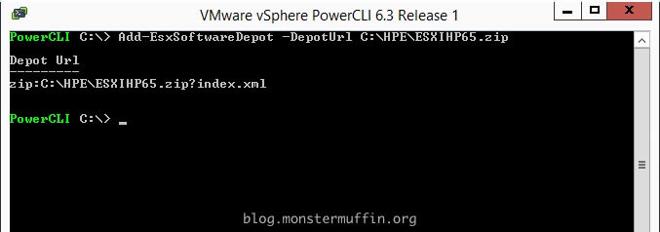
Add-EsxSoftwareDepot -DepotUrl C:\\HPE\\ESXIHP65.zip\
- Check the profile was added:
Get-EsxImageProfile\


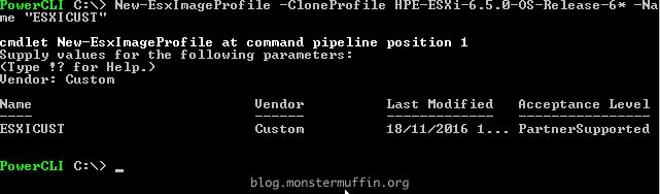
- Clone the profile so we can work on the clone:
New-EsxImageProfile -CloneProfile HPE-ESXi-6.5.0-OS-Release-6\* -Name "ESXICUST"\
Set Vendor to whatever, I used Custom.
- Check the profile was added:
Get-EsxImageProfile\
- Remove the driver from the clone:
Remove-EsxSoftwarePackage ESXICUST hpe-smx-provider\

- Add the 6.0U2 image bundle:
Add-EsxSoftwareDepot -DepotUrl C:\\HPE\\ESXIHP6U2.zip\

- Check the profile was added:
Get-EsxImageProfile\

- Now we can see both driver versions from the bundles:
Get-EsxSoftwarePackage | findstr smx\

- Add the good driver into the custom image:
add-esxsoftwarepackage -imageprofile ESXICUST -softwarepackage "hpe-smx-provider 600.03.11.00.9-2768847"\

- Export your custom bundle to ISO:
Export-EsxImageProfile -ImageProfile ESXICUST -ExportToIso -filepath "c:\\HPE\\ESXI65CUST.iso"\
You should now have `ESXI65CUST.iso` in your working folder.

Result. #
So, once that’s all done mount the ISO however you like, I use iLO and go through the install as per normal, continue through the warning about CPUs of this socket being depreciated. And, eventually….
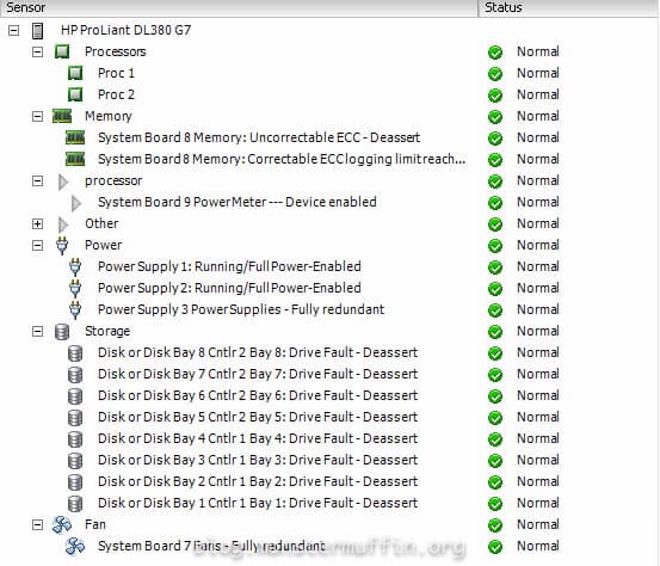
BOOM. #
Post edit: You must do a clean install for this to work, upgrading will not work as the offending driver will not be overwritten. #
If you’re lazy and trust me enough then here is a link to the compiled ISO, ready to be installed.
#
I no longer host the ISOs.
I hope this helped some of you out, best of luck! MM~~