Introduction #
This post will be a brief intro into VMWare’s distributed switch technology and how to get your feet wet in the setup. This will not cover the advanced features or in-depth configuration but a followup may come in the future.
I was myself rather confused at the concept at first and failed to see the use in a lab setting, however, since taking the plunge I can honestly say I am unsure how I survived before and I only hope this post helps those of you new to the concept to give it a go.
What Are Distributed Switches? #
Distributed switches, which will be referred to in this post as vDS, is a feature of VMWare vCenter Enterprise Plus allowing centralised provisioning and management of host networking spanning multiple VMWare hosts and clusters. vDS allow for one config change to be made to your virtual networking environment and have this change propagate across the participating hosts, alleviating the need to manually create networks on different hosts.
Following this, vDS allows for consistency in network connectivity when migrating VMs across hosts.
vDS vs vSwitches #
Now, this is where the fun starts.
We know VMWare vSwitches are exactly that, virtual switches. They allow VMs to communicate via layer 2 whilst having an uplink to the ‘outside’ world. Virtual switches switch layer 2 traffic internally, meaning traffic on the same VLAN will never leave the host, acting just like a traditional switch.
vSwitches allow for VLAN segmentation via 801.1Q tagging, link aggregation, etc. We also know that vSwitches allow for port groups, VMKernal for management and virtual machine groups for VMs to communicate, this is the same in the world of vDS.
Where vDS really starts to show its differences is the feature set which I briefly touched upon in the intro:
- Centralised Management - vCenter management of networks in a centralised location, with network changes being pushed to all hosts using the vDS.
- Network vMotion - VM network state and statistics are carried over during vMotion due to this centralised management, usually, this is lost.
- Bi-directional Traffic Shaping - Where traditional vSwitches allow for outbound traffic shaping, vDS allows for traffic shaping inbound too.
- pVLAN - vDS brings compatibility for private VLANs extending functionality not only inside the ESX host, but also in the external network environment.
- LLDP/CDP - Link Layer Discovery Protocol and Cisco Discovery protocol support allows for extended management and again, extending support with external network infrastructure.
- LACP - Proper 802.3ad link aggregation is only supported with vDS.
- Monitoring/Statistics - vDS allows the use of technologies such as NetFlow and port mirroring.
Understanding vDS #
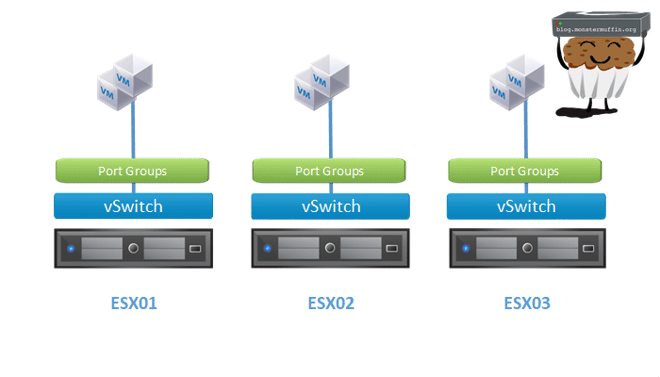
So, as discussed before a typical networking setup with standalone servers not using vDS is the following. Regardless of if they are on vCenter or not, the hosts have their own configured network uplinks and port groups. When migrating VMs using vMotion you are asked what network to transfer the VM too, even if the remote host has an identical config.
Whereas vDS looks like the following at high level.
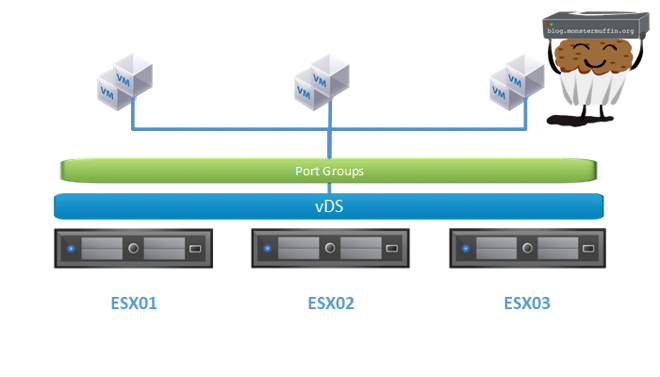
vDS is made of two architectural parts, the control plane and the I.O plane.
The I.O plane, or data plane, can be thought of as an abstraction layer between what you’re configuring in vCenter and what is happening on the host. The data plane is responsible for forwarding layer 2 frames with or without vCenter being present. It’s essentially an invisible vSwitch using the configuration from vCenter.
The control plane, or management plane resides on vCenter and allows configuration templates to be pushed to the hosts, where the data plane does its thing. This separate, central management plane is what allows vDS to be a thing.
So, some of you may be asking, as I did, what happens if the host cannot contact vCenter? Well, as above, nothing. This is essentially the job of the I.O plane, to ensure that packets/frames are forwarded to the correct interfaces on the host, regardless of the status of vCenter.
vDS configuration is stored in vCenter, and a local copy is stored on the host as a cache. The local config is stored in the following location:
/usr/lib/vmware/bin/
This cached copy is updated every 5 minutes with administrative updates being pushed live to the host.
The control plane exists in vCenter and is simply used to manage the hosts’ configuration. All the configuration visa vis uplinks, VLANs, LACP etc are configured in vCenter (the control plane) and then these configuration files are simply pushed to the relevant hosts.
Configuring Virtual Distributed Switches - Step One, Licensing #
But Muffin, didn’t you say you need vCenter Enterprise Plus to do this? I’m not shitting money.
Yes, you do need vCenter Enterprise Plus, however, this is included in VMUG! There is no excuse to not grab a copy. Not only do you get to play with stuff like vDS, but you pretty much get access to everything VMWare has to offer, so it really is a no-brainer. You can get it for even cheaper than the yearly if you look around for promo codes.
I know 200~USD can seem steep for some licenses, for a year at that, but if you’re interested in learning this stuff at home, using it in your labs and furthering your career I honestly cannot stress the importance of programs such as these and their worth.
There are of course other means of obtaining what you need 👀.
Configuring Virtual Distributed Switches - Step Two, vDS Compatibility #
Before creating a vDS, you need to decide what hosts are going to be using it. If you’re planning on using vDS for multiple hosts (as you should be) you need to ensure that the vDS version is set to the lowest ESXi host version. This is to say if you have 2x hosts on 6.7, and 1x on 6.5, you will not be able to use a vDS switch at version 6.6+ on that one host. You must run version 6.5 to be compatible with all the hosts that will be using it.
You are able to upgrade the vDS version on the fly so there is no need to do any major reconfiguration once you upgrade your hosts.
Configuring Virtual Distributed Switches - Step Three, Creating your first vDS #
For this, I will be using vCenter 6.7 and so the UI may look different if you’re not using 6.7 but the steps will be the same. If you’re using vCenter 6.5 please be aware that the HTML5 UI does not have this compatibility and you will need to use the flash client.
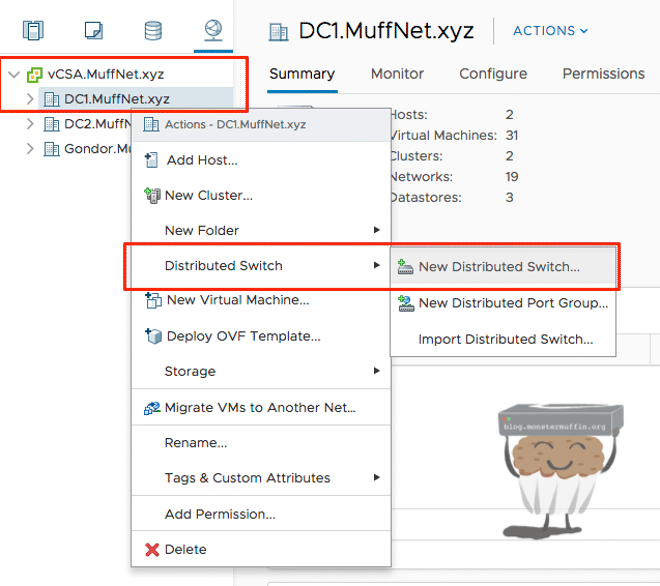
First, head over to the networking section of vCenter.

Then right-click the datacenter you want to create the vDS in. vDS are datacenter specific, you cannot assign one vDS to hosts located in different datacenters.
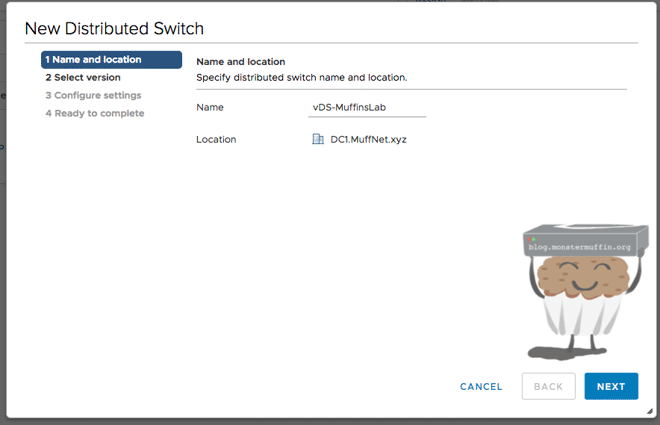
We’re going to give our vDS a name, this can be anything. For the purposes of this tutorial, I will be calling it ‘vDS-MuffinsLab’.
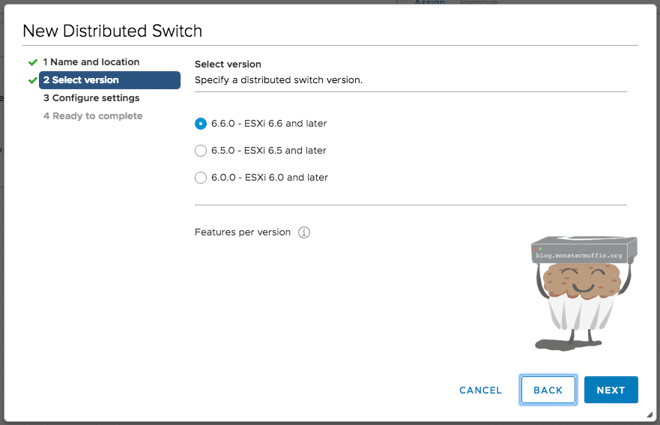
We now select our version, as explained above. The host I will be deploying this to is a fresh 6.7 install on a DL360G7, so I will select ‘6.6 and later’.
Now we configure some basic settings of the vDS.
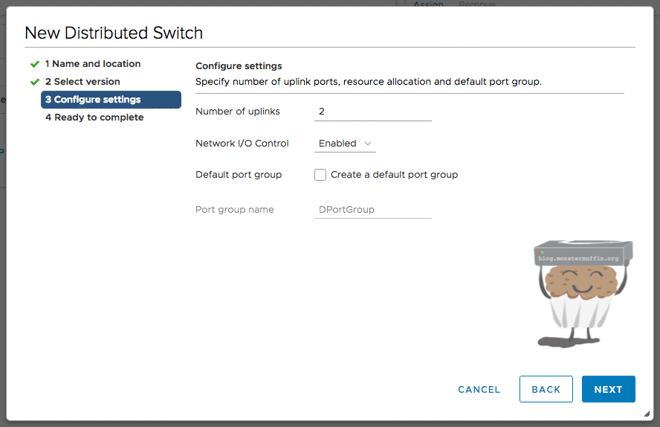
- Enter the maximum number of uplinks your hosts have to the upstream switch. If you have a host with 2x uplinks and another with 4x uplinks, select 4 here. I never use more than 2x ports personally so I will enter 2.
- We want I/O control on here, there is no real reason not to enable it off the bat as you don’t need to use it.
- Uncheck create default port group, we will do this in the next step.
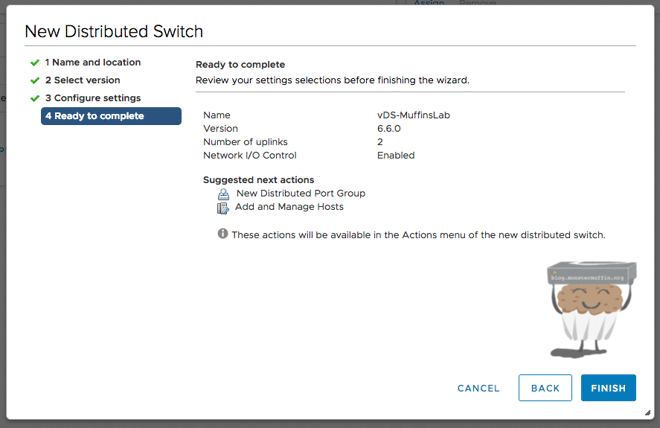
After this is done you will get a rundown of your new switch and you can then complete the creation of your vDS.
Uplinks #
So uplink configuration is exactly that, just a configuration template. You saw before I said to add as many uplinks as the host with the maximum amount of uplinks but here are some other things you should know:
- You can mix and match port speeds, that is to say, you can have one host with 2x 10Gb interfaces and another with 2x 1Gb interfaces, they can still be assigned to the same vDS uplinks.
- You cannot mix LACP and non LACP uplink ports. If you want to have some hosts on LACP and others not, you should create a new vDS for this. (I learned this the hard way.)
- Physical uplinks are tied to the vDS uplinks. You cannot now use those physical NICs for other uplinks, be it standard vSwitch or vDS.
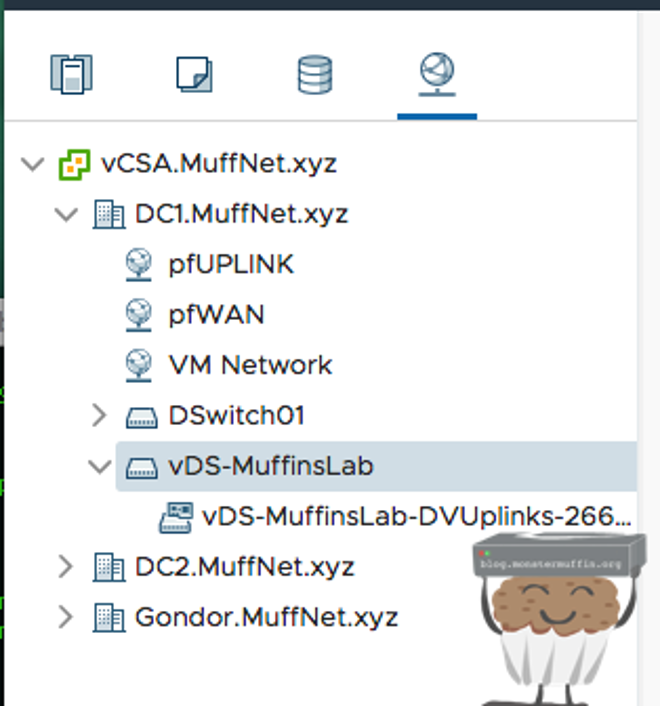
With that, press finish and you will have yourself a shiny new vDS.
Creating Distributed Port Groups #
For the purposes of this tutorial, I have created 4 blank VMs, on 4 different networks each on different VLANs.
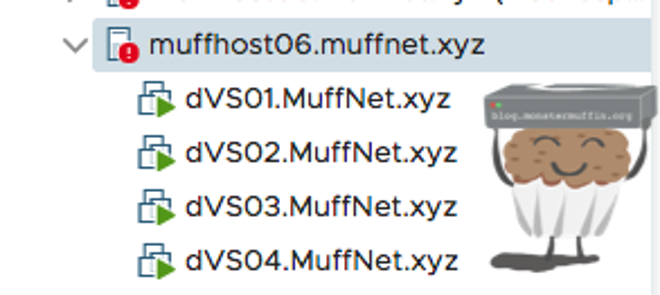
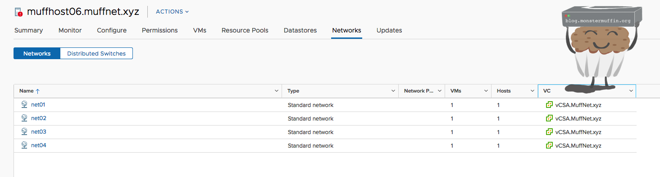
So.. we will create these 4 port groups. You should follow along here and add the port groups that you are currently using with your VLANs.
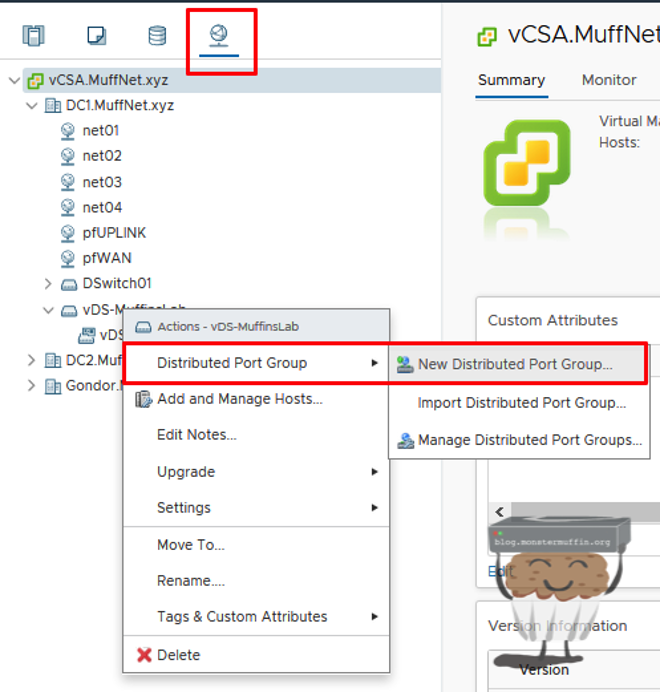
So, firstly head over to networking in vCenter, right click your vDS and click on new distributed port group.
Now we give our port group a name.
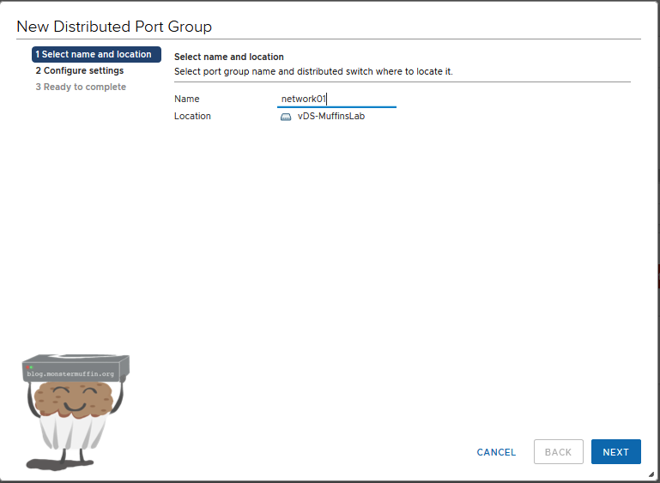
Click next and we will get a window where we need to configure some settings.
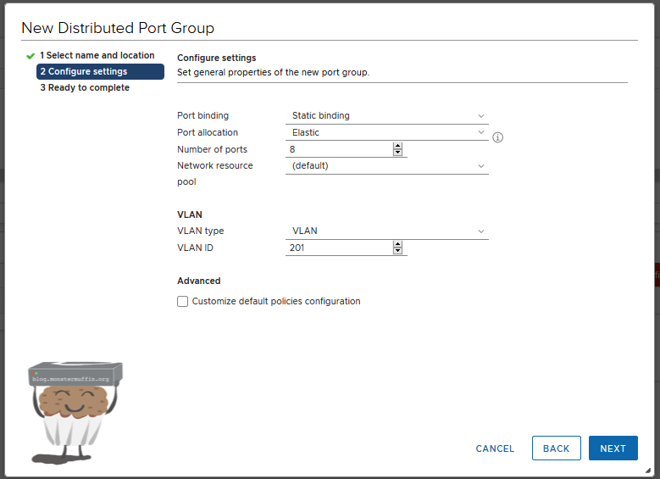
- Port Binding - There are several different ways that VMs are allocated ports on a vDS , we will use static binding here but there is also dynamic and ephemeral, you can read about the binding types here.
- Port Allocation - This is either elastic or fixed. Elastic is prefered as it simply adds more ports when you run out, so once all 8 are used another 8 ports will be added to the vDS . Fixed will not do this and you will not be able to assign more than 8 VMs to the port group.
- Number of Ports - The number of ports that the vDS starts with, and adds when the switch is full in elastic mode, there is no real reason not to keep this at 8.
- Network Resource Pool - This is used for managing certain types of traffic under a resource pool. Keep this default.
- VLAN - The VLAN protocol you want to use. This will mostly be set to VLAN, which is an access/untagged. You can also choose TRUNK, which allows you to set a range in the ID section, or pVLAN for a pVLAN.
- VLAN ID - The VLAN ID(s) you want on this port group.
You can leave the advanced settings unchecked, these can stay default.
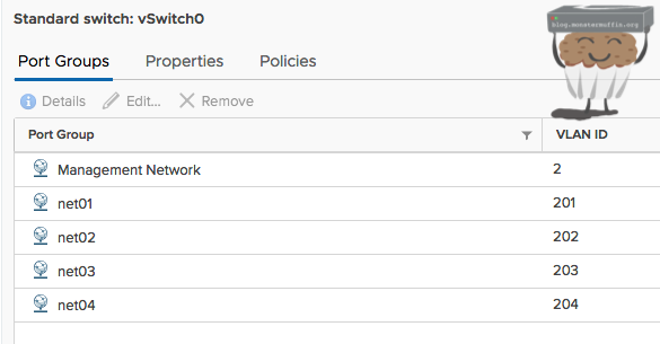
You can see here I have left everything default bar setting my VLAN ID to 201 as this is the net01 in the standard vSwitch I configured before.
If your network is one flat VM network (please don’t do this) then you can simply create one port group, called whatever you like, with the default settings making sure to set ’no VLAN’.
Now when you click next you will be presented with the settings for your port group and you can go ahead and create it by clicking finish.
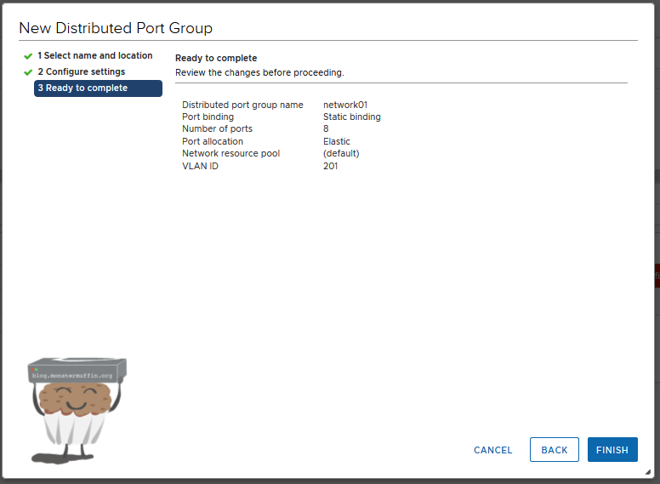
Now you can see under the vDS port groups that our port group has been created.

I will do this for the other networks that I need, you should do so too for any other networks on your hosts.

Now we have the port groups created that we need, we can add the hosts and migrate our VMs and VMKernal adaptors.
Physical Switches #
This is only really important if you’re using managed switches with VLANs. You should already have your switchports setup how you like with your VLANs and whatnot but what I like to do with these ports to virtual hosts is allow all VLANs. This ensures all I need to do is simply create new VLANs on the switch/firewall and as a port group and everything will work, I don’t need to mess with uplink interfaces. My switchport configuration looks like the following:
MUFFSWITCH01#sh run int gi1/0/7
Building configuration...

Current configuration : 128 bytes
!
interface GigabitEthernet1/0/7
 description MUFFHOST06-NIC3
 switchport trunk encapsulation dot1q
 switchport mode trunk
end
MUFFSWITCH01#sh int gi1/0/7 sw
Name: Gi1/0/7
Switchport: Enabled
Administrative Mode: trunk
Operational Mode: trunk
Administrative Trunking Encapsulation: dot1q
Operational Trunking Encapsulation: dot1q
Negotiation of Trunking: On
Access Mode VLAN: 1 (default)
Trunking Native Mode VLAN: 1 (default)
Administrative Native VLAN tagging: enabled
Voice VLAN: none
Administrative private-vlan host-association: none
Administrative private-vlan mapping: none
Administrative private-vlan trunk native VLAN: none
Administrative private-vlan trunk Native VLAN tagging: enabled
Administrative private-vlan trunk encapsulation: dot1q
Administrative private-vlan trunk normal VLANs: none
Administrative private-vlan trunk associations: none
Administrative private-vlan trunk mappings: none
Operational private-vlan: none
Trunking VLANs Enabled: ALL
Pruning VLANs Enabled: 2-1001
Capture Mode Disabled
Capture VLANs Allowed: ALL

Protected: false
Unknown unicast blocked: disabled
Unknown multicast blocked: disabled
Appliance trust: none
Migrating to vDS #
In these next few steps, we will migrate our host(s), networking and VMs to our vDS switches. VMWare has actually made this very easy and intuitive.
Firstly, head over to networking, right click your vDS and click on ‘add and manage hosts.’
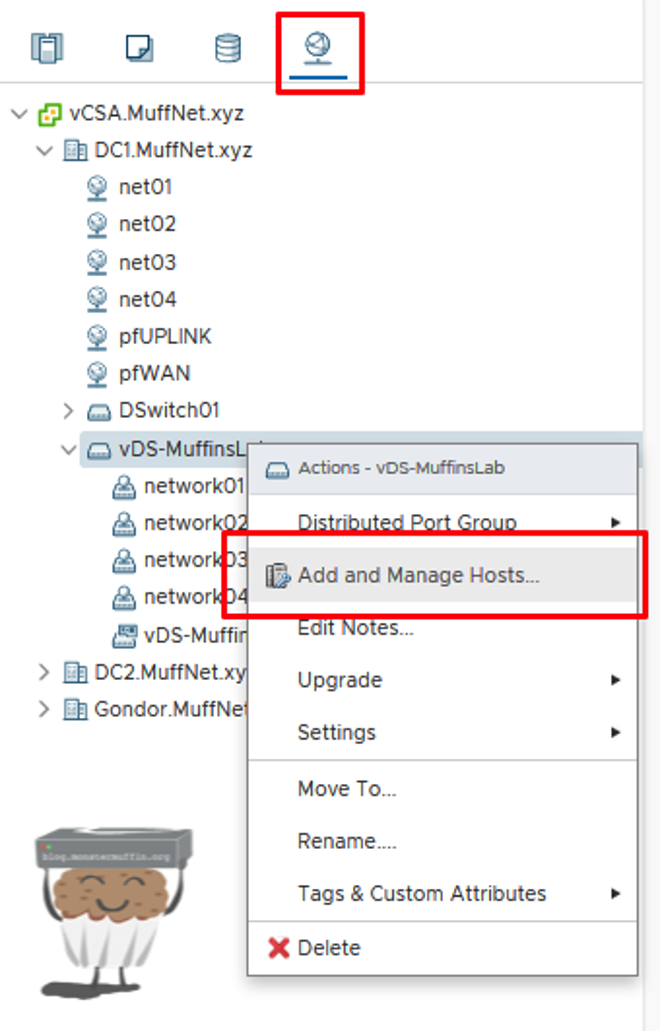
Next, you will see the following screen.
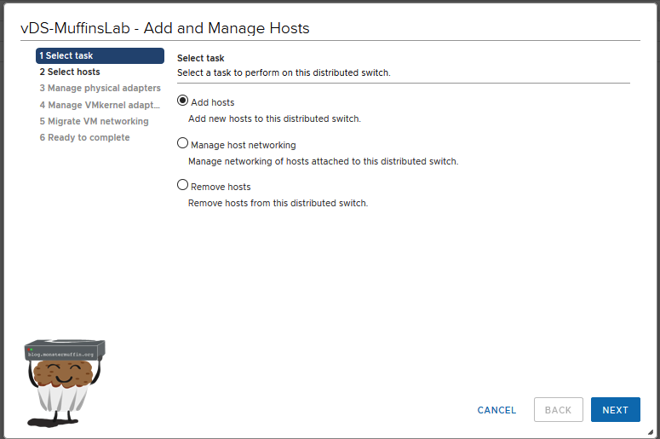
We are going to be adding hosts. This is also where you can remove hosts from vDS, and manage host networking such as changing uplinks and migrating vmks and VMs.
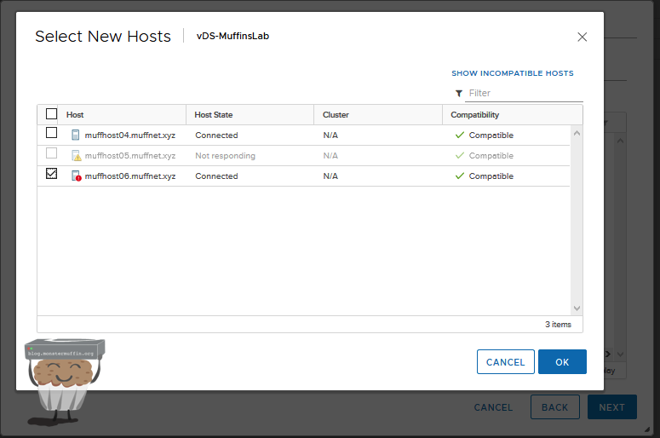
On the next screen, select add hosts and select your host.
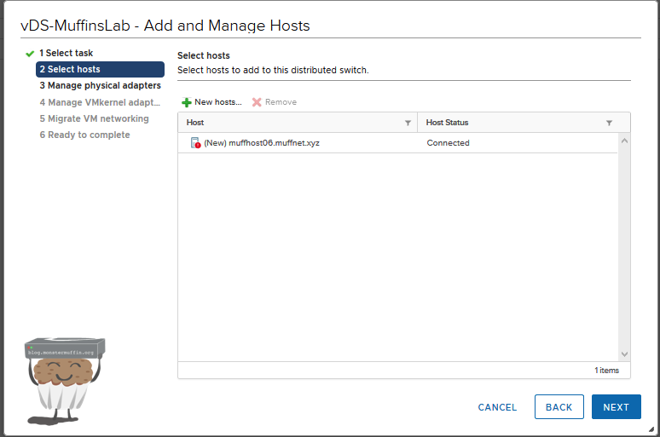
At which point you should have the host ready to be moved like so, press next.
The next step is to configure your uplinks for the vDS. You probably won’t have as many as me, probably 2-4 on a server or just the 1 on more modest setups, that’s all good.
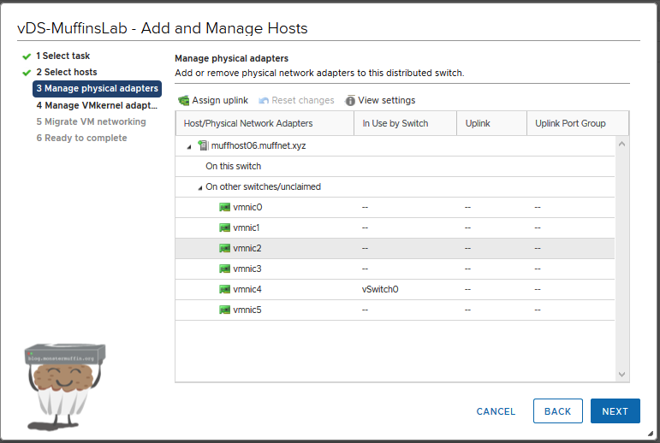
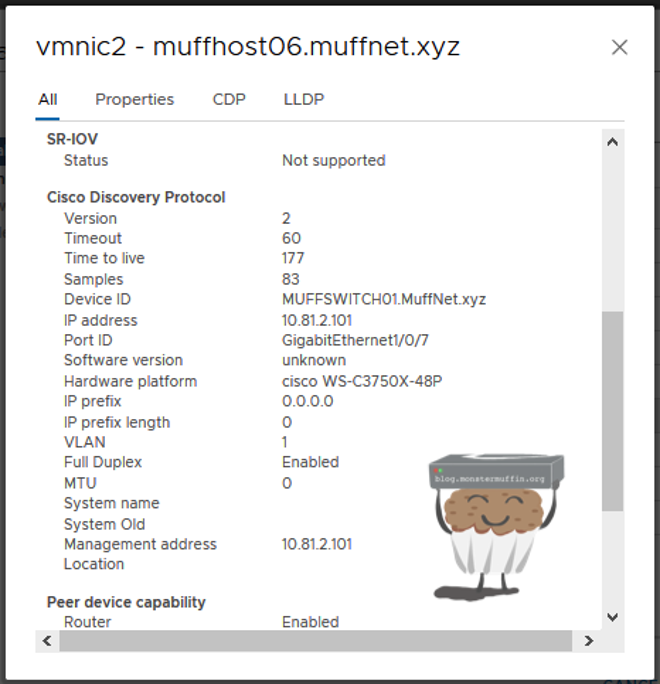
If you have a few NICs and unsure which one goes where (happens a lot…) and you have a half decent switch you can always click on one of the adaptors and then view settings which should give you CDP//LLDP information.
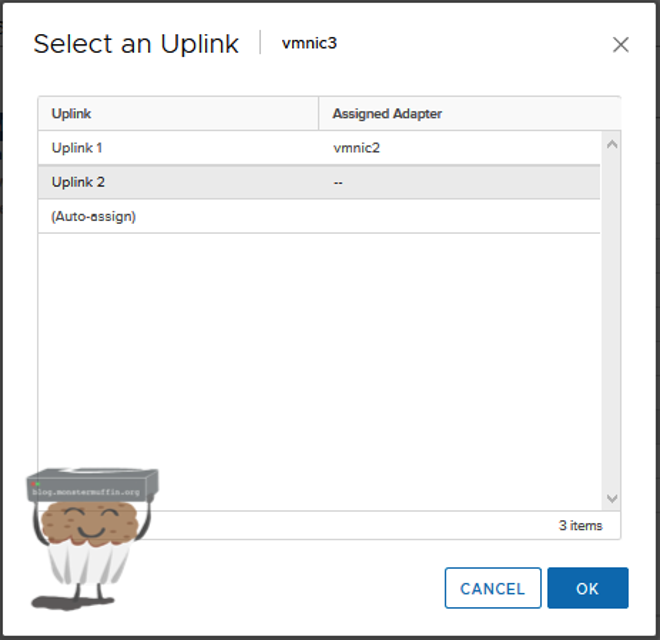
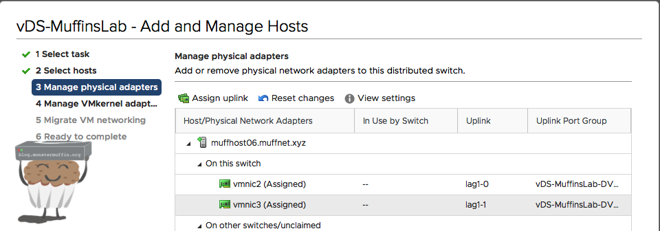
Once you know which links are going to be used, click on one of the NICs and then ‘assign uplink’ and assign to one the uplinks we configured when creating the vDS . This can be either one or many, it’s completely how you configured it.
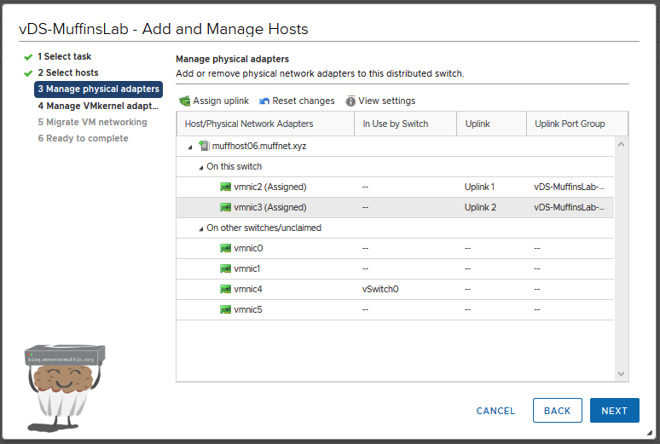
Once you’re done assigning all your uplinks you should have something like the following.
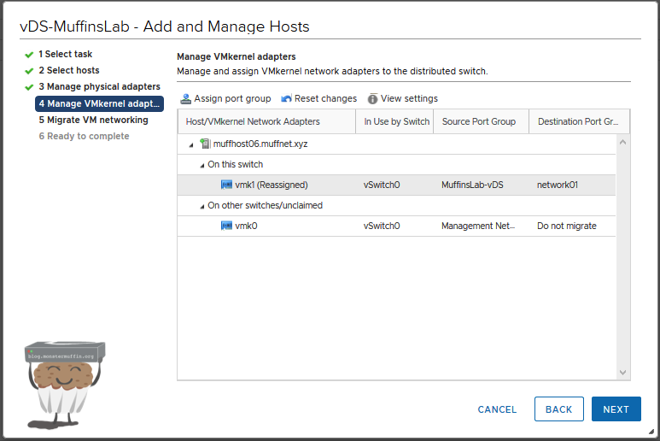
Once you’re happy, click next and we can migrate our vmk adaptor(s).
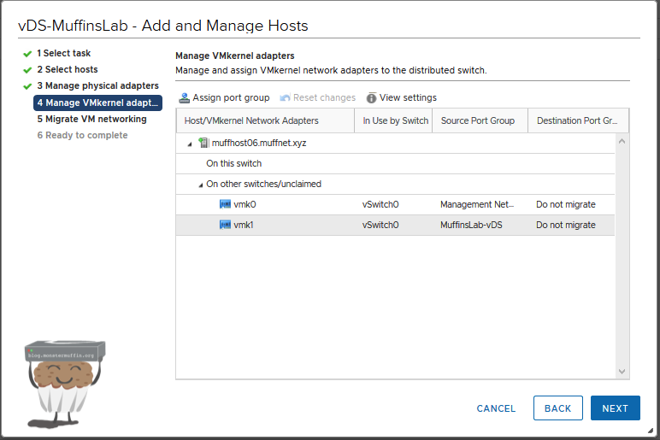
Now, it is important to mention that for the purposes of this tutorial I created a dummy vmk ‘vmk1’. Most of you will probably only have 1 vmk, and this is fine, however, you are most likely going to see this warning:
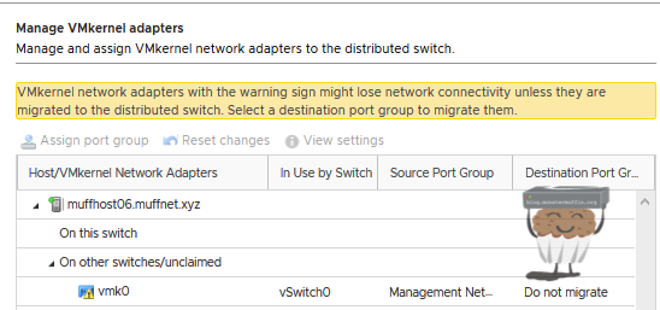
This will happen if your only management interface is connected to an interface that is being moved to vDS, so you must move it to the vDS or risk losing access to the host.
Migrate the vmk to your management port group or wherever your management network is, this should have been created when you were creating port groups. If you only have one port group where everything lives then just move it to that.
For this example, I’ve moved it to ’network01’.
Next, we will migrate VM networking, you can do this in bulk as I’m sure most of you will need to, and I had to when I originally did this a few years back.
As I had 4 VMs on 4 different networks, I did the migrations like for like, ’net01’ moved to ’network01’ and so forth.
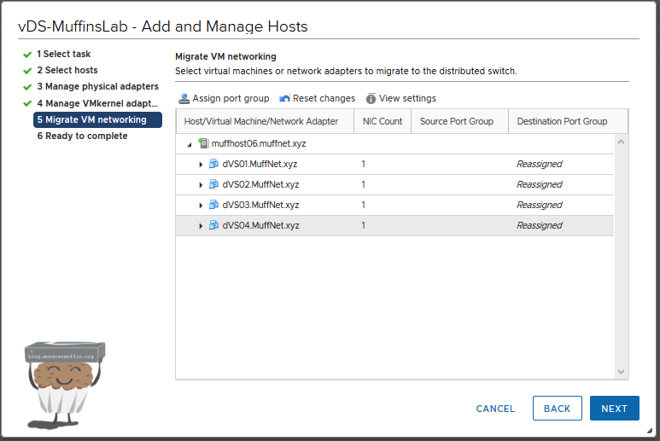
Once all your VMs have been reassigned to vDS port groups, click next.
Here you will get a rundown of what’s going to happen, if you’re happy with everything then click finish and vCenter will do its thing.
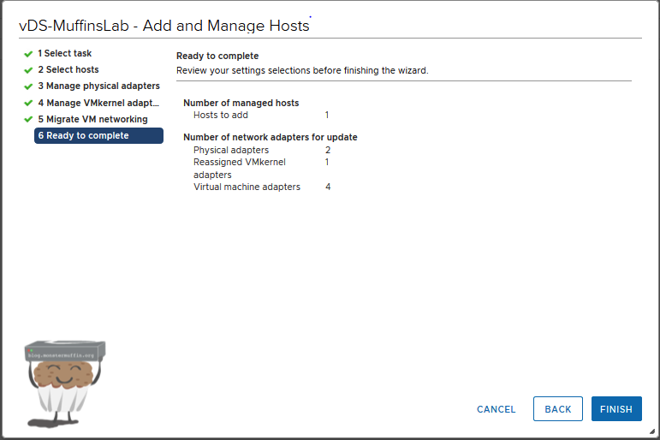
If everything was configured okay and vCenter can contact your host after moving the vmk, then you should see everything complete successfully in the tasks window.

You’re now running on vDS! Feel free to remove all your standard vSwitch port groups and the vSwitches themselves. You don’t need them.
Tackling LACP #
LACP is pretty easy to configure if you wish to aggregate your switchports.
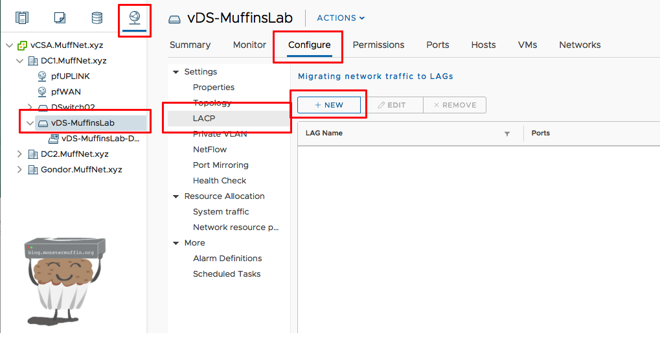
Firstly, click on your vDS, go to configure, LACP and then new
Here you will configure options for the LACP group.

Give your LACP group a name, and how many ports you want in the group. Since I have 2 uplinks and only really use 2 I have chosen 2. The mode is up to you, I normally use active.
There are a lot of load balancing modes, which one you wish to use is up to you, the default works fine. Once that’s done you’ll have a group like this.

Now when you add a host and assign uplinks you will have a choice to assign LACP uplinks instead of the normal ones, this is what you should do.
You must ensure that your switch config is setup before doing this as this process will fail if vCenter cannot negotiate a trunk with the switch.
Single Host with vCenter on that host #
So after posting this to Reddit it was pointed out to me (thanks /u/gscjj!) that this will not work if you have the one host with vCenter running on that host, and it’s something that didn’t even occur to me.
If you attempt to do this in such a scenario vCenter will lose access to itself, fail to deploy the vDS and revert the original networking, the steps to alleviate this is the following:
- When selecting NICs to add, add only one and do the migration with one NIC, keeping your vmk on your normal vSwitch.
- Create a new vmk on the vDS now on that host.
- Connect vCenter to the host on that new vmk.
- Add the second uplink and migrate the original vmk.
- Connect using the original vnk, remove the one we created temporarily.
- ???
- Profit.
Fin #
And that’s about it! I hope you managed to follow along and get vDS deployed in your environment. Now when you create new networks or need to edit networks, it can all be done centrally, once and for all.
Please go forth and mess with cool things such as pVLANs, more advanced traffic shaping and awesome shit like Netflow.
Obviously, there is a lot more that can be covered when it comes to vDS, and if I find some time I will try and make a followup post on the more advanced features and capabilities of vDS.
As usual, thanks for reading!
~~Muffin