Building Another NAS #
A lot has changed in my life over the last 6 months or so, moving out of my flat and quitting my job to travel the world only to have 2020 suck all meaning out of every fibre of my being making me yearn for the eventuality of Earth being obliterated into inexistence, but until that time my storage as of late left much to be desired.
I have been reminded, daily, by my Macbook that my last backup was almost 1 year ago and on top of this the storage I use at home is nearing it’s capacity as well as being degraded. I’ve been overlooking these things for quite some time but I have finally decided to remedy the situation.
Join me on my newest endeavour to build a new NAS, or don’t of course.
Didn’t You Already Build That Chonky Storage Server That One Time? #
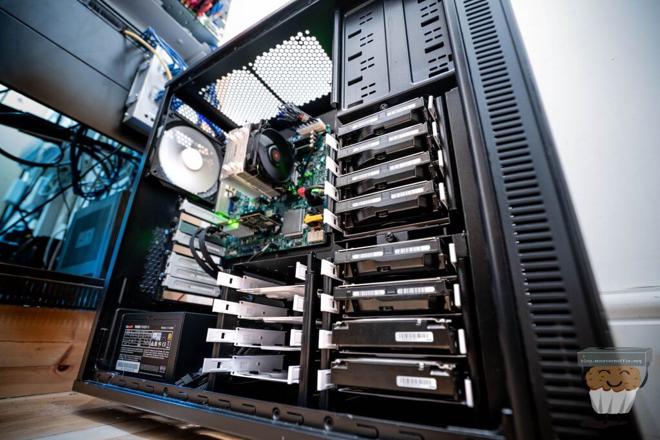
Yes. I actually had over 200TB of usable storage in that server after a while, however, one month it rained so much that the garage it was housed in flooded, wiping out the power to the entire rack.
That was well over a year ago, and I have since not moved or touched any of it, instead deciding to downsize heavily and rely on colo.
Here is a photo I had of the state of things before it all went took a swim, RIP Muffin’s Lab.
The Why #
After the above happened, I made sure I had enough storage elsewhere to get by on, which I have been doing since. The server is another home grown machine I built here, but I’ve decided to retire it and build something new and build for purpose.
This new server will be storing personal data such as photos and other crucial things such as backups and NVR footage. The existing data will be transferred over as you will see later in the post. I also plan on using FreeNAS’s built-in rclone GUI to push the data to the cloud as part of my backup strategy, as well as pushing ZFS snapshots to another storage server, but that will be in another post.
The How #
Items marked N/A without a price were already in my inventory and are thus being reused.
| Item | Vendor | Price (+ postage) |
|---|---|---|
| SuperMicro X11SSL-F MicroATX | eBay | £75.00 (£5.00) |
| Intel Core i3-7100T | eBay | £52.50 (£2.16) |
| 32GB (2x16GB) Samsung B-die DDR4 ECC Unbuffered | eBay | £100.00 |
| be quiet! Pure Rock Slim | Amazon | £19.97 |
| PERC H200 | eBay | £24.00 |
| 2x Mini SAS 36pin SFF-8087 to 4 x SFF-8482 SATA | eBay | £14.00 |
| 2x 4xSATA Power Splitter Adapter Cable | Amazon | £6.00 |
| Define XL R2 | N/A | £0.00 |
| Corsair CX430M PSU | N/A | £0.00 |
| 6x HGST SAS 4TB | eBay | £300.00 |
| 2x Seagate SATA 2TB | N/A | £0.00 |
SuperMicro X11SSL-F MicroATX #
Found this on eBay for a steal really, these types of ‘server grade’ motherboards are always pretty expensive in the UK, so getting something moderately modern with support for ECC and the likes was a no-brainer.
I like using motherboards like this because you get what you need and nothing more. No wanky ‘5.1 surround audio’ tacked to it, no fucking RGB, this is meant to be used in a server. Plus it’s got IPMI so that’s always handy.
Now, I don’t think that you shouldn’t use wanky gaming/consumer motherboards if you have to, but if you can use something like this, then you should be.
Intel Core i3-7100T #
The motherboard supports E3-1200 v6/v5, 6th/7th Gen Core i3 processors along with Celeron/Pentium lines. Realistically any processor would be fine for this. Modern processors are so damn efficient that even with heavy encryption and full gigabit throughput I don’t think you’d max out any of the available options in most real-world, home/prosumer applications.
I ended up getting the best deal I could find and not necessarily the cheapest option, which ended up being a 7100T. The T variant is more desirable for me as they have a lower TDP, not that this chip will ever be pushed to its maximum TDP doing what it’s being tasked with.
Core i3s have become amazing CPUs, with decent clock speeds, hyperthreading and ECC support, these are, imo, the best chips you can get for small servers like this, hell I even used one in post, Building a compact, quiet, low powered ESXi/Storage Whitebox Hybrid.
32GB (2x16GB) Samsung B-die DDR4 ECC Unbuffered #
It’s memory, it’s ECC, I got it for cheap, cool.
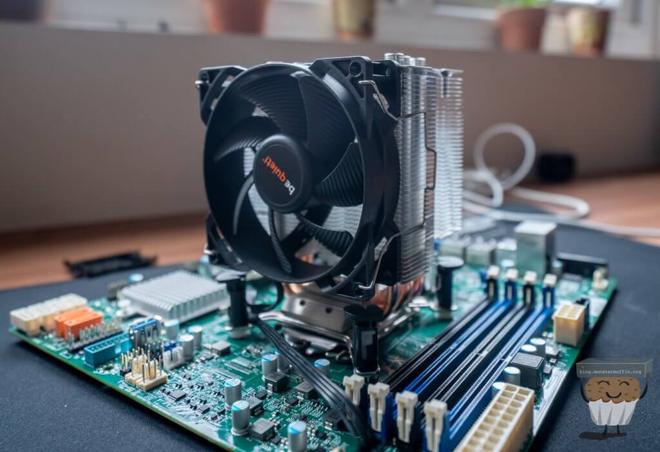
be quiet! Pure Rock Slim #
I really like be quiet!’s products. In my experience they make really well built, reliable and, believe it or not, quiet equipement. Oh and it was cheap.
PERC H200 #
Cheapest card I could find that can be flashed with HBA firmware.
2x Mini SAS 36pin SFF-8087 to 4 x SFF-8482 SATA #
So, I actually needed this as some of my disks are SAS disks and without a backplane you need these connectors, you’ll see in the pictures further down.
2x 4xSATA Power Splitter Adapter Cable #
To power the disks, again you will see this below.
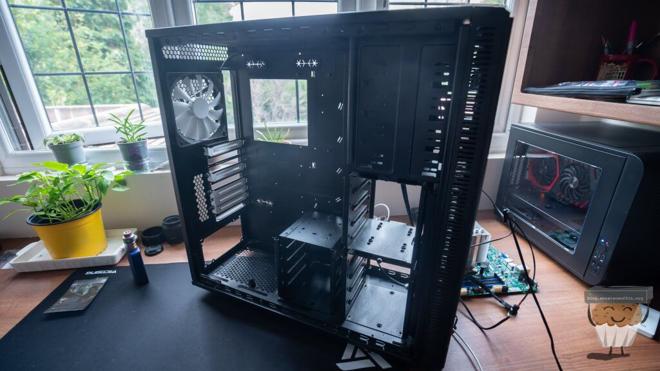
Define XL R2 #
I’ve owned this case for a long time before I really got into homelabbing and servers. I do believe it was my very first NAS. The guts eventually got transferred into a rackmount case and it was unused for many years, but I really love Fractal stuff and as is perfect for this build.
Back in the day I actually added an additional drive cage to it, bringing it to 12x 3.5" internal which is nice, I’ll only be using 8x slots for now but it’s good to know I can slap 4 more disks in with relative ease, I won’t even need another HBA as the motherboard has sufficient onboard SATA connectors.
As luck would have it I have some pictures of it in the first flat I moved into with my girlfriend at ripe old age of 17, when I still had hopes and dreams.
Looking at these pictures I was rather confused where that PSU went, as the one currently in the case is not that be quiet! unit, but then I remembered this was transplanted into its rackmount replacement, and then transplanted again into its rackmount replacement a few years down the line in this post.
Corsair CX430M PSU #
This PSU was already in the case when I came back to it. Is it the best PSU? Probably not. Will it do the job? Most likely. If it does decide to burst into flames, all I ask is it (quickly) take me with it.
**The Disks **I have a lot of disks. I mean a lot. Well over 200TB of disks as previously mentioned, the issue with these disks however is that one day, I will need to resurrect the arrays and get the data from them and, most likely, archive it to the cloud.
What I ended up doing for this is heading over to eBay and finding someone with multiple disks that was accepting offers, and with that, I managed to snag 6x HGST 4TB SAS drives. SAS drives are usually a lot cheaper to buy than SATA owing to their niche market and abundance of decoms.
This is more than enough to store the data I will need to store for myself and my family and at £12.50 per TB it’s a pretty good deal, not to mention my prefered vendor for disks is HGST.
The Seagate drives are currently in the NAS running here now, there are 4 in a Z1 (yeah I know) with one failed, so 3 working. I am planning to use 2x of these to fill the chassis to 8 disks, having 1 disk ready as a replacement.
As previous, I am leaving 4x bays unpopulated for anything I may require in the future.

Fractal are pretty dope #
One issue I faced was that I did not have any screws required to install the HDDs in their caddies. I submitted a support ticket with Fractal Design and they sent me over some caddy screws. Unfortunately, there was a misunderstanding and they ended up sending me 12 screws instead of 12 sets of 4, so another ticket and a few days later they sent me over the remaining screws, great! Big up Tim and William whosever you are from Fractal Design Support.
Another minor issue is that the case is missing one case foot, I probably could have asked for one of those too but completely forgot. It’s a non-issue anyway as the case stands up fine, it just rocks if you push it down on that side, nothing some cardboard stuffed underneath can’t fix.
The Build #
Looking at the case after I’d gotten it out of storage was quite sad, the old girl was pretty grimey and mould had started to set in from the flooding of the garage.
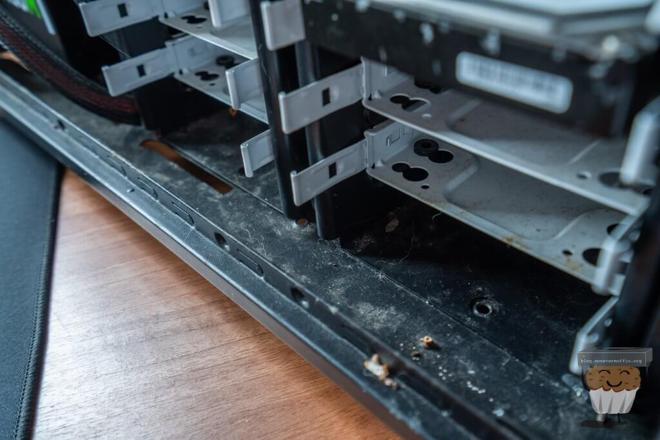
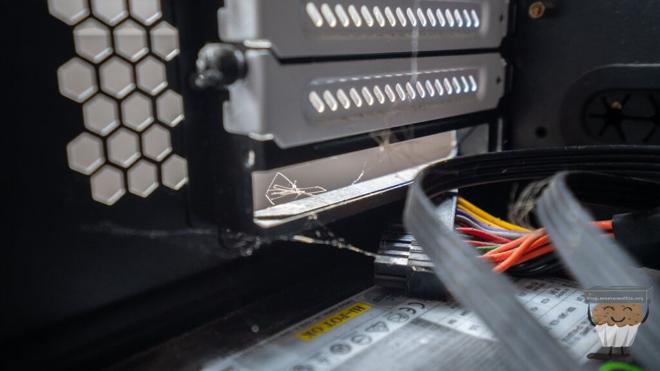
So the first thing that had to be done was clean the old girl up a bit. I used a lot of antibacterial spray and scrubbed the dirt off the best I could without disassembling the different bits of the chassis, ain’t nobody got time for that.
The rest of it is pretty standard build stuff, you know how it goes. Here are some pictures.


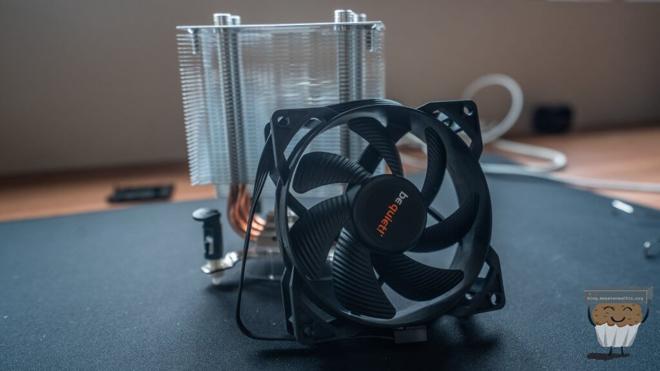
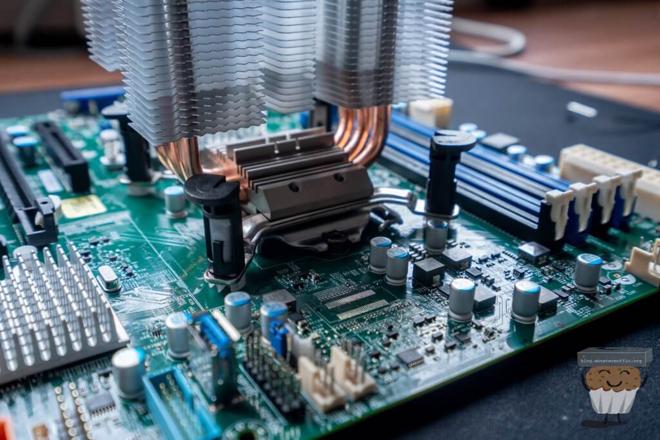
I’m not sure how I feel about pre-applied thermal compound on new coolers, on the one hand it’s handy and well spread, but on the other hand I kinda just want to use my own stuff. ¯\_(ツ)_/¯.
I get that these push clippy things are on the low end because they’re cheap and not really ideal for proper cooler pressure, but god damn why can’t all cooler installations be this easy? Some of the shit I’ve had to install in my past have been too damn complicated for no obvious reason. Although, after putting this thing on the board, there was very obvious warping happening on the board, so, pointless rant by me, clearly.
I really don’t mind warping as much as a lot of people seem to, I’ve used a lot of warped PCBs in my day and they’re pretty solid bits of kit. Once I installed the board in the case the motherboard screws seemed to ‘bed it back’ as it were, so the board was straight.

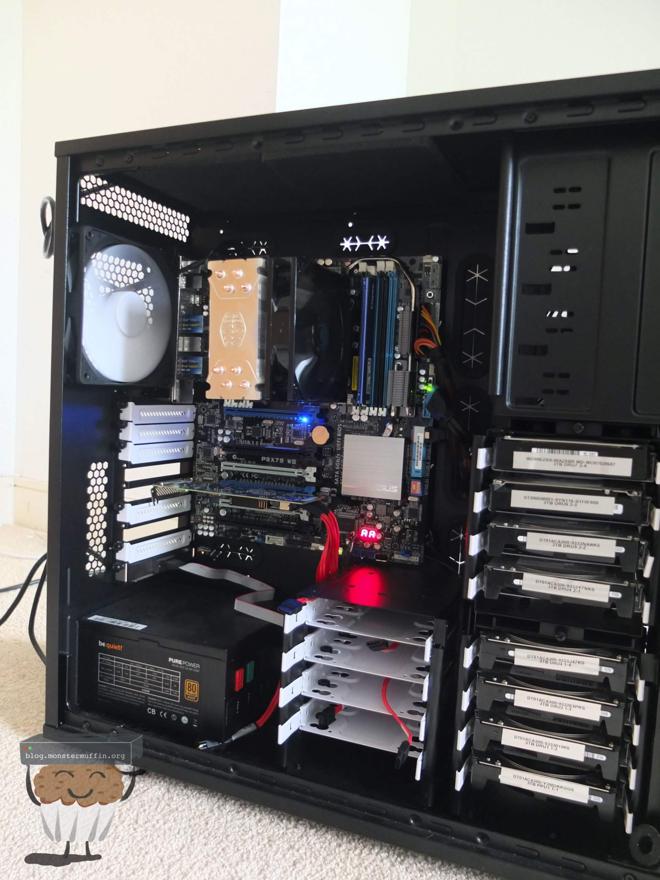
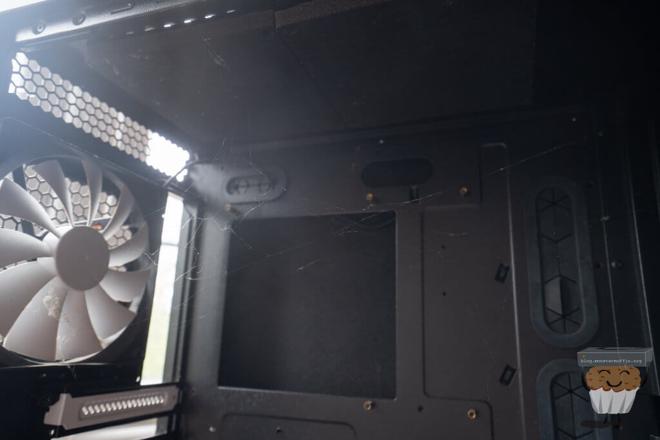
Here’s the case all cleaned up and ready to inplant the hardware.
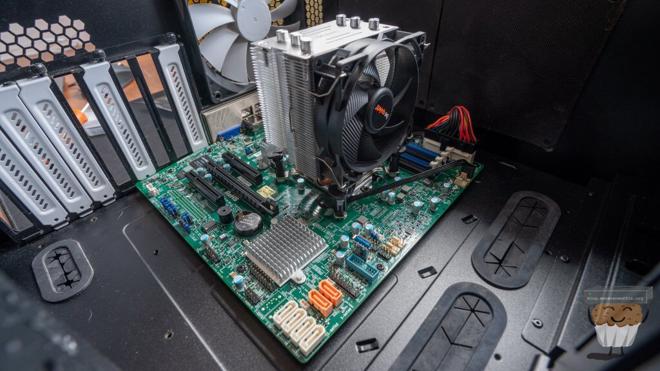
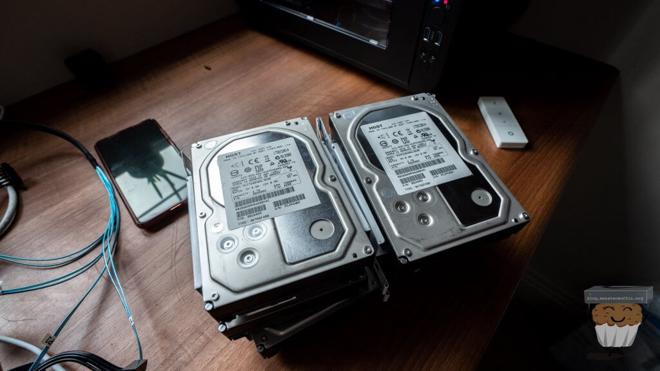

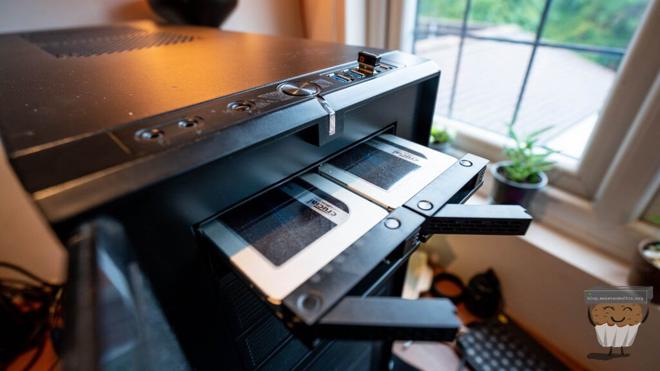
You can see the 6 purchased drives here, the 2 Seagate drives destined to go into the 2 slots at the bottom will be put there after the data transfer from the current server.
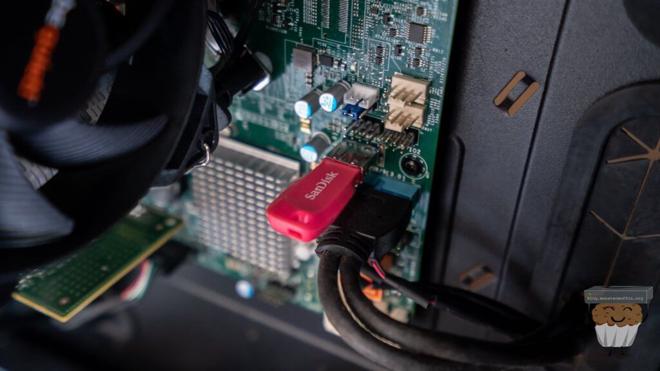
Internal USB slots are pretty dope, this is where FreeNAS will be installed.
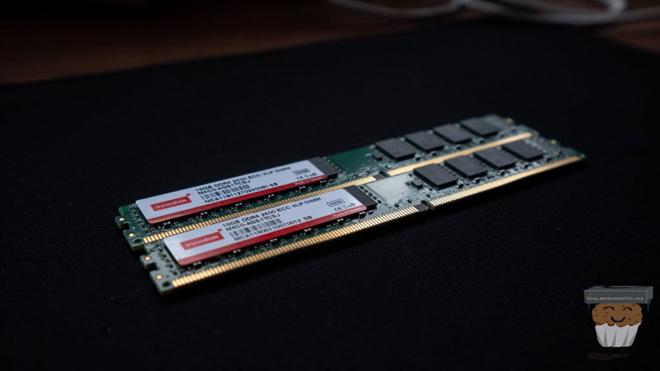
You’ve also probably noticed that I have yet to install any memory, the memory was due to arrive during the day so I got started anyway, I ended up receiving it around this point, and I’m always surprised how small low profile memory is.
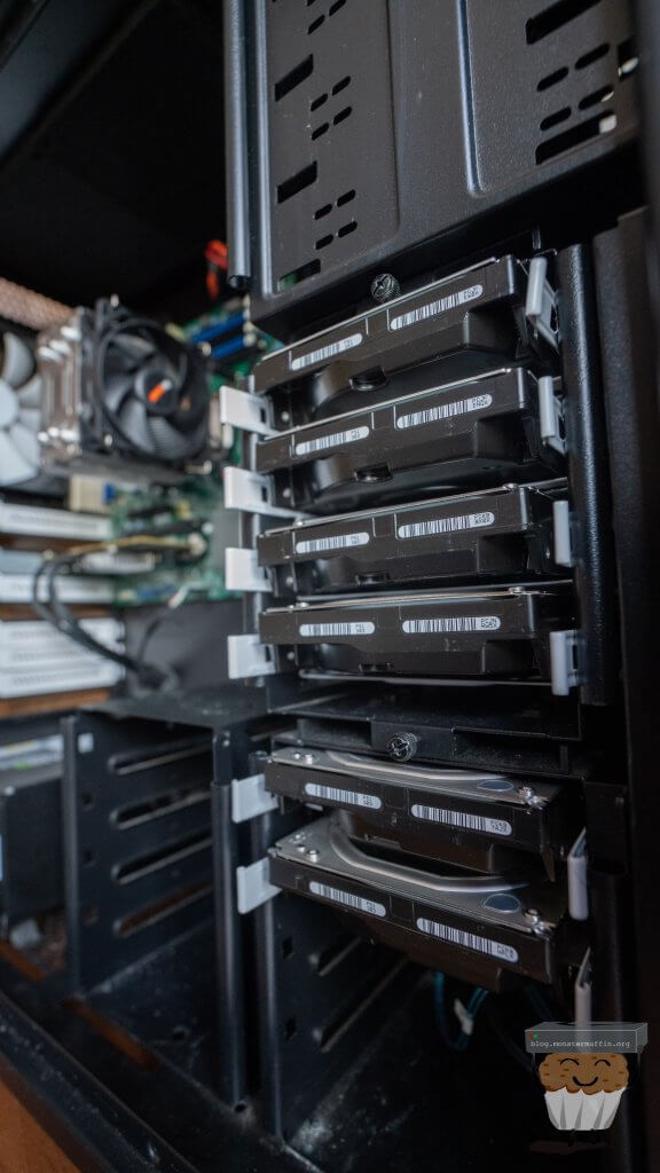
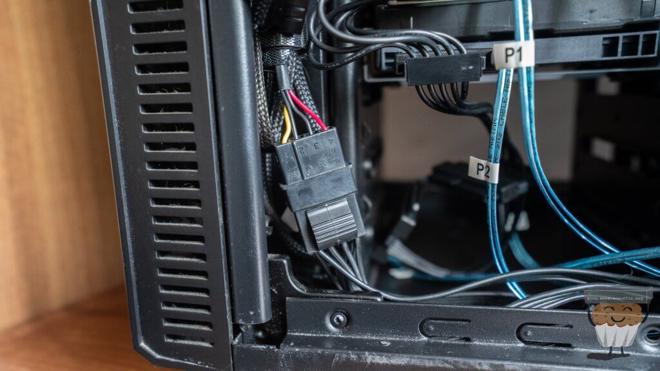
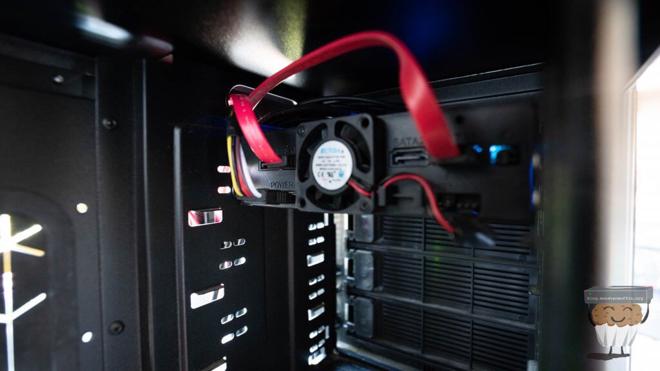
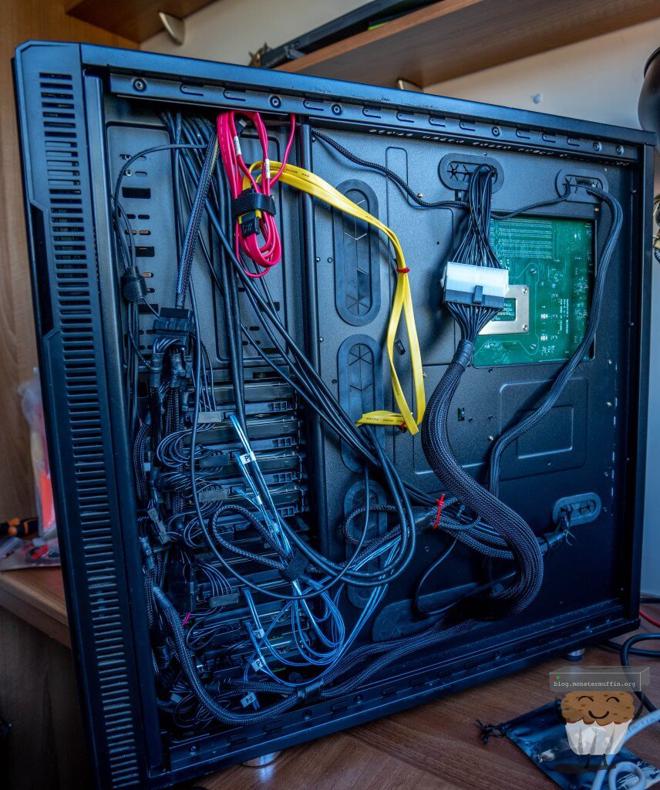
Here’s the back of the case with almost everything plugged in and routed. You can see the how the breakout cable here works along with the power splitters I bought, makes life a lot easier.
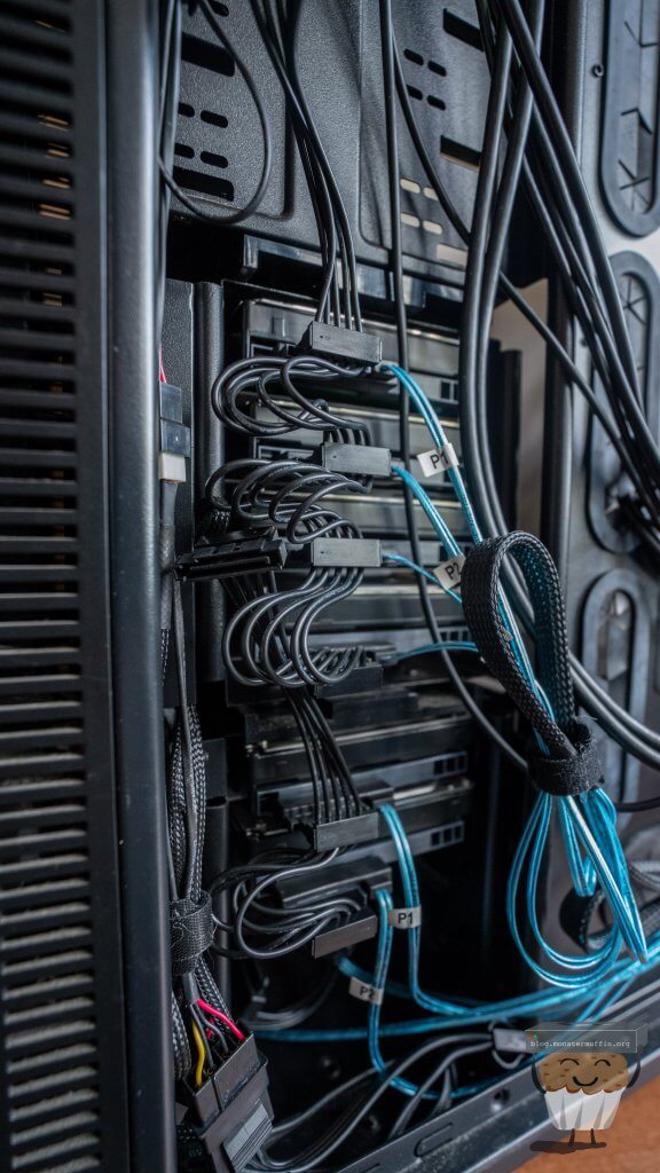
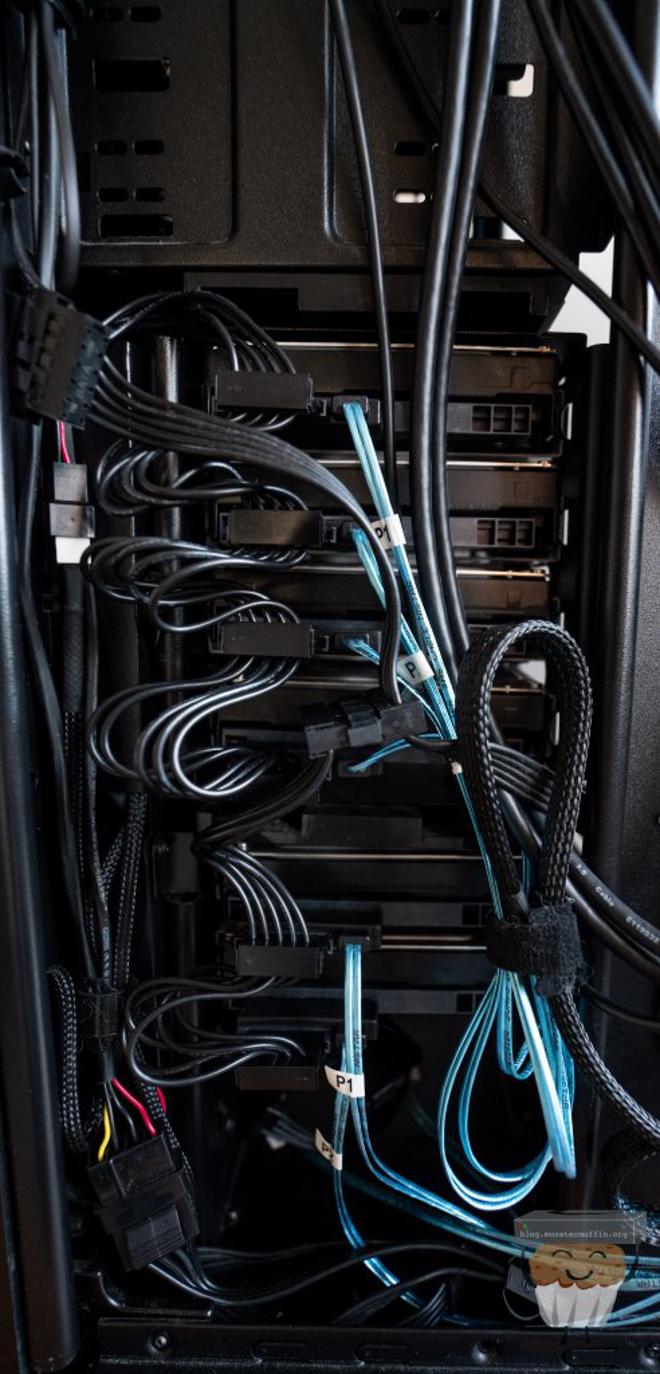
All the fans are connected to a fan controller at the front of the case. Usually I don’t care very much for this but in this case it allows all 3 of the 120mm case fans to be connected to one molex, and, if I ever wanted to, lower their RPM. This is the only molex used in this system so it’s annoying to have to use any at all but it beats running them to the motherboard.
Setting Up FreeNAS. #
So all was almost done with the build so I plugged it into a monitor I keep in the corner of the office for builds and servers. Thankfully, all looked well and the system POSTs.
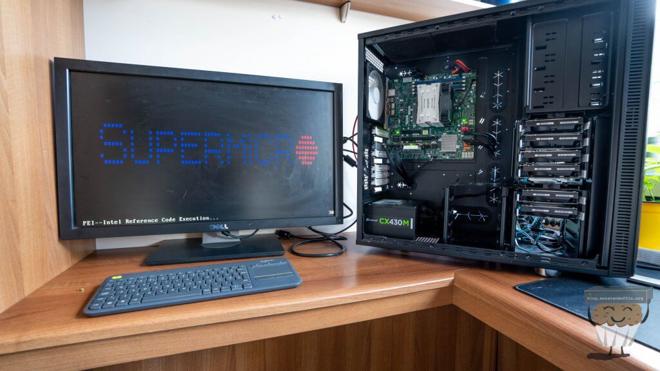
Unfortunately, the system was hanging on the H200’s BIOS which isn’t ideal, but these cards can be finicky. I always like to reflash cards I get anyway to make sure everything is updated and working properly.
After leaving to go to the shops and returning the system was complaining about no boot drive, so the system did actually boot past the H200’s option ROM, it just took ages.
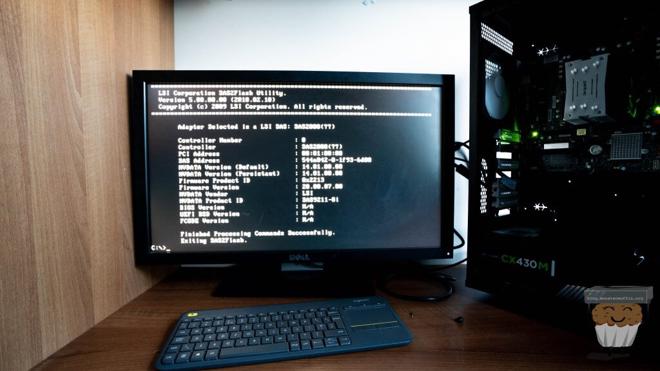
Knowing this I set up the FreeDOS USB I’d need to flash the card, set the USB to boot without the card plugged in, plugged the card in and waited for it to finish doing its thing. I then just did ye olde’ sas2flsh in a DOS environment and got the card crossflashed to an LSI 9211-8i in IT mode with firmware P20.
At this point, I installed FreeNAS, setup some basic configuration including a RAID-Z2 of the 6 drives that were in there, and started copying the data over from the old fileserver. This took a few hours but once it was done I brought the old one into the office to start taking out bits I would need.

If you’ve read my previous posts, you may remember this machine from this post, when I moved out I moved my VMs elsewhere and it has since just been running FreeNAS bare metal.
I needed the 2 drives from the machine I would be taking and the 4x 2.5" adaptor in the front. The reason I needed this is that I wanted to carry over the SSDs in that into this new build to use as a system dataset.
With FreeNAS, when using encryption, you cannot set a passphrase or recovery key if a datastore is being used as the system dataset, and as this was the only pool that’s where the dataset currently resided. I did not want to run the system dataset from the USB boot drive. These SSDs are setup as a mirror pool in FreeNAS.
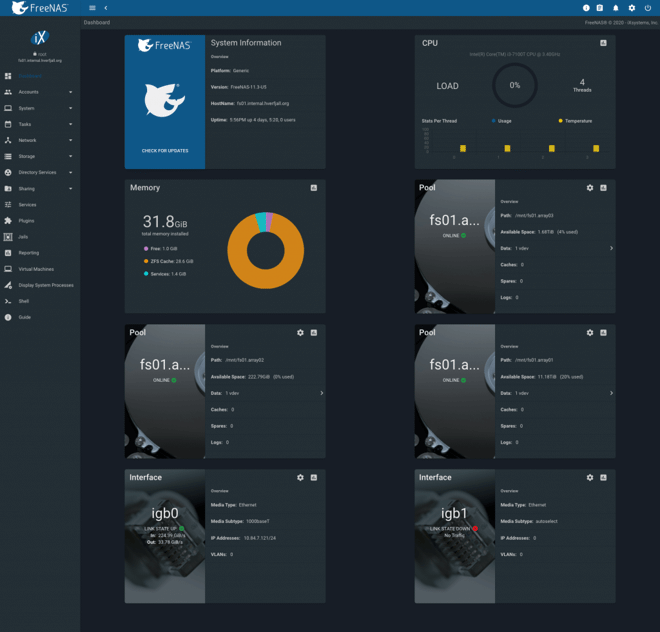
Once this was all done and the arrays looked like this;
NAME           SIZE  ALLOC   FREE  CKPOINT  EXPANDSZ   FRAG    CAP  DEDUP  HEALTH  ALTROOT
freenas-boot  14.5G  2.01G  12.5G        - - 0%    13%  1.00x  ONLINE  -
fs01.array01  21.8T  4.29T  17.5T        - - 0%    19%  1.00x  ONLINE  /mnt
fs01.array02   230G  30.2M   230G        - - 0%     0%  1.00x  ONLINE  /mnt
fs01.array03  1.81T  77.5G  1.74T        - - 0%     4%  1.00x  ONLINE  /mnt
  pool: freenas-boot
 state: ONLINE
  scan: scrub repaired 0 in 0 days 00:01:23 with 0 errors on Fri Oct  9 03:46:23 2020
config:

	NAME        STATE     READ WRITE CKSUM
	freenas-boot  ONLINE       0     0     0
	  da8p2     ONLINE       0     0     0

errors: No known data errors

  pool: fs01.array01
 state: ONLINE
  scan: scrub repaired 0 in 0 days 01:13:33 with 0 errors on Sun Oct  4 01:13:34 2020
config:

	NAME                                                STATE     READ WRITE CKSUM
	fs01.array01                                        ONLINE       0     0     0
	  raidz2-0                                          ONLINE       0     0     0
	    gptid/523b8a8d-5ebd-11e8-be20-ac1f6bf005fa.eli  ONLINE       0     0     0
	    gptid/5207c1c7-5ebd-11e8-be20-ac1f6bf005fa.eli  ONLINE       0     0     0
	    gptid/52c87e7f-5ebd-11e8-be20-ac1f6bf005fa.eli  ONLINE       0     0     0
	    gptid/5292404b-5ebd-11e8-be20-ac1f6bf005fa.eli  ONLINE       0     0     0
	    gptid/52d1de20-5ebd-11e8-be20-ac1f6bf005fa.eli  ONLINE       0     0     0
	    gptid/52ddd784-5ebd-11e8-be20-ac1f6bf005fa.eli  ONLINE       0     0     0

errors: No known data errors

  pool: fs01.array02
 state: ONLINE
  scan: none requested
config:

	NAME                                            STATE     READ WRITE CKSUM
	fs01.array02                                    ONLINE       0     0     0
	  mirror-0                                      ONLINE       0     0     0
	    gptid/45477801-04ba-11eb-ae82-ac1f6bf005fa  ONLINE       0     0     0
	    gptid/454de83c-04ba-11eb-ae82-ac1f6bf005fa  ONLINE       0     0     0

errors: No known data errors

  pool: fs01.array03
 state: ONLINE
  scan: none requested
config:

	NAME                                            STATE     READ WRITE CKSUM
	fs01.array03                                    ONLINE       0     0     0
	  mirror-0                                      ONLINE       0     0     0
	    gptid/4bb4c15d-04c1-11eb-9953-ac1f6bf005fa  ONLINE       0     0     0
	    gptid/4c758ce9-04c1-11eb-9953-ac1f6bf005fa  ONLINE       0     0     0

errors: No known data errors
PSU Woes #
So after getting the pools setup and data moving I started to hear a horrible grinding noise from the PSU, giving it a good smack seemed to fix it for a bit. After looking online it appears that this is a common failure with these PSUs and a simple fan replacement would do the trick.
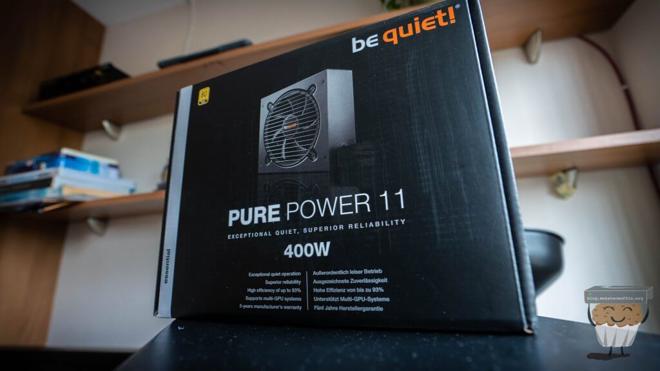
I decided to order a new 80+ Gold PSU from Be Quiet! to replace it with as I thought replacing the PSU with something better was the smarter choice in the long run, so the next day I had one sitting on my desk.
I ordered a new fan for the PSU and will fit it and keep the PSU as a spare for another time, I’m sure it will be put to good use once again someday.
Unfortunately, the 24 pin ATX power connector was, and I fuck you not, millimetres (very small in ‘freedom’ units) too short and whilst I could just about get it to fit by routing it over the motherboard, which is what I did until an extension I ordered arrived allowing me to at long last, finish this build and put it in the comms room.
Done #
Data moved from old NAS, Active Directory connected and permissions setup, shares configured, timemachine storage allocations done, NVR (Blueiris) recording to its mirror share, I was finally finished with this project.
It was very nice to finally see the following too, not just on my machine but on the other Macbooks in the house which is about 5 at this point.
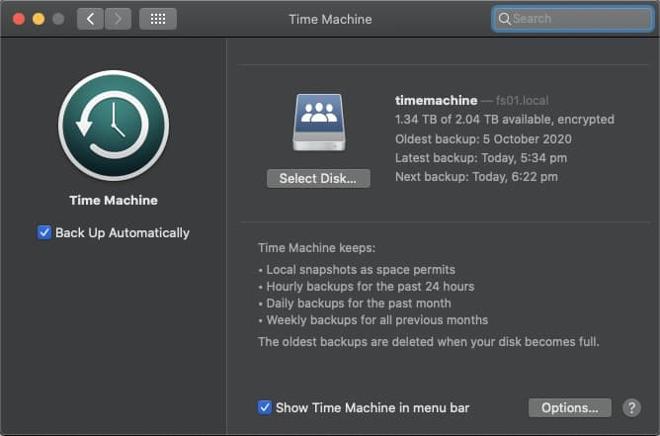
I noticed that the Timemachine shares always use the .local domain instead of the proper FQDN of the machine, I’ve not looked into this yet but it doesn’t seem to be an issue.
I’ve configured storage quotas for each machine/user for timemachine based on how large the storage of the Macbook is. Since mine has a 1TB disk, 2TB will allow me to have a nice history of files in my vault.
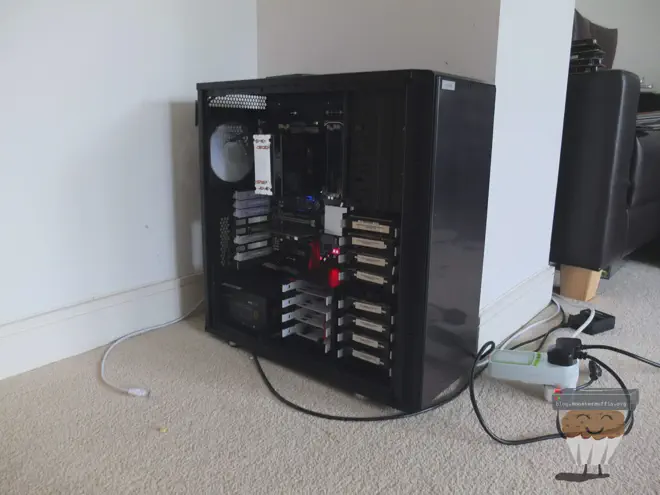
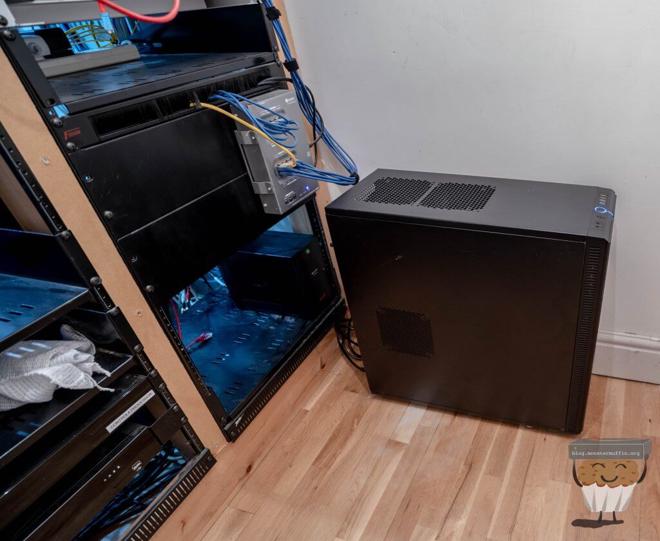
All that was left to do now was move it to it’s forever (for now) home, on the comms floor room.
What Next? #
When I was digging through my old machines I found a machine I had built years ago in a Node 304 which got me thinking I could probably do with a backup of the above machine, but in a tiny form factor, hidden away.
So, my next planned project is going to be (another) another NAS. But that will be more focused on the software side of things rather than the hardware, although the hardware will be awesome as who doesn’t love tiny servers?
The plan is to send incremental ZFS snapshots from this NAS, over to this planned NAS via ZFS send.
I am also due a massive internet upgrade in the coming weeks once my road is dug up (35/15 Mb/s > 500/100 Mb/s), so I will probably do a post on connecting FreeNAS with cloud providers (Google Drive, in my case) and sending data off to the cloud as a backup, keeping in sync with your local box.
So, unless the universe delivers our sweet demise via asteroid instead of the inevitable collapse of human society as we know it I will, hopefully, see you again in the next post.
Muffin. #