Surprisingly, I don’t have any backups of my stuff. Apart from my Microserver Gen8 FreeNAS replication project which was necessary for my photos and personal media I don’t have any backups of my VM hosts, laptops or machines I use everyday which is very, very bad. A lot of my stuff is stored on RAID or RAID-like systems which I know aren’t by any means secure, but it’s kept me going and the sheer thought of having to invest in another storage system to store things that are already on storage servers makes my stomach sink a little; I’m only (currently) 20, and have just started my career so I don’t really have the money to keep spending on hardware unfortunately.
Apart from exceptions of course.. Recently; when I did a Windows 10 upgrade on my main gaming/editing rig I realised how useful it would be to have a backup of all my stuff instead of shuffling terabytes of data around in preparation for a fresh install, so I decided to start investigating how I can achieve a full, not half baked backup solution that I could deploy to solve my issues.
Now, before we begin, I must preface that this is a rather long post with information that goes nowhere as I chop and change a lot, but I like to show my mistakes and what I did/didn’t do, it’s all part of a process and it helps everyone to learn so if you’re looking to read something that is concise with its methodology and execution, please read elsewhere.
Aims #
There are specific targets I want to achieve with this project.
- Deduplication. I want whatever I end up with to be able to support/handle block level deduplication on a file system level, Backup & Replication does to dedup but dedup will be useful for things other than backups.
- Speed. This thing has to be able to do gigabit speeds and when I decide to go faster the only thing keeping me back should be the disks.
- Redundancy. This will be my storing full backups of the machines under MuffNet and the data stores currently on MUFFSTORE02 will be moved here, ideally I will want data mirrored on this machine.
- Power. When idling I want this to be as power efficient as possible, either equalling or pulling less power than my ReadyNAS.
- Reliance. As previously stated this will be housing full backups of all my machines so the machine itself has to last and compose of parts that won’t break, I don’t want something hobbled together only to have to throw more money at it in a year’s time due to failures.
- Encryption. As this will have full backups of my machines the OS/FS needs to have the ability to encrypt this data without performance impact.
- Backup over VPN. This has nothing to do with this build on a hardware level and everything to do with my network and backup solution/implementation; but when this is done I want machines located offsite at my mother’s house to backup to this machine.
- Silence! Within reason, this machine should be quiet. I don’t want my living room sounding like an airport as there is already a very audible hum in there.
Plan 1 #
I have a lot of spare drives, a lot of these are 2.5 SAS drives that I have amassed. These drives seemed perfect for a new file server, I didn’t need to spend any money on drives and they’ll give me the performance I need. So with this in mind, how the fuck do I get a decent amount of 2.5 drives into a rack mount chassis? It looked as if I had 3 options here, which wouldn’t break the bank.
- HP ProLiant SE326M1
- HP ProLiant DL380 G7 - 20 bay SFF version
- Dell C2100
These all have at least 20 SFF bays for me to play with. The SE326M1 seemed like the best option but it’s loud, old and I was reading online about people who were having trouble with the backplane and warning people to stay away. The DL380 was a good option but it came with a price. Here in the UK I could not for the life of me find the 20 bay version for under £500 which was a bit of a bummer and, also, it was going to be rather loud and power hungry too. I could mod these to be a bit more quiet but I started to wonder if this was more hassle than it was actually worth.
Then I stumbled upon the Dell C2100 which seemed perfect. £300, 25 SFF slots and it looked highly moddable. I put an offer for one for £200 without any memory or CPU and it got accepted. I also bought 12 caddies that the internet told me would work with it, they didn’t, but more on that in a second.
When the thing came it was broken, one of the ears had come off, the metal was in bad shape and overall seemed a bit cheap, but I wasn’t too worried; the fans were standard and swapable, the motherboard was ATX so I could swap that if I wanted (which some header pinout magic required). Essentially, I’d bought a £200 case, but I was fine with that. Later on I noticed that this thing was even more broken than I thought and the caddies which I’d bought for £4.70 a pop didn’t work. Shit. Found out that they use proprietary caddies only for this model which cost £20+ each. Started a return on both of the items and went back the drawing board, I just wanted to say this as there is a moral here. Do not buy the Dell C2100. It is just not worth it.
Plan 2 #
Okay so a whitebox it is, this will costs slightly more as the case alone will be more than the machines listed previously, but with my planned parts list it will use vastly less power which I’m all game for, also it means I can fine tune performance to my liking. My ReadyNas 4 bay doohickey is currently pulling around 70W+ so realistically I wasn’t going to get power savings from any of the servers in Plan 1 but the initial cost saving was a plus. Oh well. Moving on..
Parts list #
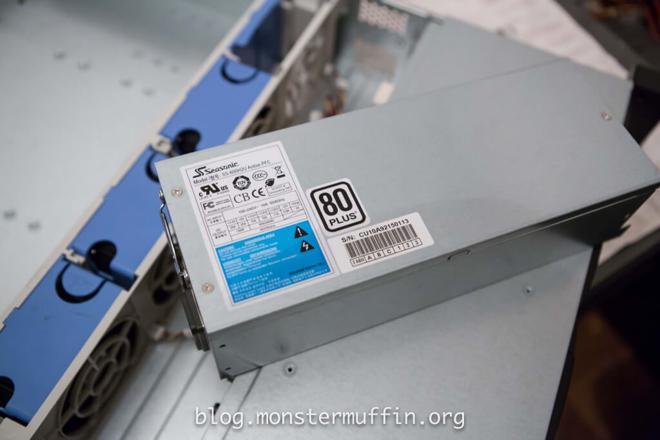
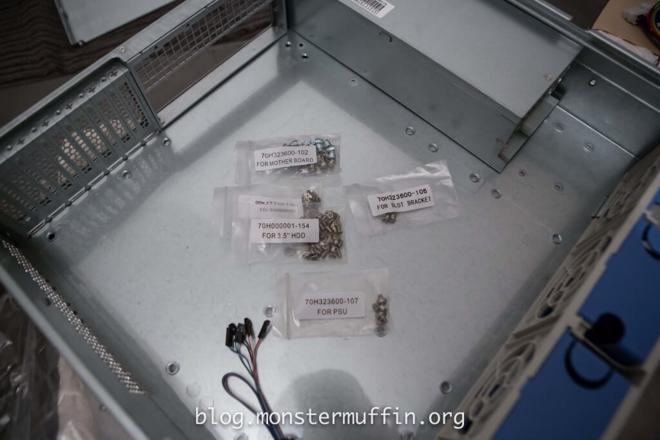
CHENBRO RM23612 2U 12 Bay - £226.80 Chenbro Easy Fit 20" Rails Extendable - £42.00 SeaSonic SS-500L2U - £99.60 AsrockRack E3C222D4U - £135.00 ARCTIC Freezer 11 LP - £16.00 Intel Core i5-4690 - Have in inventory 4x 8GB UDIMM - Have in inventory LSI-9211-8i x2 - Have in inventory SAS Cables - Have in inventory Data HDDs - Have in inventory SSD x2 - Have in inventory
So this adds up to £519.40, which is okay I suppose, considering I’m doing this from scratch. Ideally, I’d be using an E3 Xeon but I already have some i5 1150 CPUs so I see no reason not to use them in the interest of cost savings.
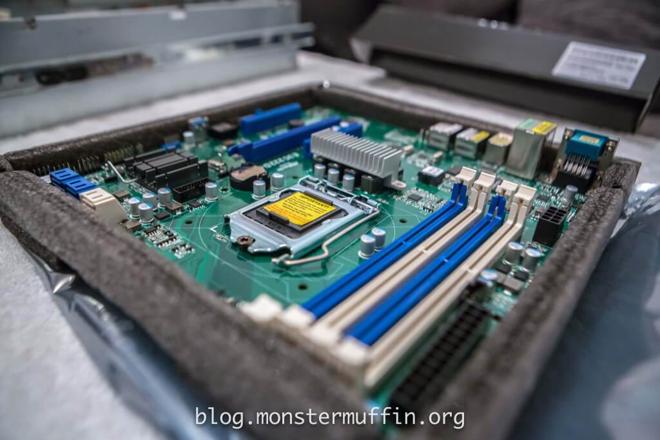
The case seems perfect for what I need, it’s the cheapest thing I can find that looks like it will actually hold up and deliver so that’s alright. The motherboard, again, is the best thing I could find in that price range, there were other similar SuperMicro offerings at a slightly higher cost but this actually seemed like a better deal. The board has a modern socket which is what I wanted for efficiency reasons, enough PCIE expansions (2x x8, 1x x16) which works great for me, 2 of the x8 slots for the HBAs and the remaining one for something like 10GBe in the future. Dual Intel LAN + 1 dedicated IPMI, awesome. To top that all off it has 2x 6GB SATA ports which my boot SSDs will be hooked into using the onboard RAID controller. Go checkout the board yourself, it’s pretty nifty. The cooler is just a bog standard cooler that I found on the cheap which should perform okay whilst keeping the temps down, hopefully. On the memory side of things I opted for whatever I have in my inventory, ideally, I would have liked if the board took RDIMMs so I could use the heaps of 16GB sticks I have, but it doesn’t, and neither does the CPU; plus the CPU maxes out at 32GB so that’s the amount I’ll put in, non ECC unfortunately.
The Build #
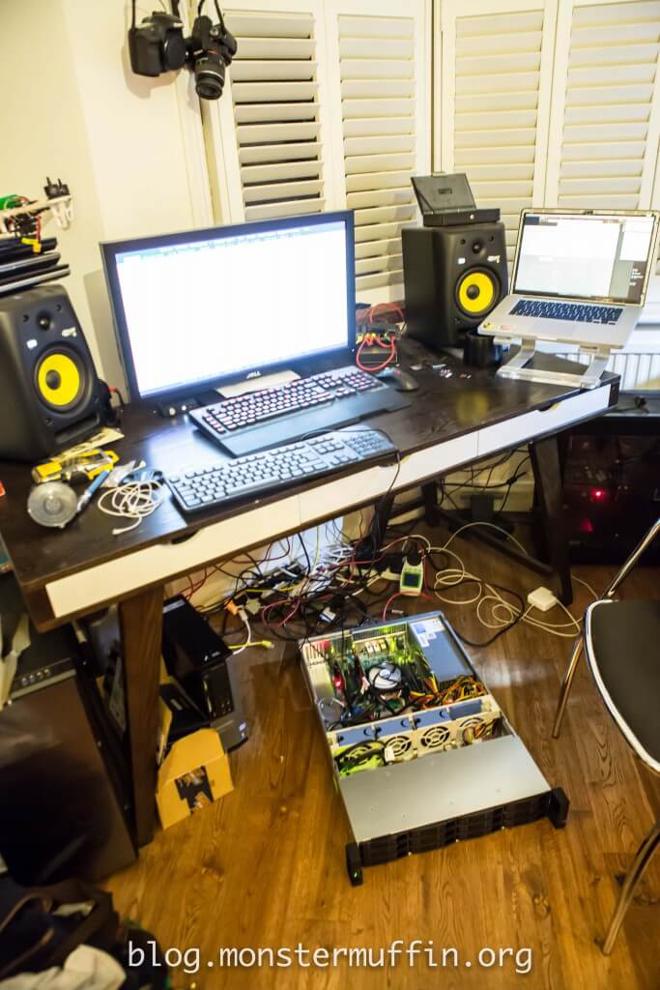
If you’ve read this far in I applaud you, and as a reward here are some pictures of the build. Please excuse the awful photos, it’s pitch black outside when I get back from work and the lighting in my place is abysmal so I’m having to bump the ISO lots; I could have waited to do this on the weekend, but there really is no fun in that.
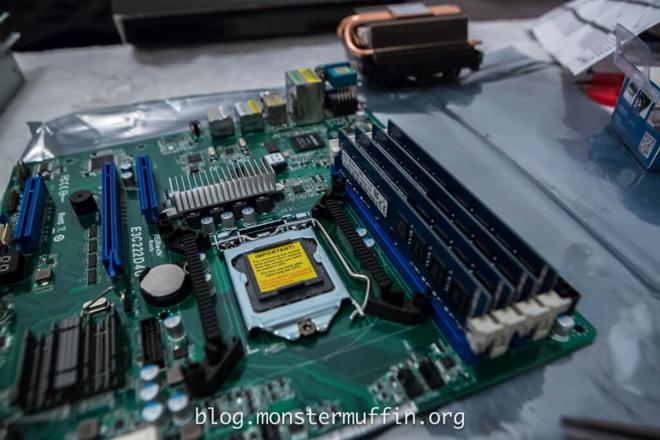
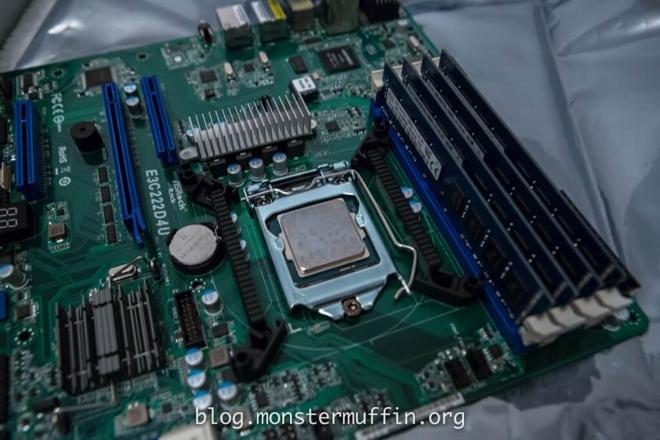
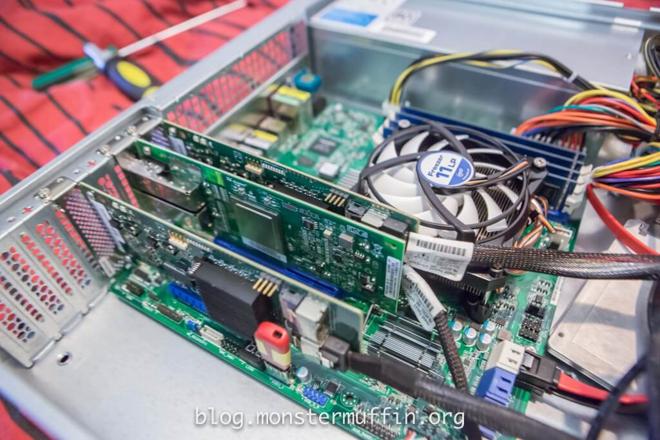
The board is exactly what I wanted, looks and feels solid, has the essentials and no fluff.
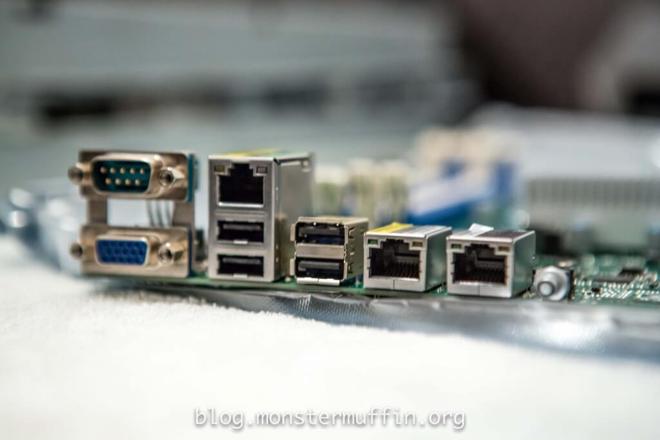
Dual Gigabit Intel LAN ports with a dedicated IPMI port for management, sweet. The console port on board might come in handy too at some point, I actually like to see serial ports being put on server motherboards. Onboard VGA will be useful as well, but after setting up the IPMI I don’t think I’ll ever use it unless shit hits the fan. !
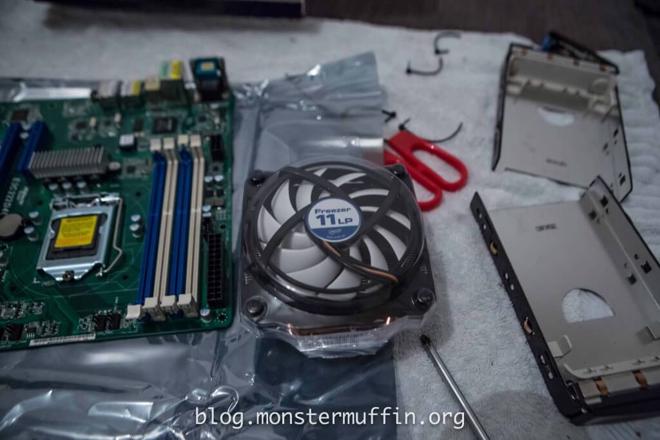
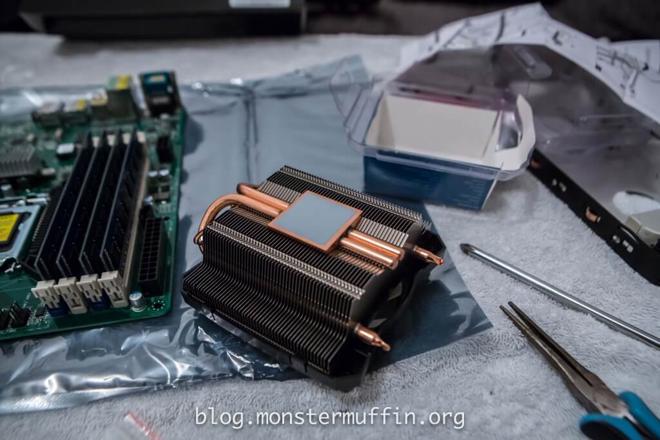
My cheapo cooler of choice, actually looks okay and feels like it should do just fine.
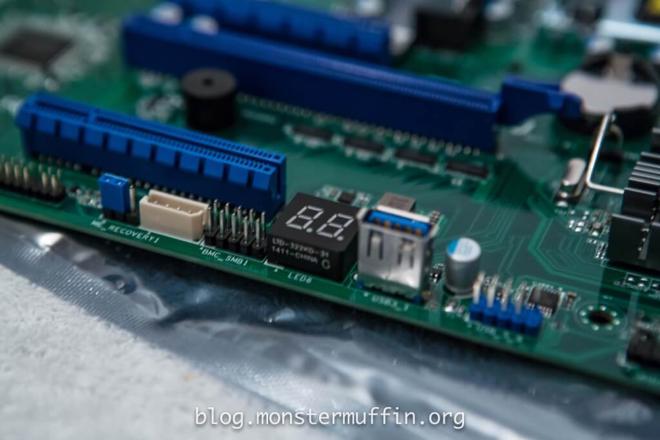
Onboard USB3 is always nice to have as well as an LED readout for when the inevitable time comes when something memory related goes wrong. I am always having problems with memory.
I put the brackets for the cooler on as you can see here and ended up having to remove the right side (second photo) as the CPU release arm was trapped underneath it, no problem just annoying. Should have noticed really.
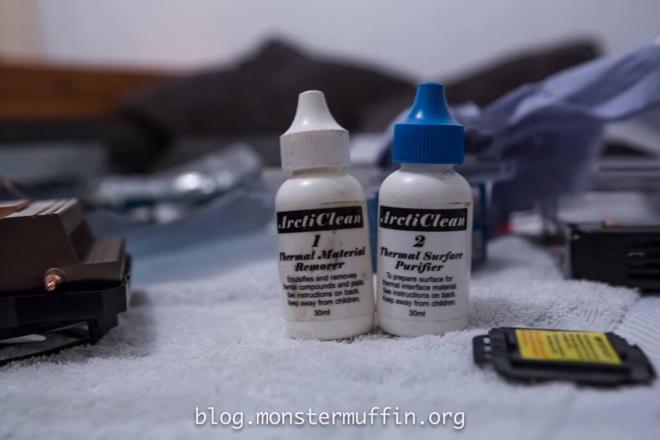
My trusty thermal paste kit. Always use this stuff to make sure everything is nice and clean.
!
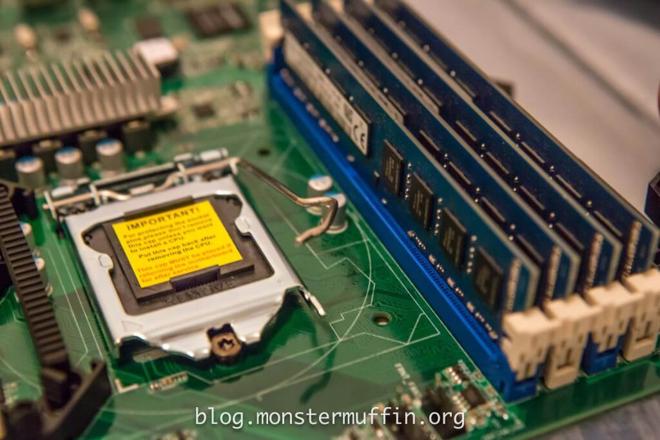
CPU Before:
CPU After:

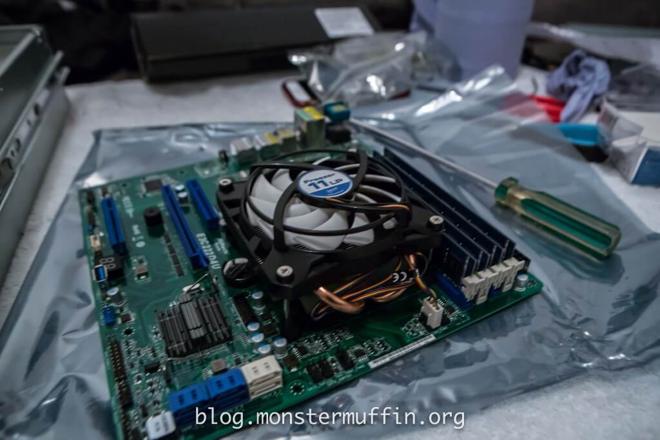
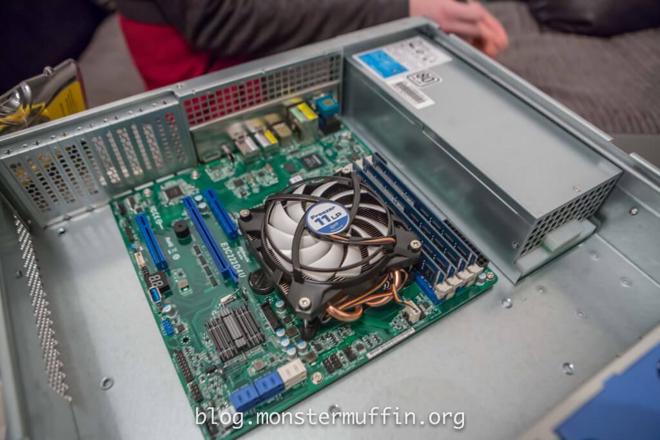
The cooler comes with it’s own thermal paste which is cool, so once the processor was all clean and ‘purified’ the cooler was mounted without hassle.
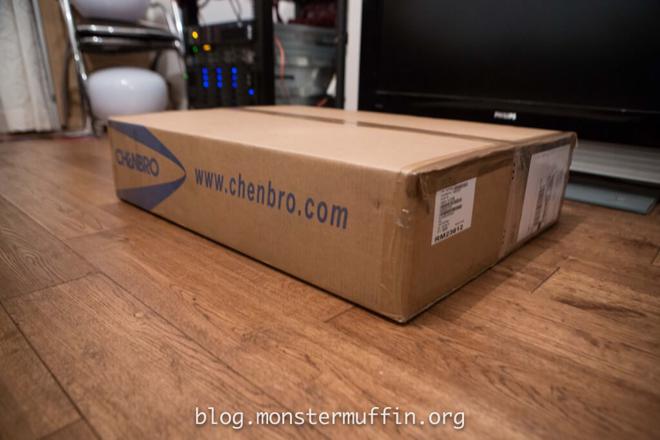
And the most expensive bit of this project - the case and PSU…
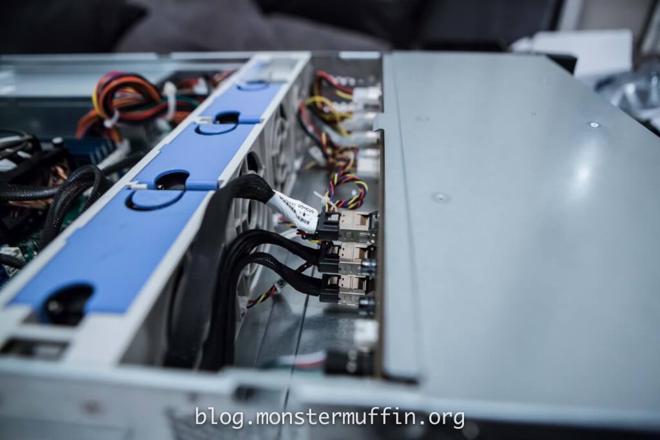
Mounting everything inside and doing the cabling is pretty easy with this case which I like, cables can be tucked away nicely and there isn’t anything stretching to anywhere.
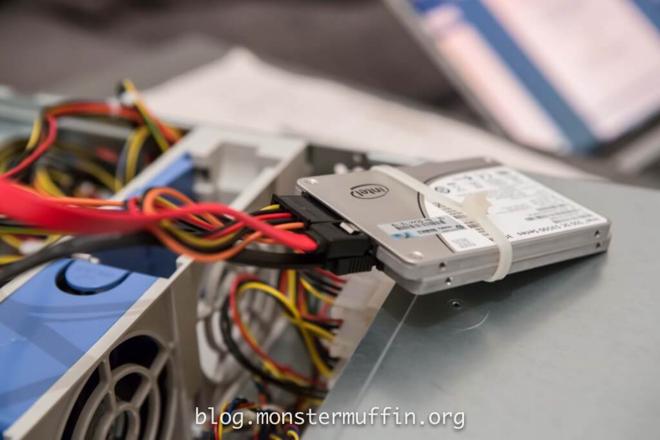
The SSDs I will be using as the OS datastore are these two 300GB SSDs will be in RAID1 and running from the 2 6Gbps onboard SATA ports. As they’re SSDs I don’t really mind zipping them together and chucking them in the case.


I put a USB stick that I found in my drawer in the internal USB slot, this will come into play as you read on (then not so much as you read further.) 16GB. After this it’s pretty much all done!
Storage/Software Plan #
There are 2 ways I have thought about doing this and they are the following:
Windows Server Bare Metal: “But Windows is for n00bzz! Linux is the only way with servers/file storage” Yeah, okay, I get it. I like Linux too, but I also really like Windows and have for a long time. Since I was 10 I’ve been meddling with Windows and since I was 13 I’ve been using it in enterprise environments so I am completely happy using Windows, regardless of offerings such as BTRFS, my next suggestion is a Linux solution using ZFS. I’ll need a Windows machine anyway as I am going to be running Veeam Backup & Replication, If I install Windows on this box I can have that all running bare metal, with the drives under something like StableBit Drivepool or Storage Spaces.
VmWare Host: The other option is to add this machine as a VmWare host on the MuffNet cluster, run Windows Server as a VM for the Veeam stuff and run FreeNAS in a VM, passing through the HBAs and having multiple ZFS arrays, one of which will be the target for Backup & Replication. This way I can also spin up an OSX VM and run OSX server and have that backup my handful of Macs to the FreeNAS share.
Both of these solutions, in my eyes, have their pros and cons. Some of you (or none of you) may be wondering why I don’t implement plan 2 on my current, main VmWare host which is a good point, but I want backups in case **everything ** goes to shit. If I loose that host for whatever reason, I may still have the backups physically on disks, but I will have to recreate the machine that will restore the backups and that is defeating the point. If MUFFHOST01 goes down the shitter, I want to be able to replace the disks, initialize the RAID, and restore all the VMs to the last backup point. Now, the title of this post has given away which of these methods I am going to be doing.. So on with it. This was originally called “building a virtulized file server” but it’s not anymore for reasons you will learn about shortly..
Executing the Plan #
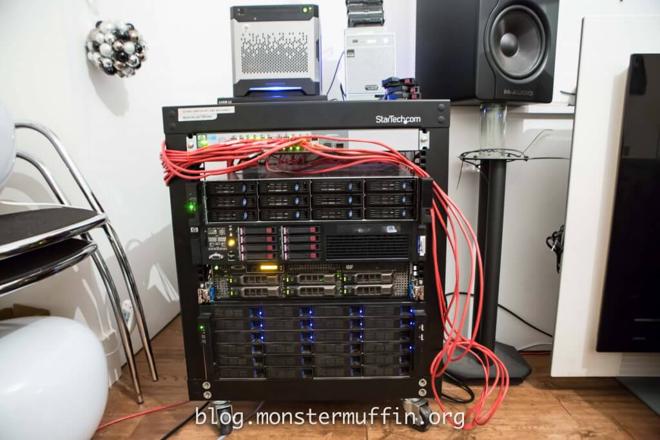
Currently, the lab looks like this, in respect to MUFFSTORE02:
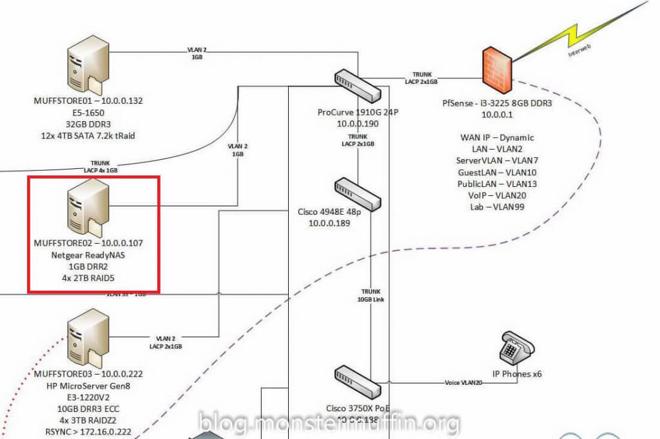
And will be changed to the following, (please ignore all IP/link changes, this is a more up-to-date document):
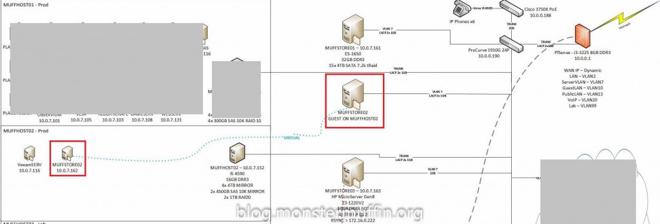
This method allows me to have FreeNAS running as a guest and have my data pools under ZFS, which, as per the requirements I set, supports both deduplication and encryption. The methodology of setting up should be pretty straightforward, installing VMware onto the box is easy enough and the datastores will be running from the onboard SATA controllers so there will be no issues with the passthrough of the PCI HBA cards to the FreeNAS guest. The steps will be as follows:
- Download latest firmware for BIOS and BMC and flash to board.
- Connect the machine to the network and setup the IPMI ensuring I can remote into the machine underneath the OS layer.
- Setup RAID1 of the two SSD’s.
- Rack machine in with power and data.
- Install ESXI onto an onboard USB drive plugged internally.
- Configure ESXI and add to MuffNet.
- Configure Guests.
So, first thing’s first, making sure I have remote access to the machine: just after I built it I made sure I setup the IPs for the IMPI so I could use the KVM, here it is sitting under my desk connected to monitor and keyboard for first setup:
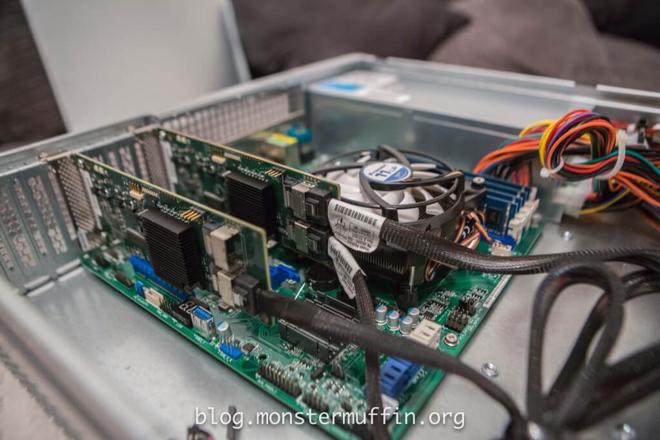
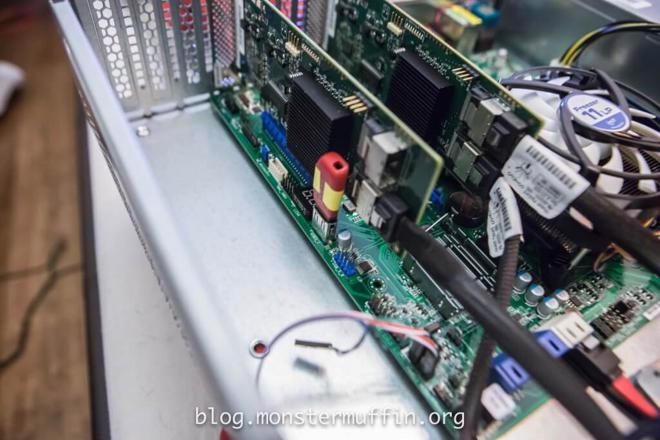
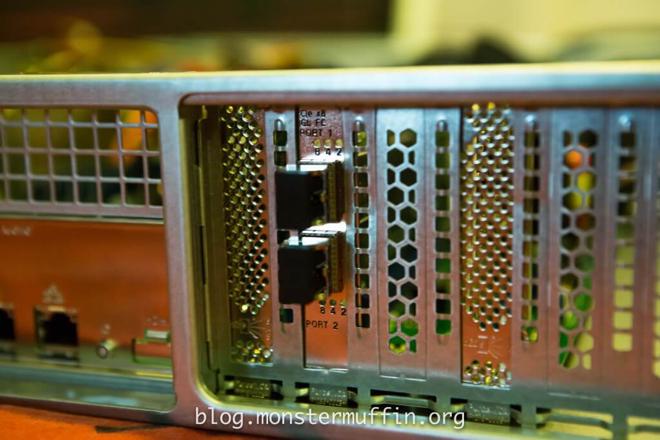
Once that was done I lidded the thing and set it inside my rack, with just power, both LAN ports, and the management port. This is a temporary setup as I have to redo my rack layout soon anyway, so I just patched it in and left it. Before I put the lid on however I did add another card, just because I have loads laying around and thought why the hell not, saves me having to open it up again and put the card in if I want to use fibre in the future.
Now that I can control it from my network and it’s out of harms way I can get to work, the first thing I noticed upon booting it up is that one of the HBAs has an old firmware flashed and IR at that, so I did a quick bootup into an EFI shell and flashed the card to the latest IT firmware like its companion, all good.
Next, I RAID1’d the SSDs and installed VMware ESXI onto the internal USB, setup the SSDs as a datastore, configured the link aggression on the host, added the machine to MuffNet in vCenter and configure the HBAs for passthrough to guests.

Revision #
It wouldn’t be a project by MonsterMuffin if I got everything working right the first time with the original plan, the only way I can put this is that FreeNAS fucked me. FreeNAS was not happy. For whatever reason I could not get it to perform properly, I tried for an entire 2 days and it was absolutely nothing to do with the host or allocated resources, the thing was just slow. I messed around with probably 30 different driver configurations but all in all I figured it just wasn’t worth the time and effort. I had written this whole thing about VMware and installing the guests and configuring and what not which I have since deleted. So what does this mean? Bare metal, fully juiced up file server, running …Windows! Yes, I’m sure there was something to it, and yes, I have seen this running flawlessly in other environments, I’ve even run FreeNAS virtulized just fine before, but this just wasn’t happening and I was ripping my hair out with frustration which just wasn’t worth it.
Re-Executing the Plan #
So remember everything I said about VMware? Forget it. All of it. I am going to be going from this:
To this:

So! After wiping all my previous config in PfSense and wiping the machine, I changed the boot priority, removed the internal USB, booted it from the network and installed WS 2012R2. After the basic setup I installed all the file services I slicing dedup and Bitlocker. Bitlocker? Ew. Not really… I’m not scared of the fuzz needing to decrypt my data, I’m scared of this data getting stolen and the Bitlocker role works flawlessly and seamlessly.
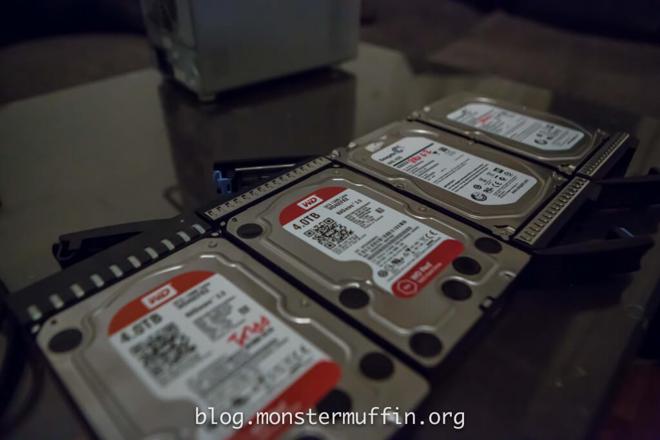
The drives I’ll be using to start with will be the following:
- 2x 2TB WD RE-4 drives.
- 2x 4TB Seagate *shudder* NAS drives.
- 2x 4TB WD Red drives.
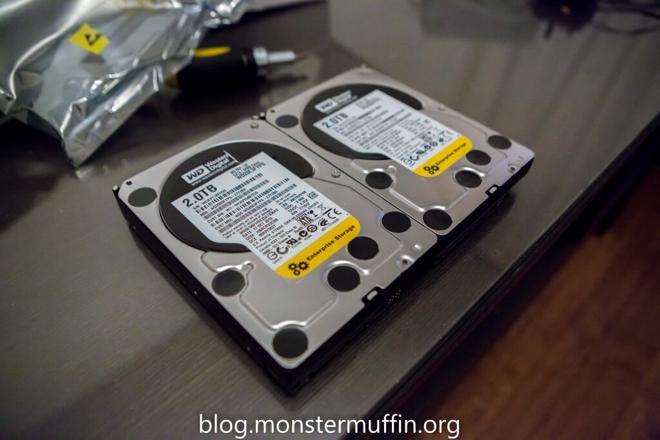
The two 2TB will be mirrored and will store my music and other shares like my software repository, currently stored on my NAS. I would have liked to use 4 WD Reds, but I already have these drives at hand from other builds so there really is no reason to spend more money. These will be in a parity array for the main backup target giving me 10TB. If I have serious performance issues I’ll look into making all the drives the same. 10TB purely for backups should be just fine as the bulk of my data is RAW photos and videos which is on its own FreeNAS box and will stay that way. The backup partition will be both encrypted and dedup’d at the file level, so no ReFS for me. The other share will just be NFTS without encryption and dedup, no need at all.
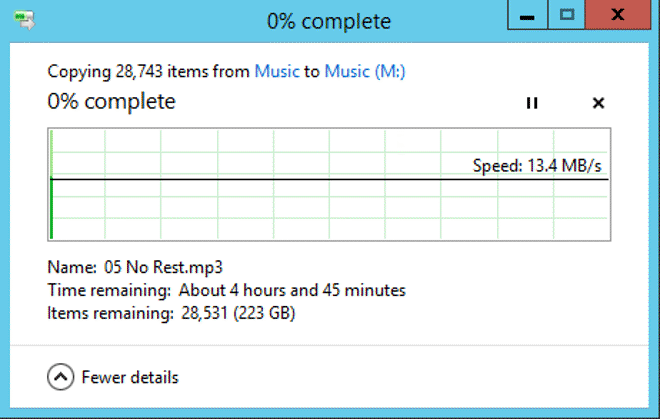
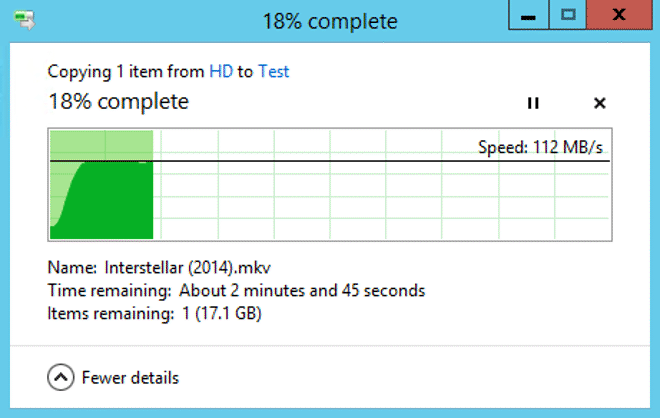
After creating the 2x 2TB pool I started moving the shares from my NAS over to MUFFSTORE02 at a whopping 14MBp/s, this really shows you how much the ReadyNAS was suffering, this was with it fully saturating its 1GB of memory which I upgraded from 256MB.
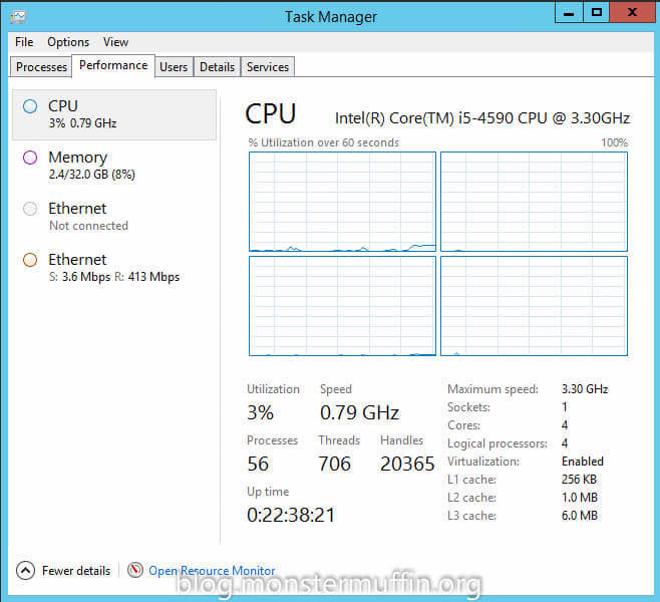
Achieveing full gigabit speeds isn’t really too suprising, but it’s nice to see that the new shares can keep up. The new system is also working incredibly well in terms of downclocking and conserving resources; when this was an ESXI host there was far more memory being used and the processor was being worked a lot harder. Power consumption is also a lot lower now that this is a pure Windows box, but I’ll get onto that. Here is it both receiving and serving files which shows the relatively low resources needed for this kind of work, if Raspberry Pis can serve files this thing definitely can.
Veeam #
Once the shares were done and the ReadyNAS decommissioned I went ahead and installed Veeam B&R with a license I have from work and setup its main backup repository to the 4x4TB parity array. Hooking it into vCenter was easy enough and backing up my VMware hosts is working great. Backups! Yay! Now if the host ever goes tits up I can either fix the host and deploy the backups or deploy the backups to another host and get everything going again with minimal hassle. The backup speed I was getting from the array was actually faster than I thought, as you can see in the following screenshot the speed isn’t too bad at all, with Veeam telling me that the source was bottlenecking me, not the array. The backup speed peaked at about 120MB which was expected since this is only running on a gigabit network, even though both ends have link aggregation this is perfectly acceptable for this kind of setup since this is not realtime storage and the incremental backups won’t be very large, but it’s good to know the array can keep up with gigabit.
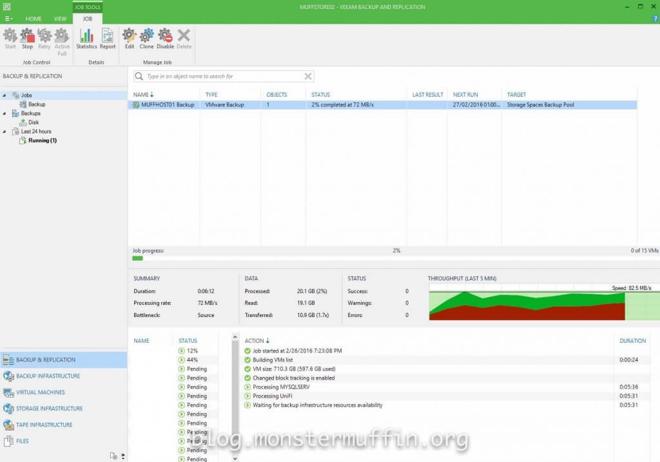
All my physical machines are backing up to the repository using Veeam Endpoint Backup, which is free, into Veeam B&R. My main machine with about 6TB of local storage I had to let run overnight, but once it was done I was comfortable knowing that the future incremental backups would take a fraction of the time. I mentioned that this array has deduplication set in Windows, but Veeam is also doing inline dedup and compression with the backup jobs. I have left both on as the inline dedup is really useful as duplicate blocks are never even written to disk in the first place, but also because I may be placing files manually here myself and Windows dedup can take care of that for me. After a few days both of my virtual hosts were backed up as well as 5 other physical Windows machines with quite a few TB to spare, so this is working out very well for me. I am only keeping 5 past backups to save space as opposed to the default 14. One thing I did notice which was pretty impressive was the file size of the backups. I mentioned that my main computer as 6TB of local storage, this was shown as being 2.9TB in size on the disk from a data size of 5.6TB, that is a pretty good reduction thanks to both dedup and compression. The same thing can be seen with my hypervisor backups, as can be seen in the following screenshot.

Targets #
So starting this project I set myself some goals to achieve; this whole endeavour would have been pointless if I deviated from this a lot, so let’s take a look at this:
- Deduplication: Yes. This system is able to dedup and thus save storage, as previously mentioned, this is only enabled for the backup array as it will be back up many like OSes. WS is doing this on a schedule as well as Veeam doing inline dedup and compression, which, as mentioned is working a treat.
- Speed: Gigabit baby! Well, 2x gigabit but for single file transfers I can only achieve gigabit without changing the physical connection of the server, but that’s fine. LACP was only enabled so that in the event of the server receiving/initiating multiple backup jobs I wouldn’t be throttled.
- Redundancy: So this is a tricky one to gauge. Originally the NAS was using a RAID5 which is poop, I have successfully replaced failed drives, but they were only 1TB and everyone knows RAID5 isn’t ideal and the bigger the disks the bigger the danger. I think that the 2TB mirror is pretty solid. I’m not scared of losing both disks at the same time, if one shows SMART/Bad Sector errors I will immediately move the data off, but the sweet thing is that I have another copy that I can just put in any system and read. The backup array is parity protected which is pretty much a RAID5, however, this is only for backups so writes/reads won’t be too intense therefore I have faith in it. Also, I have a lot more faith in recovering software RAID solutions should it come to it over hardware ones. I would be inclined to call this one a great success, in my eyes anyway.
- Power Usage: When I first installed VMware and had Windows Server and FreeNAS installed as guests I was pulling around 90w from the wall with the thing doing nothing which I wasn’t too pleased about; now that this is a pure Windows machine it pulls about 40-50w with the drives in which is less than the ReadyNAS. This is a huge win for me.
- Reliance: This server, in my opinion, is built from parts that should last a good few years running 24/7, I was careful in picking parts that would be reliable, low power and future proof, all of which I believe I have managed.
- Encryption: Backups are under lock and key. Thanks to Bitlcoker. I understand this isn’t ideal for a lot of you, however, I am safe knowing that if this system were comprised/stolen my data is safe. I would have used TrueCrypt/VeraCrypt but due to Bitlockers integration into Windows I really see no point.
- Backup over VPN: This one wasn’t necessarily covered in this post, but there is no reason why this shouldn’t be marked as a complete goal. I will backup my family’s machines locally and then let my site to site VPN take care of the future incremental backups.
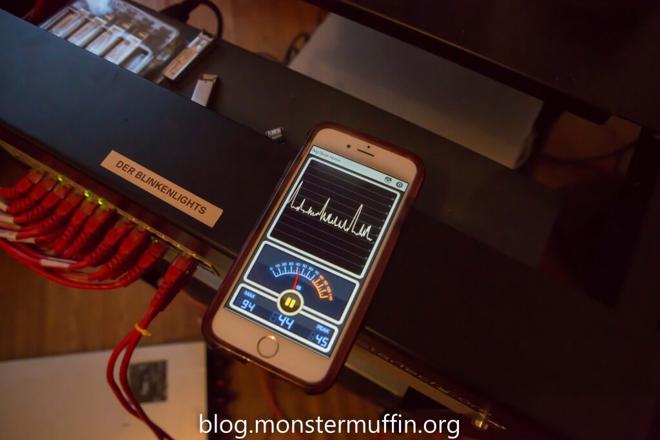
- Noise: Unfortunately, this machine isn’t silent like I’d hoped. The PSU is just too darn loud for some reason, even though I read beforehand that the fan isn’t always on. It’s not loud, by any means but it’s not silent. The following image is measuring the noise of everything switched on bar my hypervisor, so you can see it’s not bad at all, just not as good as I’d have hoped.
What Now/Future Plans #
Even though I am extremely happy with the outcome of the project (and my wallet not so much) there is still a lot I can do with this machine and things I would like to try and implement in the future.
- Hardware Alteration - I still think there is some space for power improvements even though the i5 is clocking down well, I would like to think a low power i3 would be able to bring this down even more. Deduplication on Windows is single threaded per pool so I wouldn’t be crippling myself from losing a few cores, but I should be gaining some power improvements.
- Additional storage array - So some of you might have noticed that in using 2x9211-8i that I have a spare 8087 SAS port, this actually opens up a lot of possibilities for me. Since the board only has 3 PCIE lanes and I am using 2 for the HBAs and 1 currently has a Fibre HBA in it (whether or not I will put it to use is unknown) I can get myself one of these and attach an external disk array to this system. I actually have 4 MSA20s sitting in a pile along with a SUN 3.5" disk array which uses SFF8080, this would allow me to attach another array to the system using the existing HBA with the free port. Awesome.
- Something, something Fibre Channel. Now that this box is purely Windows there is less use for the Fibre HBA I installed in there, but it still allows me to see what I can and can’t do with it in terms of a Fibre Channel target.
- 10Gb. As 10GbE is still far too expensive I was hoping that maybe someday in the not so distant future I’d be able to get my lab 10Gb’d, and this would be great to have on that network.
And that is the end of that! I am happy with the results and most importantly, I have even more storage capacity which makes me very happy.
Last but not least; Goodnight, sweet prince.

Thanks for reading, if you have any questions, criticisms or comments, please, have at it.
MM~~