📔 Intro #
My 3D printing journey started like many others, with an Ender 3 (Pro in my case) and covid lockdowns. I had wanted to get into it much earlier but a tiny apartment stopped me from doing so.
With the purchase of my Ender 3 Pro came a world of learning about all things 3D printing and, of course, how to modify the printer.
After a few years of modifying and upgrading, I finally decided to level up my game, stop drooling over all the Vorons out there and build one myself.
🌱 To Kit Or Not To Kit? #
The age-old question.
In a perfect world, I would self-source and I’m sure many others out there would too but there are significant downsides to doing this. The great thing about Vorons these days is the fact that there are so many regional vendors now that sell part kits, such as frame, motion, etc. This allows you to slowly buy what you need without buying each and every part piecemeal.
Being able to get exactly what you want is also a massive bonus. You get to choose how ‘good’ each part is, truly making the build yours. This can be very advantageous, however doing it like this is time-consuming, and can get very expensive. No matter where you get the parts from, paying for shipping each time and buying multiple items is always going to be more expensive.
I am extremely impatient and like to spend as little as required on my projects when I can, so this was pretty much a done deal for me.
💰 The Kits #
There are several kits one can choose from when going the kit route, and they all come with their own pros and cons. The most notable that I’ve seen discussed are:
LDO Motors Kit #
The priciest of the bunch, by far, but has everything you need and more with high-quality parts.
Formbot Kit #
Generally considered the go-to for the price to performance. It has everything you need at good quality since they’ve been at it for a little while. Early units had some issues but most of that has been resolved now. Part quality can fluctuate based on availability but the general consensus is, for the price, this is the one to get unless you want to spend more on the LDO.
FYSETC Kit #
Similar pricing to the Formbot, but people seem to say this is generally lower quality than the Formbot kit. I’m sure you can get good results, but it does seem to be hit-and-miss and unless this can be grabbed for cheap, I don’t see why you would opt for this at the time of writing.
Various other Chinese Vendors #
With the rise in popularity the Voron has received, it seems that other vendors are trying to edge their way into the game. I have found a few sellers that are little known, and have shipped very few orders but seem to want to try and compete with the bigger players. These, at the time of writing, have no real standing with the masses, and their quality is to be seen. This leads us to the next section…
❗️ The Siboor Kit #
For one reason or another (one of those being money), I decided to take a risk and go with option 4.
In my looking around I stumbled upon Siboor, a very new company with relative success in v0 kits. There wasn’t much to go on in terms of reviews or Youtube videos making things difficult.
The one massive thing going for them though was the fact that they are not only cheaper than all other kits but also include a set of functional printed parts. All the kits I had come across so far didn’t include printed parts, so this was always going to be an extra £100~ via the PIF program, or if that was too long and I couldn’t wait, £140ish from various other sellers. Siboor was selling the kit at a price undercutting the competition with printed parts. Pretty sus to be honest.
Asking around in the UK channel of the Voron Discord it seems that one particular user Rushmere3D#2168 was receiving a review kit to check out and after a few weeks, had an unboxing and first thoughts video uploaded. You can find those here and here.
With those videos watched and fully digested, I decided to take the risk and order the kit. My thinking was, as long as most of the core components were of good quality, replacing some bits and bobs here and there would still put me far under the price of any of the other options.
So I went ahead and contacted Siboor directly, and one punch to the wallet later I had a 25KG package on its way to me from China.
📦 Ordering and Receiving #
To order the kit I decided to contact the vendor directly to try and get some preferential pricing. Whilst AliExpress does offer buyer protection, they also have to take a cut. I always prefer dealing directly if I can and I wasn’t worried about them running away with my money as everything I had seen so far did not indicate to me this was something to worry about.
And with that I sent over the money and waited patiently to hear back. This was most certainly the most painful part of the process as I would only be able to communicate in real-time with the vendors at around 3-4AM GMT otherwise I would just reply in my day and await the next morning. This is of course no-ones fault and it wasn’t too bad in the end. There was a slight delay in dispatching but, again, it wasn’t all that bad. A tracking number was given to me and all I could do was wait.
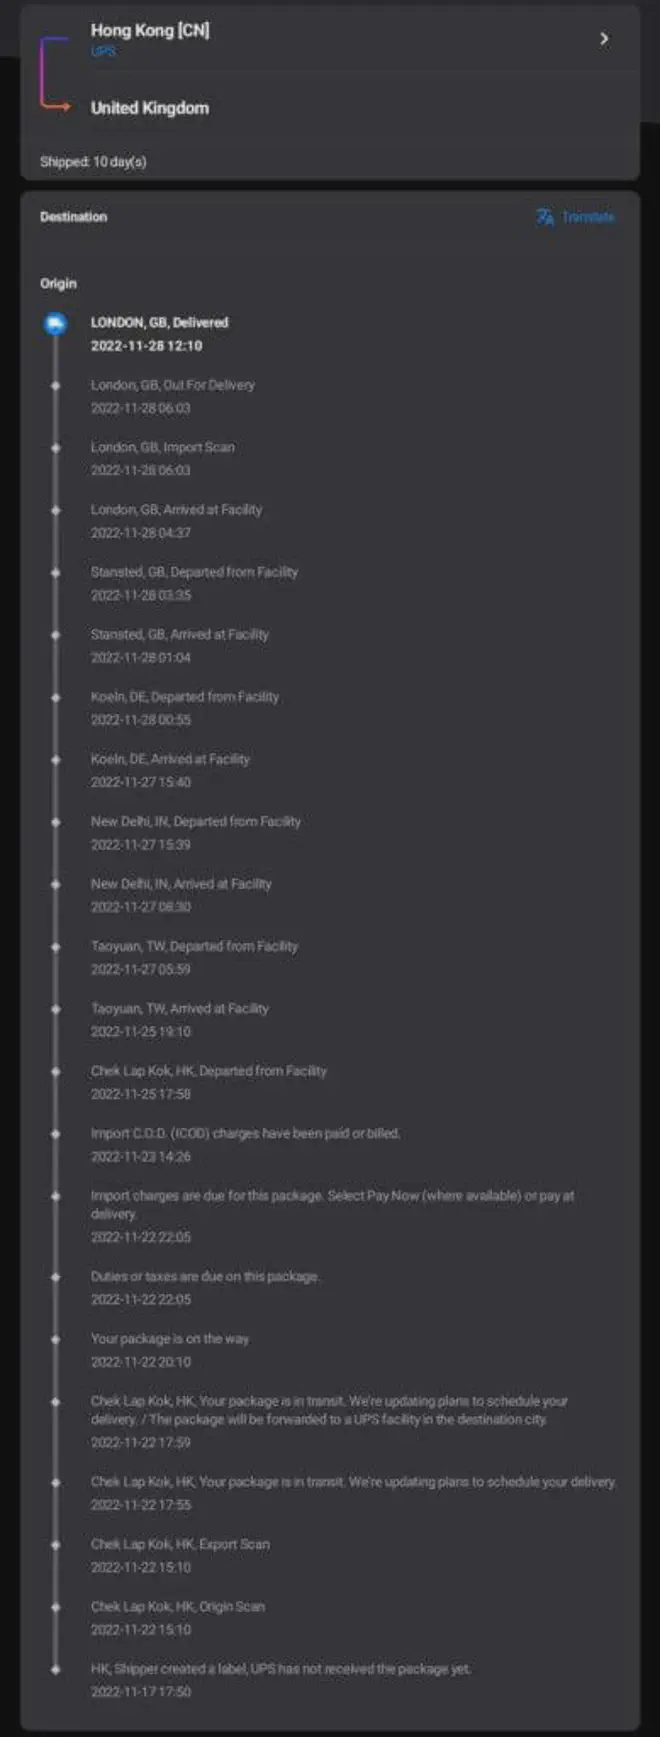
The entire thing took about 10 days which I don’t think is too bad to travel halfway across the world.
I paid the import duty early to avoid any problems at the time of delivery. Import tax was preferable as I had contacted them directly hint hint.
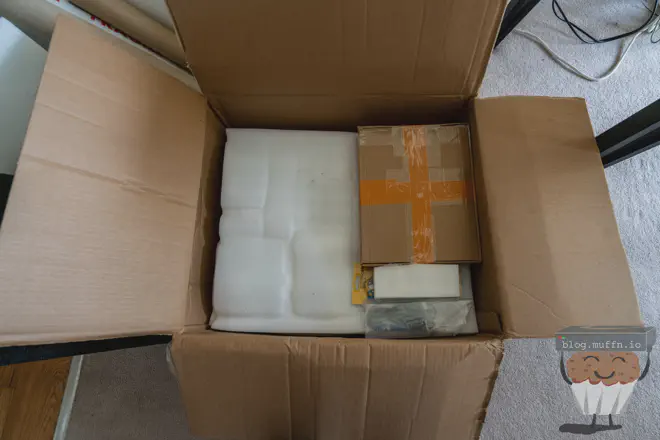
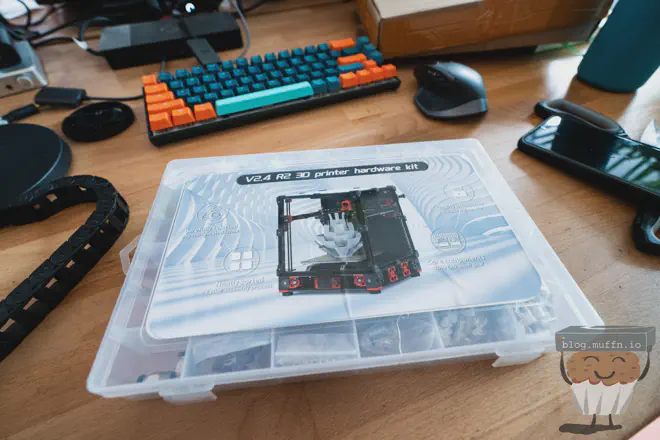
After very impatiently waiting about two weeks when this sight appeared I was giddy like a child:
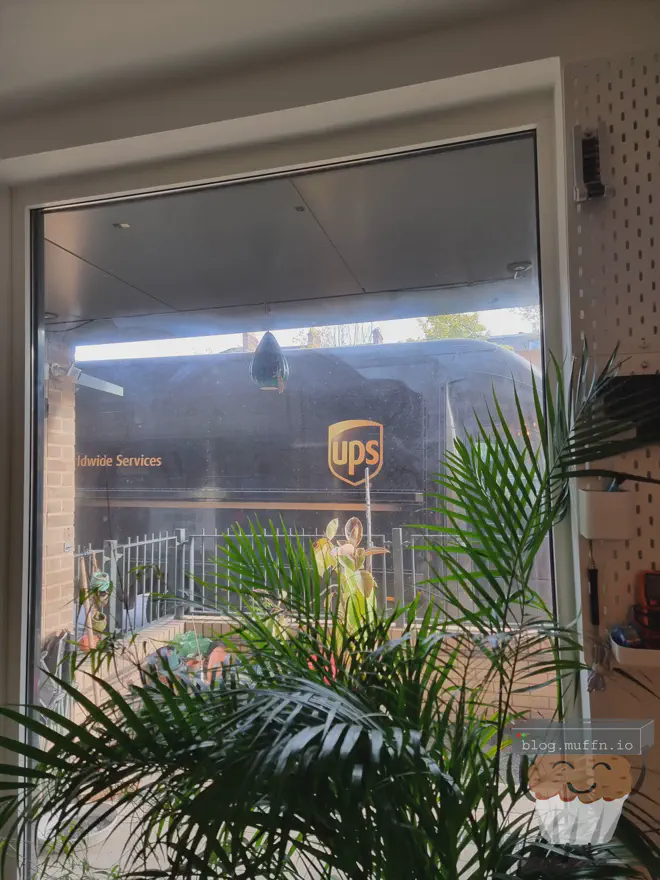
From payment to receiving I would say took about 14 days, at which point I had this sitting in front of me:

Packaging #
The packaging was done extremely well and every part had its place in the many layers of shaped foam. This is somewhere I would have expected to see some ‘cheaping out’ for lack of a better phrase, but this was not the case at all.
Everything has its place and was still in its place after travelling across the globe.
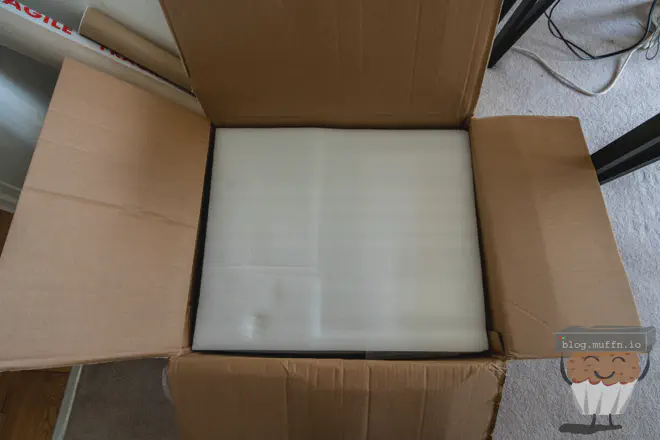
Getting some good sniffs of Hong Kong.
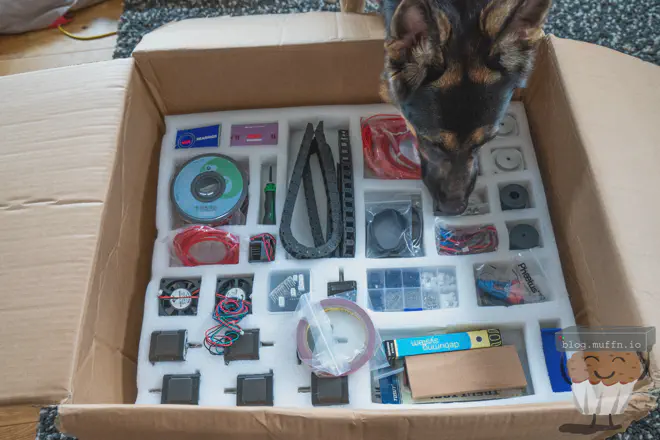
⭐️⭐️⭐️⭐️⭐️ as far as packaging goes.
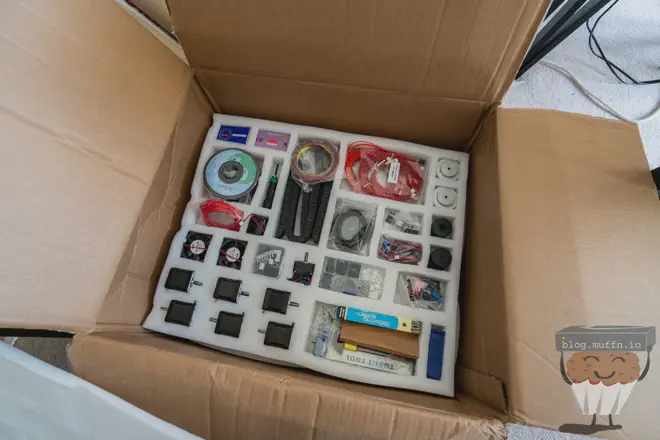
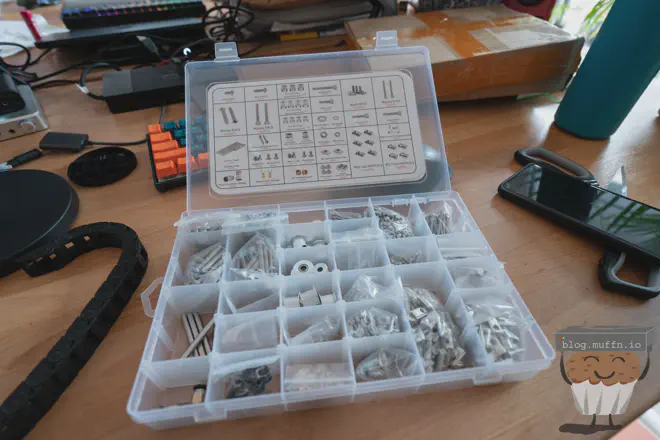
⚙️ Parts #
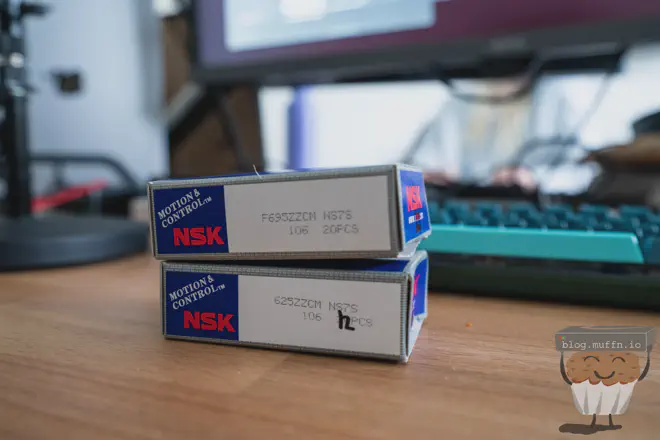
We have a good selection of parts with brand names. I am not qualified enough to tell you how genuine these are but everything felt and looked as it was supposed to. At the end of the day, if it functions well that is all that matters.
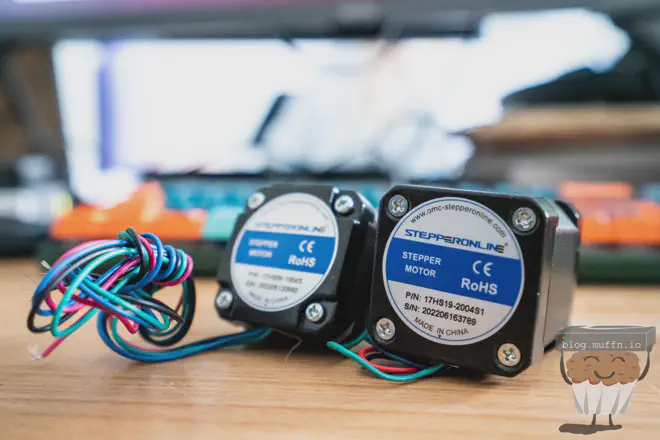
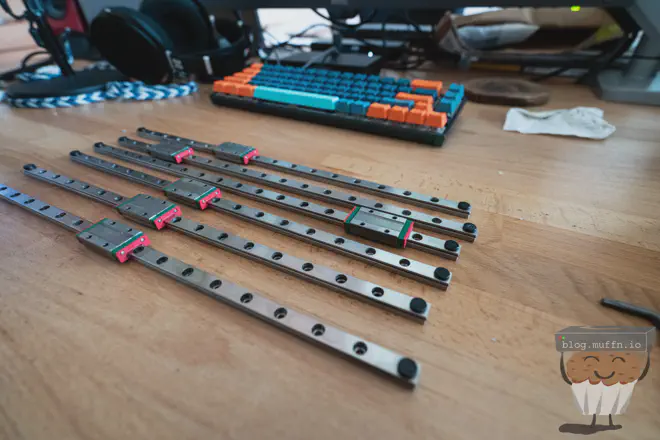
From genuine bearings to Gates belts, there isn’t much here that leaves to be desired. The stepper motors seem like the usual affair of stepper online units, which are in-spec going by the BOM. Rails are ‘Highwin look’ ones but the motion was smooth on all of them.
The X gantry rail was Highwin branded however I am 90% certain that a kit at this cost would not have a genuine Hiwin rail but this is a non-issue.

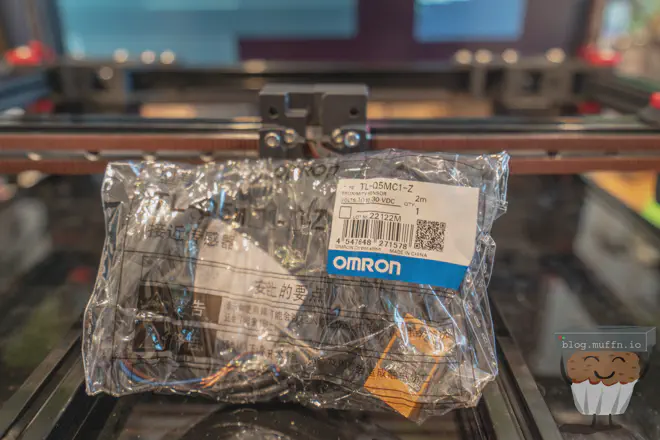
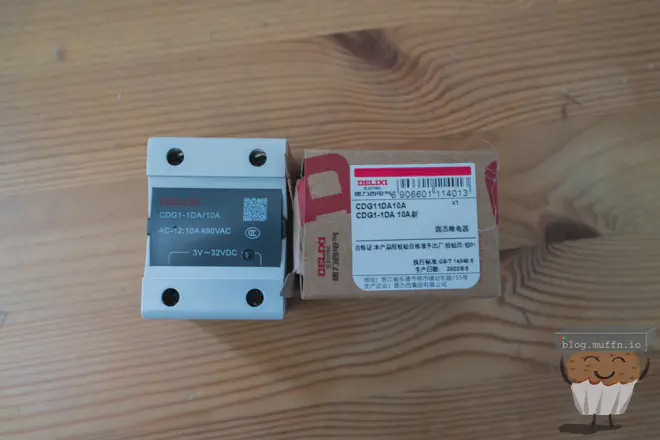
Important electrical items such as the SSR were branded parts. I know many people will change this anyway (myself included) but it’s good to see items such as these not being completely cheaped out on.
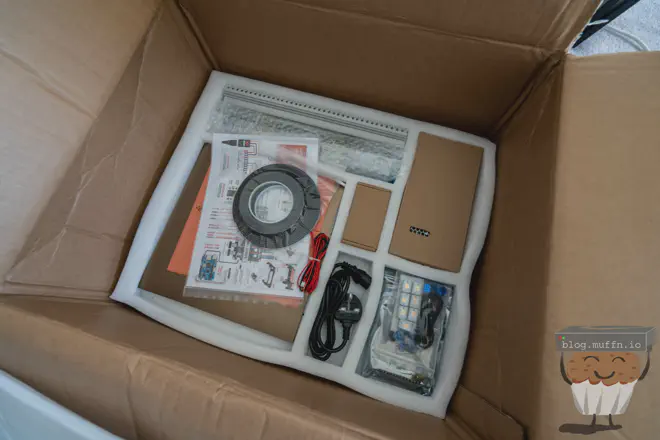
The board included is the FYSETC Spider (not pictured) which is perfect for a Voron 2.4.
An SBC is included too in the form of an Orange Pi 3 LTS (again not pictured) which is a perfectly acceptable SBC to substitute for a Pi in the current climate. I have spare Pis so never used it, but if you don’t have any other option this will do just fine.
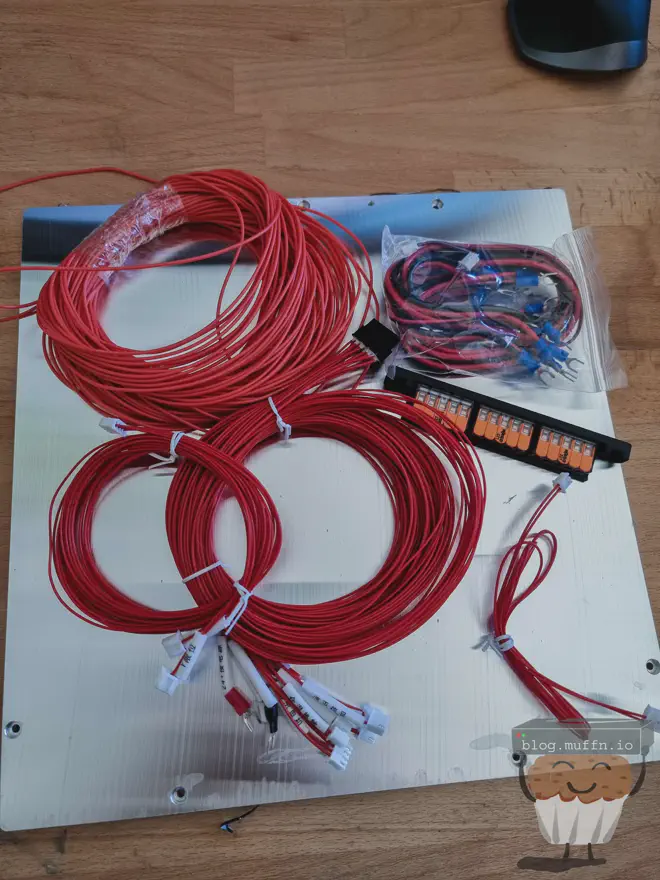
Along with this is a fully pre-wired loom and a healthy amount of spare cable included. Almost no crimping is required here (extensions for A/B motors are required, explained below).
The included toolhead harness has some white ‘gloop’ in the connector, which I was told was to ensure nothing comes loose during shipping. It’s functional but I would prefer it without as in this state it is not rearrangeable by the user. If you ever wanted to change anything on the toolhead side you would need to cut the harness and recrimp.
One major drawback of the cable harness are the Chinese labels, but more on that later.
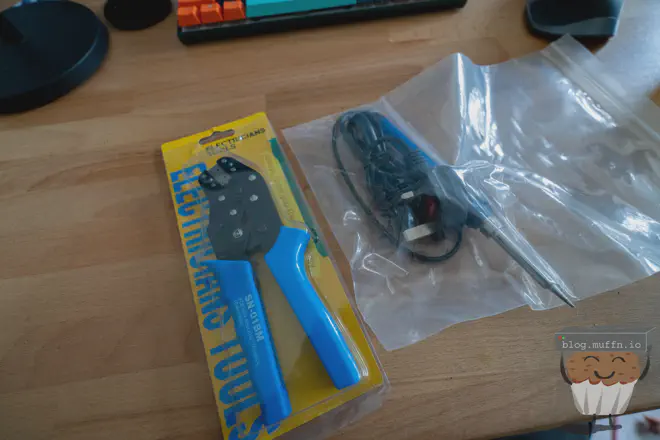
A variety of tools are included in the kit. I would hope if you are undertaking this project that you would have better tools already purchased but these will certainly make do if not. The kit came with more tools than pictured, the soldering iron was useful as a dedicated heat inset iron, saving my main irons from such tasks as there are a lot of heatsets during the build.
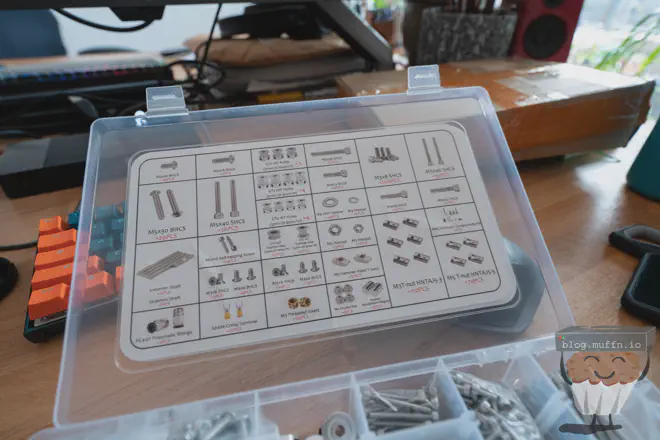
The clearly labelled fastener organiser was great to see. Not something I would have expected from a kit coming from this price point. If everything came in little labelled bags I wouldn’t have complained, but this is definitely a great extra step Siboor have gone to, props to them.
During my build, this well-organised and labelled fastener box would prove invaluable.
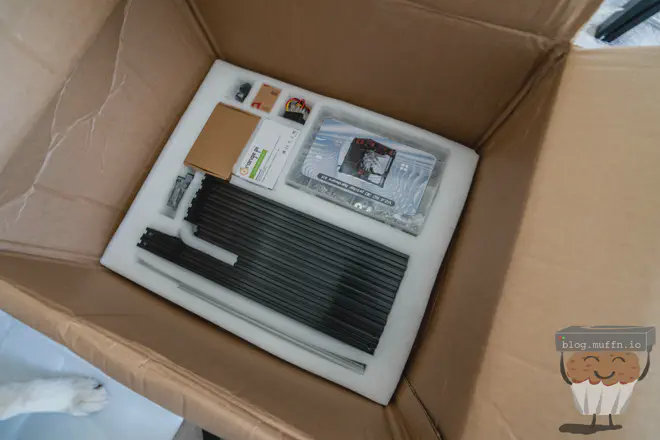
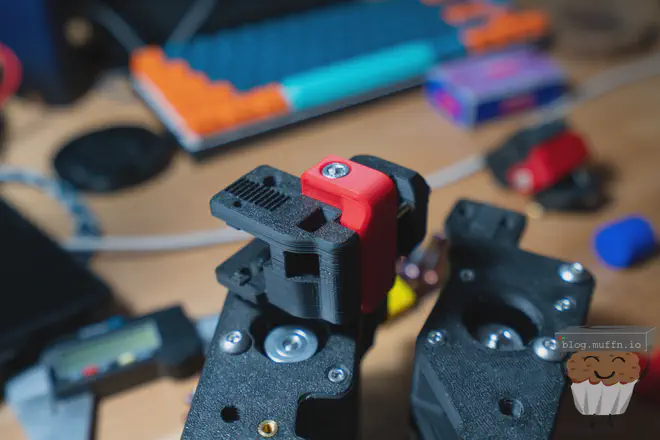
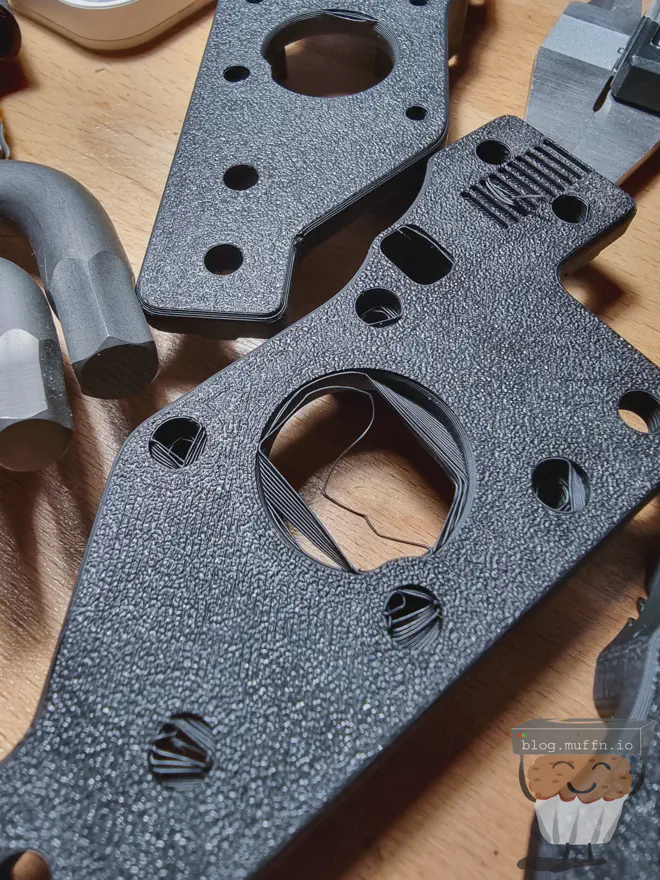
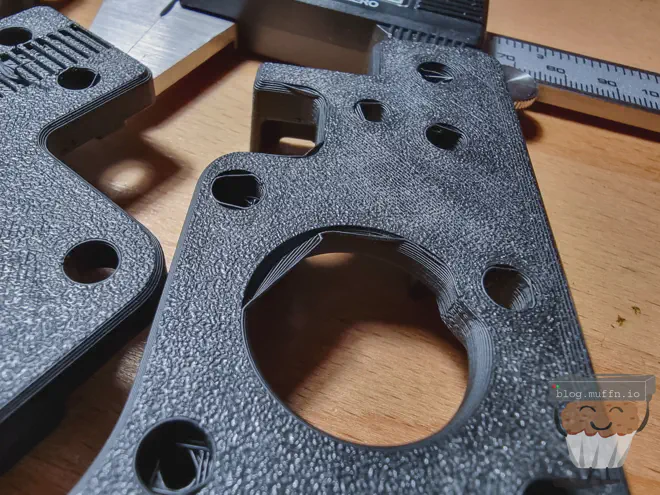
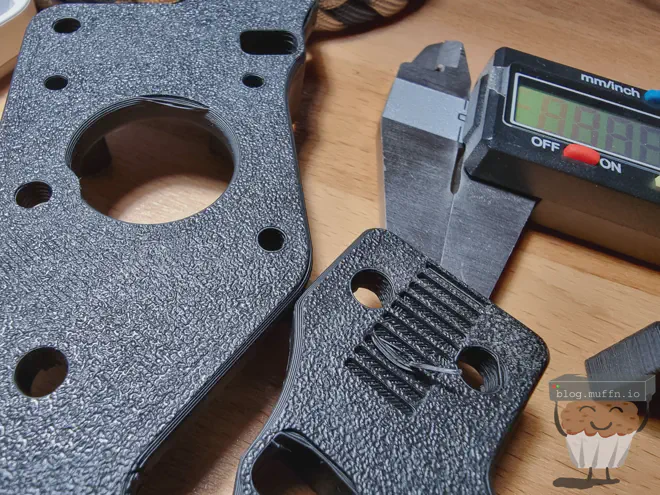
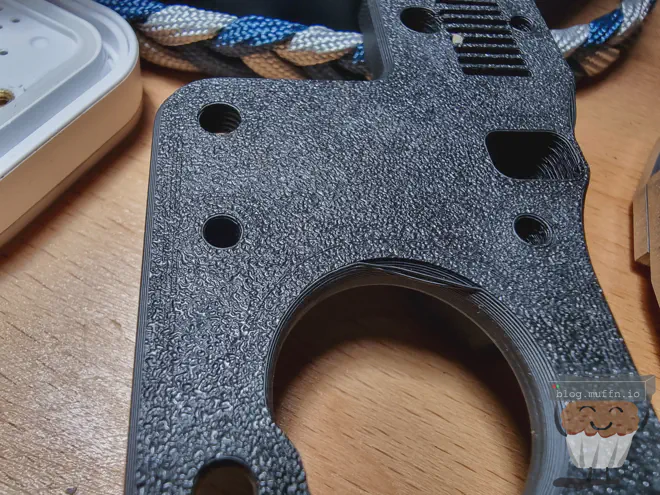
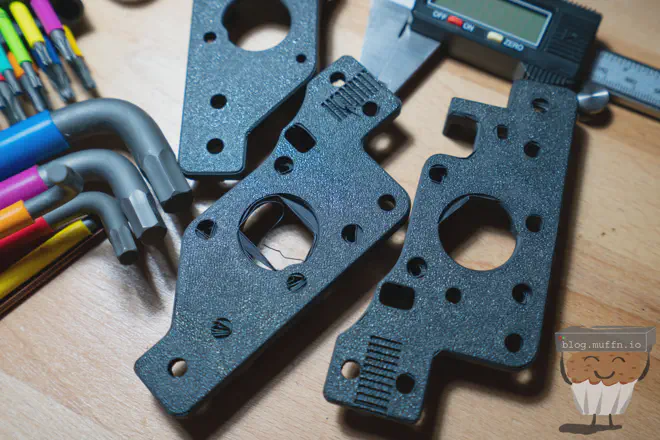
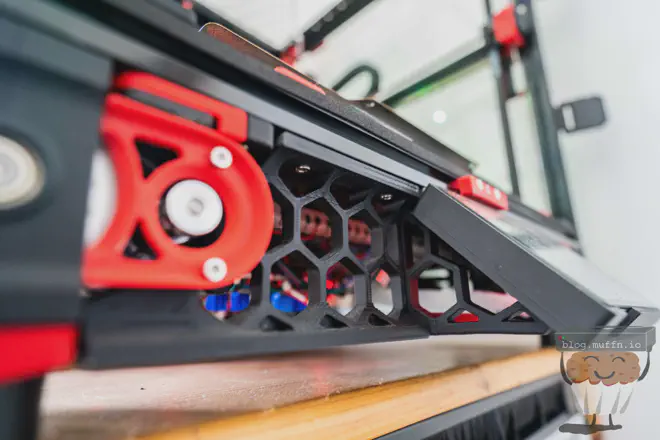
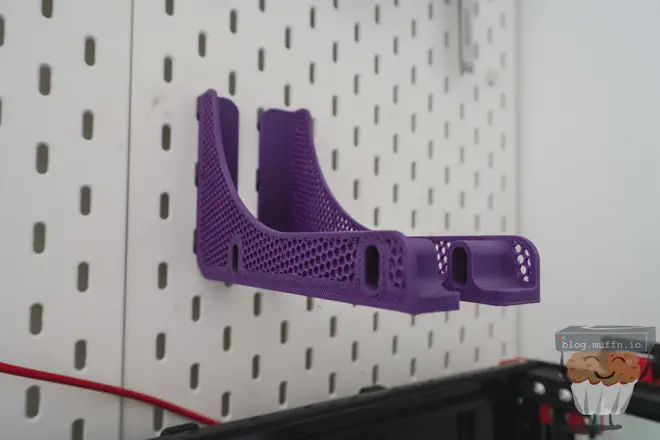
🌀 Printed Parts #
The printed parts were somewhere between acceptable and great. Slightly overextruded but perfectly functional. I had no issues with the clearances of any of the parts throughout the build, everything was accounted for and worked as intended.
I didn’t end up taking as many close-up pictures of the parts themselves, but these samples should give you a good feel for the quality as well as seeing the parts throughout this post.
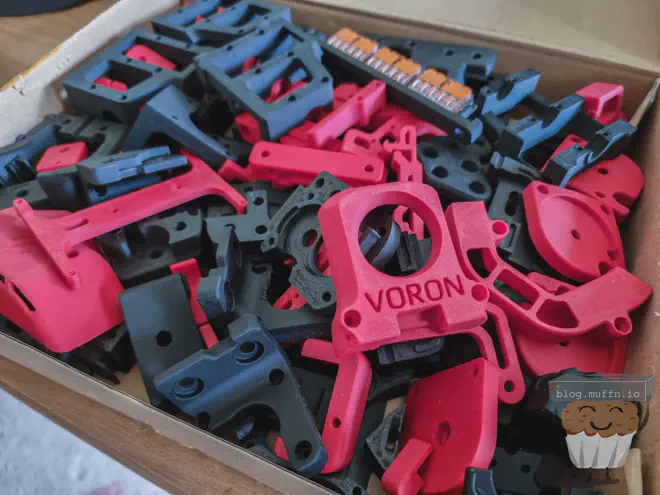

The only issue I had with the parts was this stringing on some of the parts, this cleaned up easily however and did not affect the functionality of the parts.

I declined the replacement parts as I didn’t think it necessary, I appreciated the gesture though as a whole set of parts are not cheap.
If you expect PIF quality parts then this is not it, but if you’re being realistic with your expectations considering the price then these should surpass them, as they did mine. I was more than happy to use these parts and everything worked out great.
🔨 The Build #
After going through the manual a few times and countless hours of build guides watched it was finally time to start my journey.
This is not a build guide. I am not qualified or arsed enough to do that. This section will be bits and bobs along my build. There are large sections I did not document as that was not my main goal. Mostly notable milestones or issues were documented.
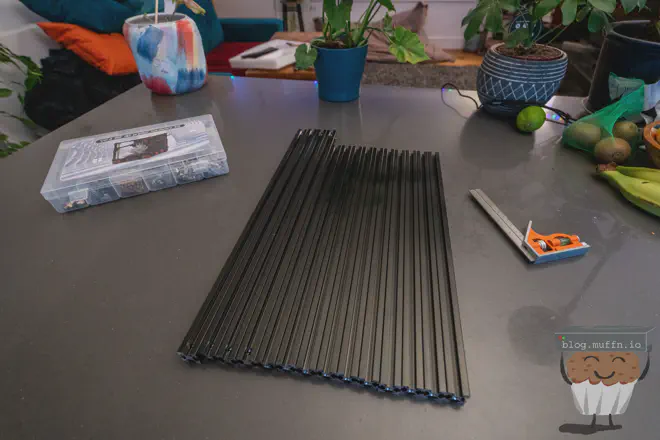
Frame #
Putting the frame together went without a hitch. Following the manual was straightforward and there was no issue with the parts. All extrusions were cut to the same length and all holes had been tapped in the correct position so that everything lined up square on my kitchen counter.
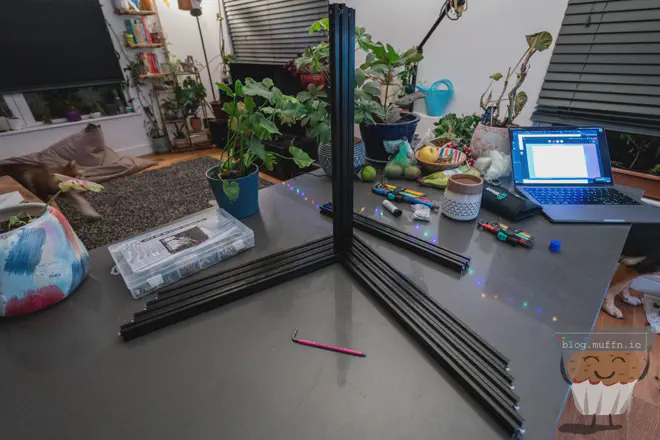
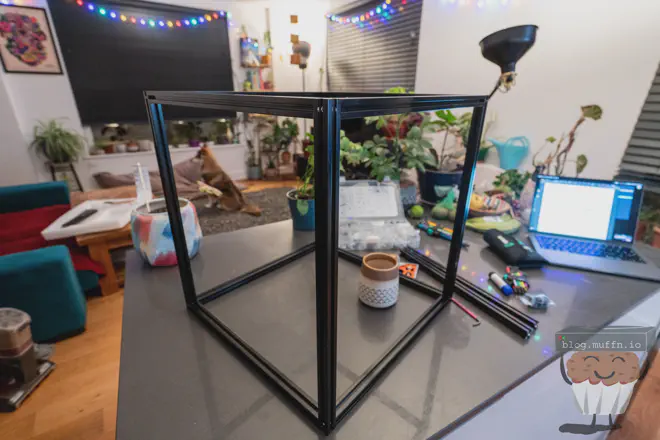
And with that, the frame was completed and step one of the build was, to me, looking like a great start.

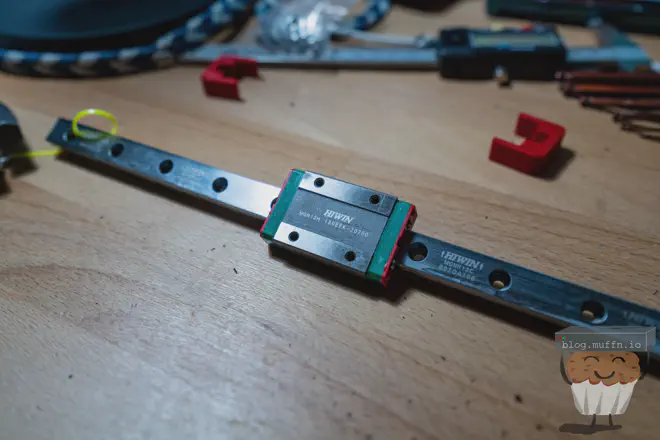
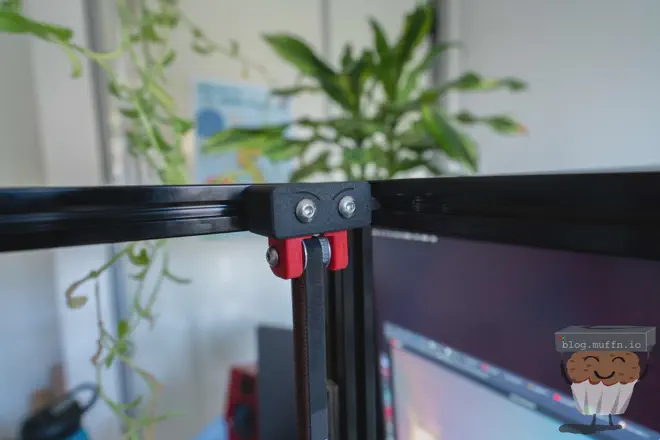
Rails #
The rails as previously mentioned felt fine out of the box. They needed cleaning and greasing before use. They came sealed in bags with oil to prevent rusting, as is usually the case.
I didn’t have anything suitable to clean the rails in as little ISO as possible so I ended up emptying and cleaning our recycling bin and sitting the rails in there with enough ISO to cover the rails, this worked very well and was a perfect fit.
I opted to use WD-40 white lithium grease to lubricate the rails and after running them a few times things were smooth.
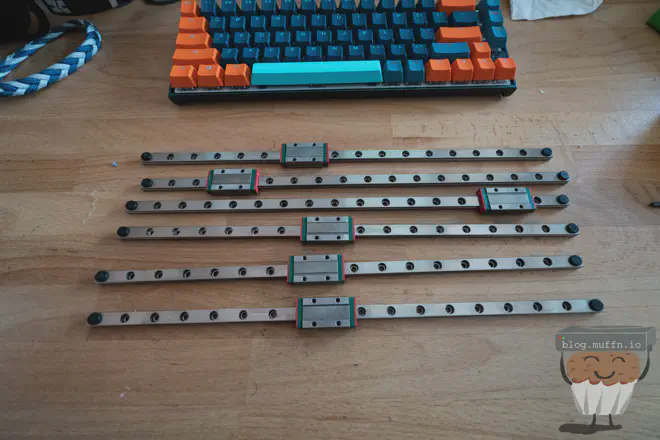

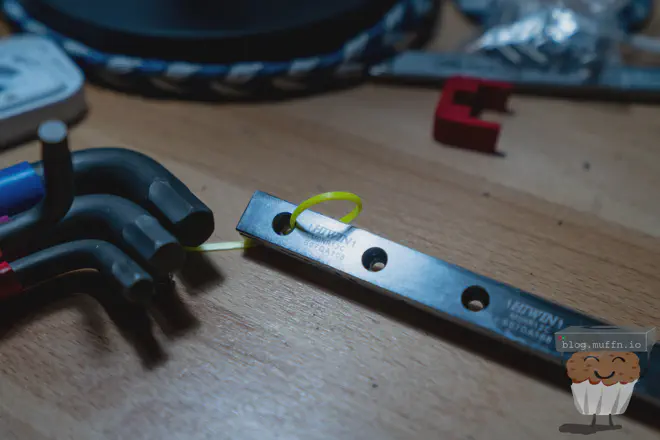
The ‘Hiwin’ MGN12 rail looked and worked as expected after a clean and regrease. Whilst the branding is all over the rail I doubt it is real but that doesn’t matter, the functionality should be in spec for this application. The Hiwin rail didn’t have stoppers on them so I just used some zip-ties.
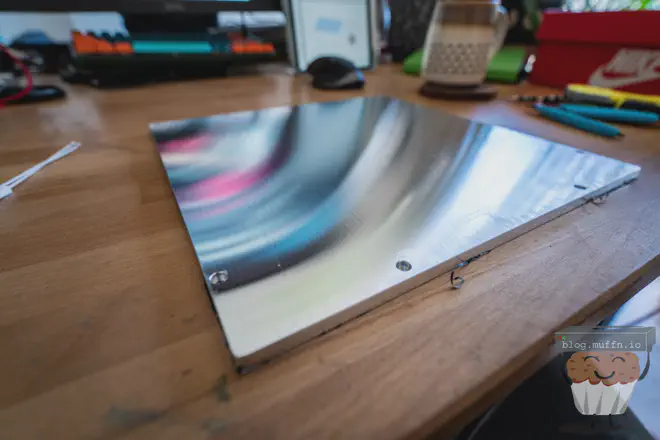
Build Plate #
The build plate had some residue on it as expected but this was easy to clean off with some ISO. The plate was machined and all the tools I had to hand showed it as straight. I don’t have anything to measure in many decimals of precision vis-a-vis flatness, however, this was already miles better than my Ender 3 bed and I didn’t feel like this had been a point of cost-cutting as I was expecting.
All the holes had been drilled in the right place and overall I had absolutely nothing to complain about. I wouldn’t have complained if I bought this standalone from a UK vendor claiming max deviation of +/- 0.075mm.
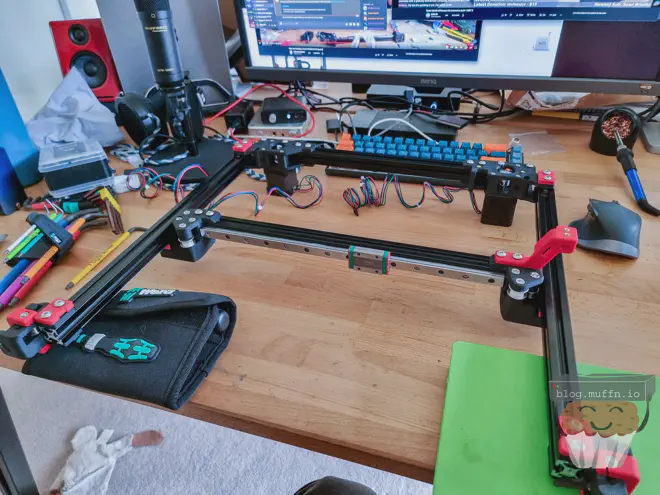
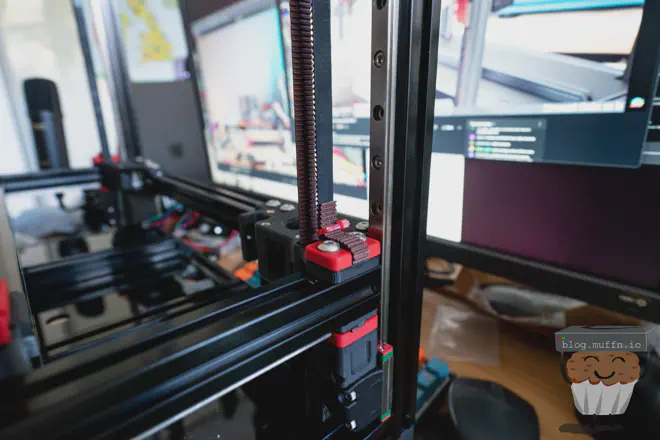
Gantry #
Building the gantry with the supplied parts went smoothly. Everything fits as it should and overall the process is straightforward once the instructions are understood.
I didn’t take many photos during these steps as I was concentrating on not fucking up. I will say, it is extremely difficult to mount the gantry into the frame without any tools by yourself. I should have waited for my partner to come home and help but my impatience made me persevere. I did eventually do it, but I would highly recommend a second set of hands.
Alternatively, make sure to print these ‘z-locks’ which should save you a lot of hassle. I now have some printed if I ever need to take the gantry out.
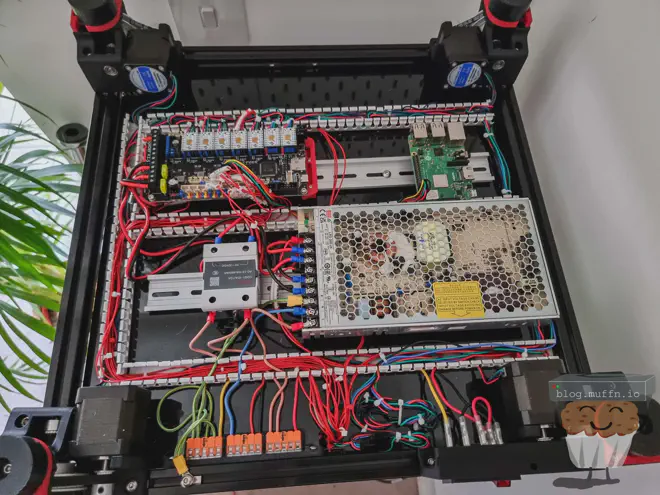
Electronics / Cabling #
The bit that everyone dreads, and for good reason when you look at the work required. Wiring everything up isn’t so bad though, it just takes some time and patience.
The PCBs are from Hartk designed with the X/Y PCB being this one and the Z endstop being this.
I wasn’t really expecting to have these parts included in the kit so this was great to see. They all fit together and work perfectly if following the official manual properly.
The included wiring diagram is Chinese on one side and English on the other. The labels on the cables are in Chinese and a translation is included at the bottom of the page. This can be very tricky and painstaking but is a non-issue if you take your time. It would be easier to relabel them off the bat as a lot of time was taken checking the translations multiple times.
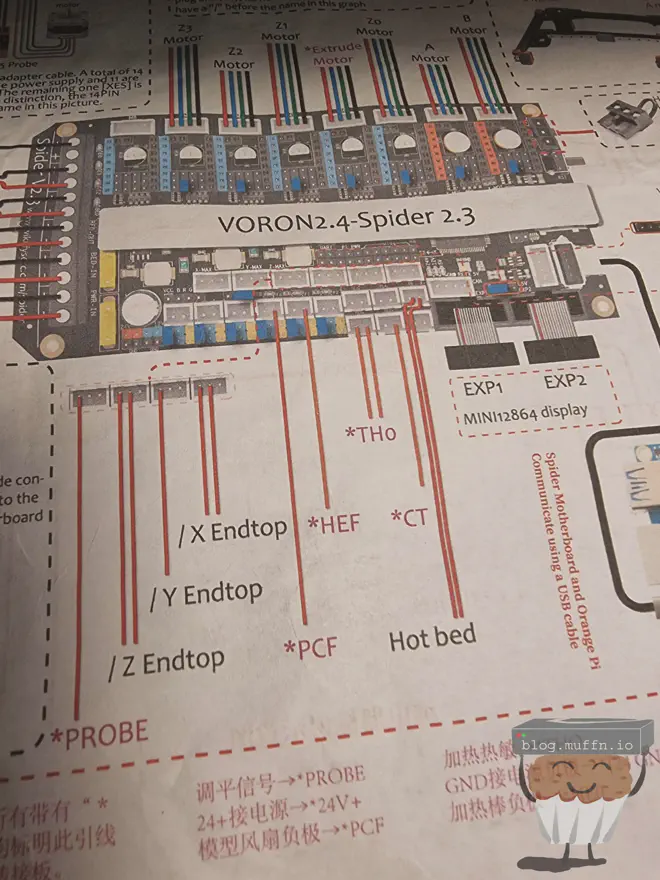

One thing to note is that the motor wiring did require crimping as there is no connector as shipped except for the extruder connection as which is part of the toolhead loom.
Both the A and B motor cables required extending as well. I opted to use some silicon cable I had and used the included microfit connectors to make a male and female end for connecting the motors to the MCU. All the Z motors had sufficient cable length.
I would say this is a minor inconvenience and something you should be prepared to do if you’re going to do such a build.
The wiring overall isn’t too bad, it’s just a slow process to make sure it’s done correctly. At the end of my first run this is what I ended up with. Not the best by any means, but I don’t think it’s too bad.
A small screen is included with the kit as per the BOM but I opted to not use this as I had planned to do my own screen setup as you will see towards the end of this post.
Cabling Issues #
After the initial round of cabling, I was having issues with the X and Y endstops. After checking all the documentation I confirmed I had it connected as Siboor wanted, however, the crimp has been done incorrectly.
The X and Y endstop PCB share a GND and VCC and this had been incorrectly crimped on the MCU side. It was easy to fix, but certainly something to note.
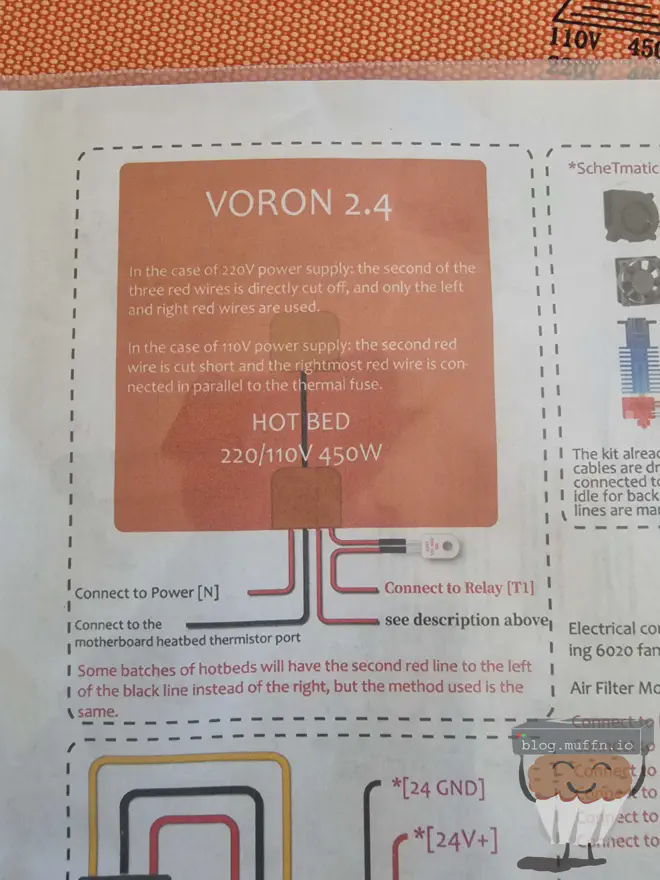
Bed Heater Oddness #
One point of confusion with the Siboor kit is the somewhat confusing diagram for connecting the bed heater as it is dual voltage. The following is what is sent for documentation:
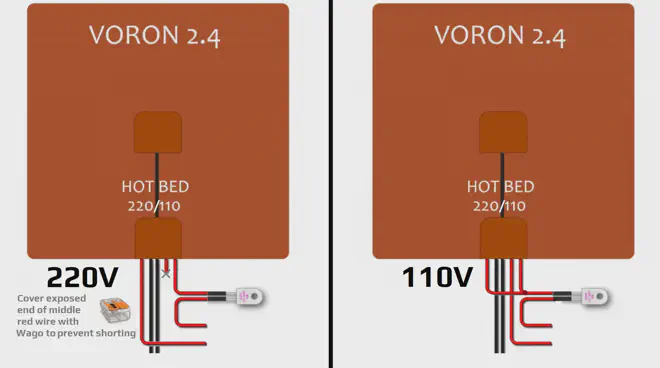
The following diagram was created by user timmit99#1319 on Discord which makes it easier to understand:
And with that, it was just software that had to be installed and configured….
We printing boiis #
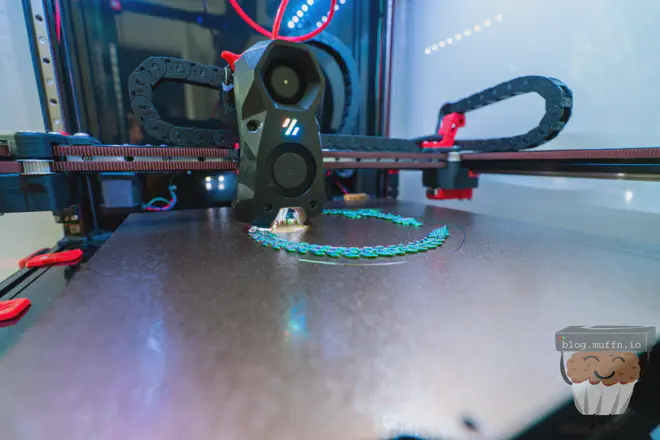
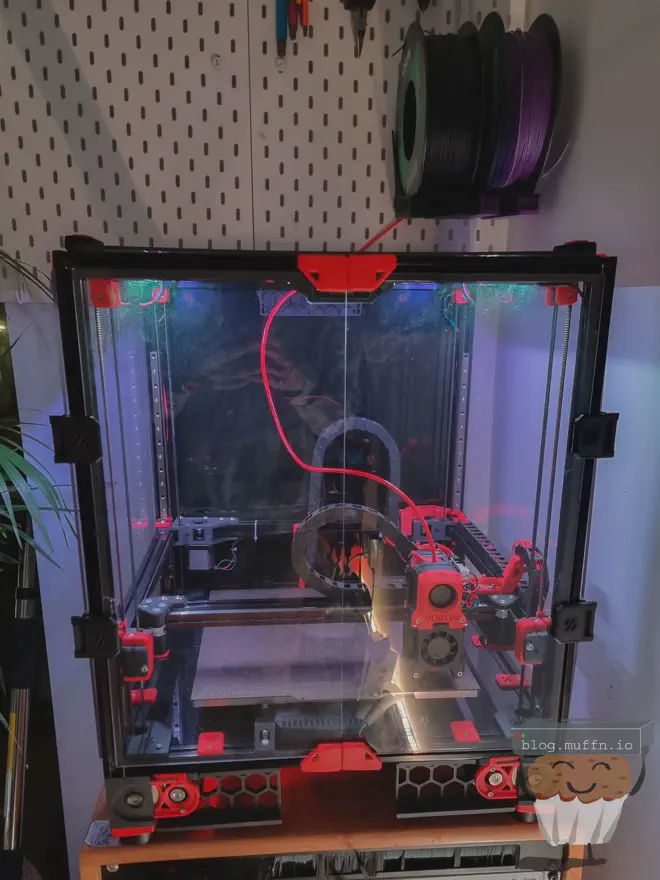
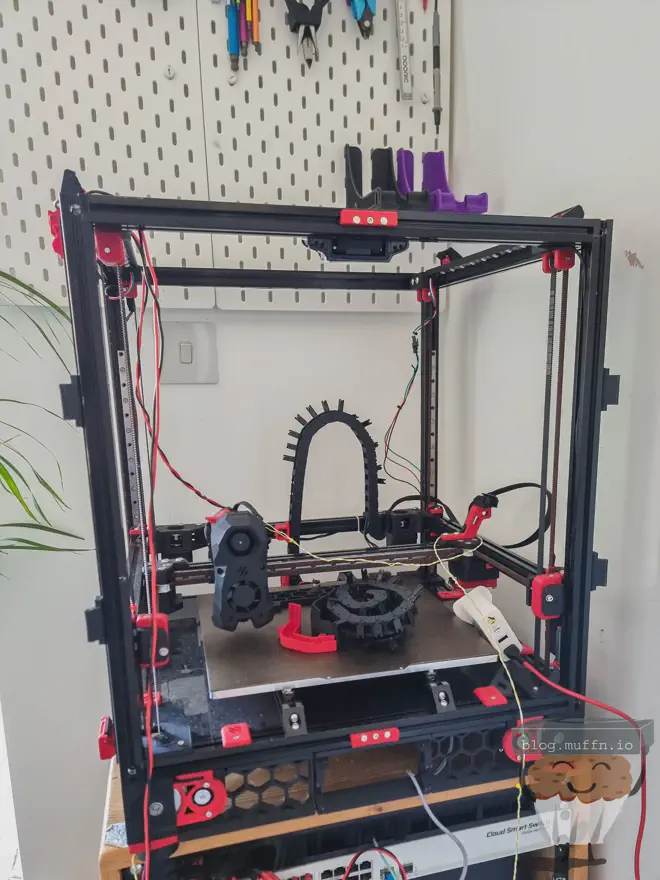
🥳 Completed - Base Build #

V2.4708! #

Reaching the milestone of getting a serial number is a great feeling. After some time with the build I’d tuned it to print better than anything I had personally experienced.
The journey was not done here though. After a few 100 hours of print time I was confident with the build and my tuning. I printed the parts I needed and progressed to the next phase of the build.
🧰 Mods #
During the first few 100 hours of the initial build, there were a few mods I had to tackle right away.
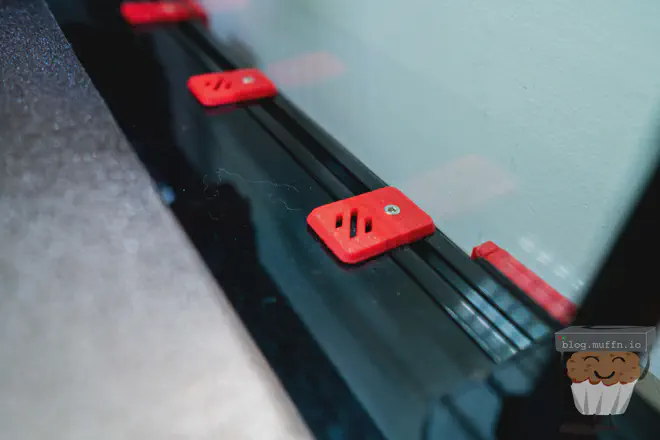
Deck Support Clips #
The internal temperature of the chamber really is no joke. After my first few prints I was already noticing the deck starting to warp. I’d read about this and it makes sense. The fix is these deck clips that have a top and bottom part that clamps the deck onto the bottom extrusion.
After 100s of hours, I can say confidently they work 100% and is a necessary mod. The other option is to use a steel sheet as a deck off the bat which is something I will look into putting in at some point.
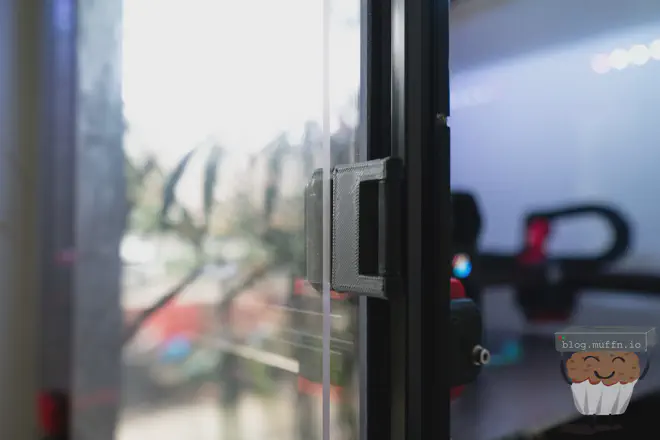
Panel Latches & Door Hinges #
Deciding to not bother with the stock panel mounts, I instead went with these fully 3D printed latches. These allow for easy removal of the panels and work stupidly well. An absolute marvel of engineering, the snap these latches have all whilst being held together with 2 bits of filament is really impressive.
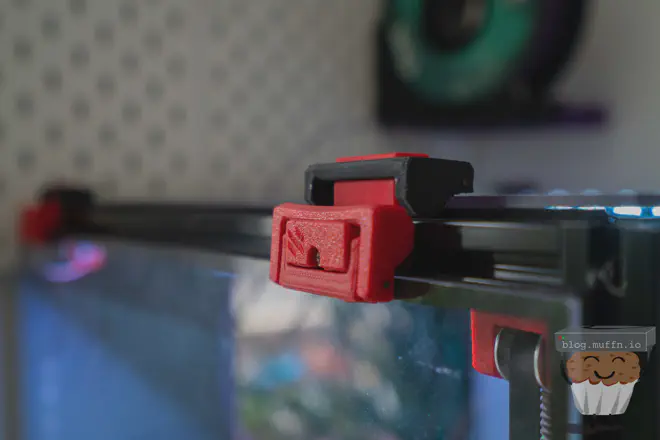
I tried a lot of different mounts/hinges for the doors. The ones I ultimately ended up with and really like are these fully articulating printed hinges.
They are secure with the front magnets and easily swing out to the sides of the machine, again, a really amazing design.
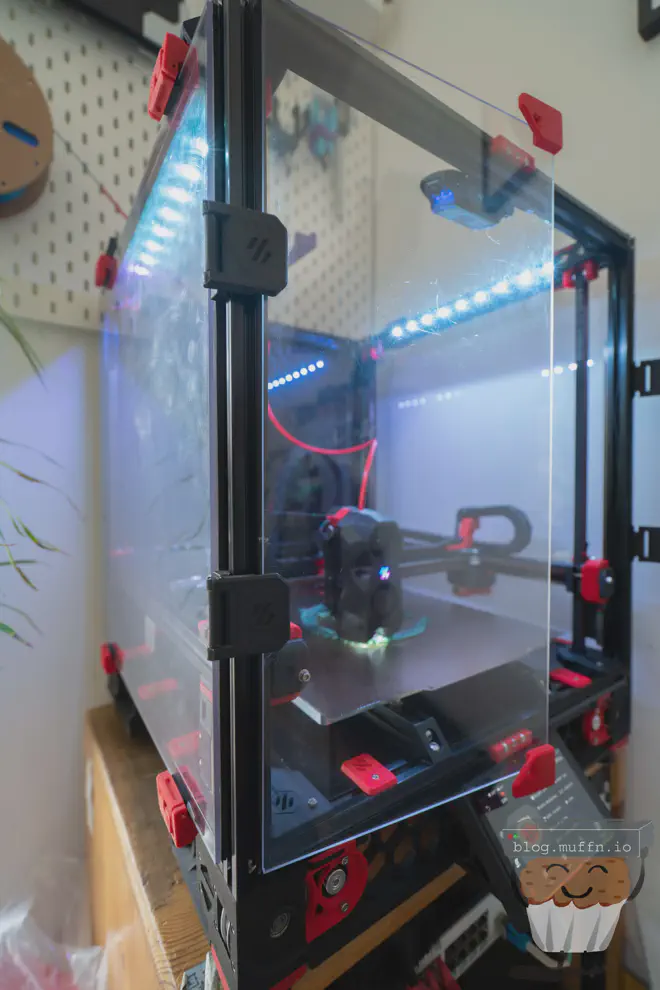
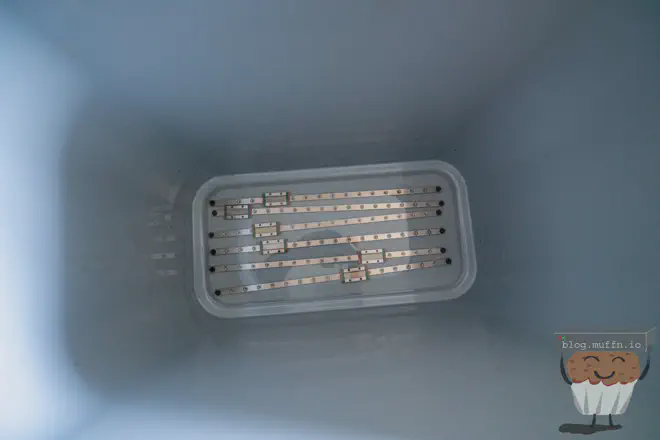
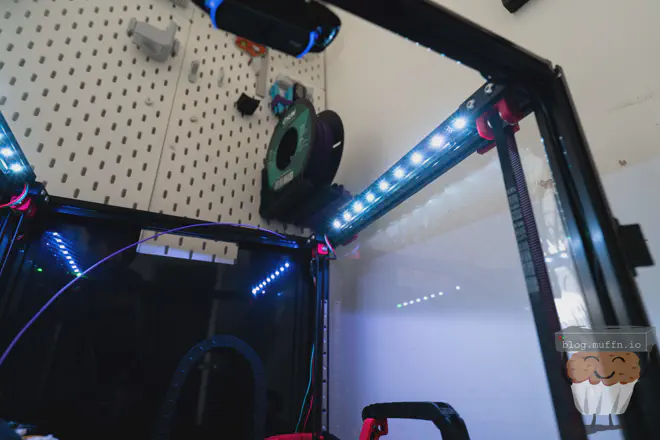
LEDs #
I was having trouble seeing into the chamber so preemptively decided to install some chamber LEDs.
I used designed and printed two LED mounts for the top of the extrusion and installed some neopixels in parallel. This worked well and I never bothered doing any effects with them as the white illumination light was pretty enough!
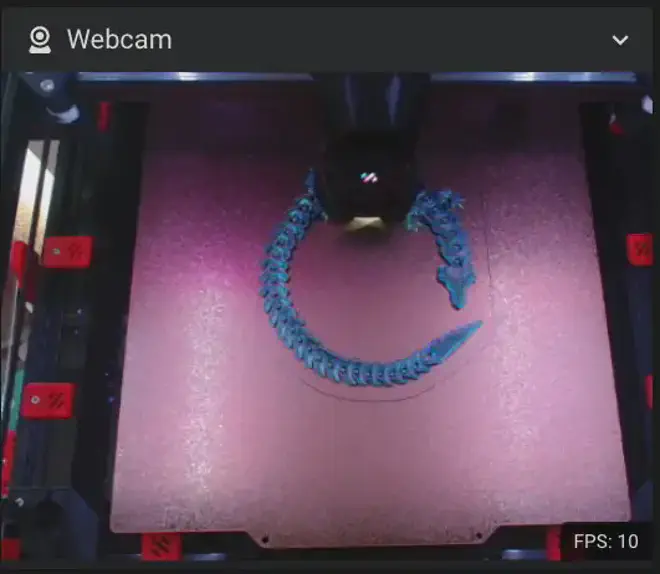
Webcam #
For the webcam, I used a C920 that’s been laying around with this slim mount which requires disassembling the camera and replacing the stock mount with this printed version.
It works really well and makes for a very tidy installation, my only gripe is that the print is extremely weak where the mounts for the C920 are inserted and I’ve already been through a few by accidentally knocking it, thankfully, it’s a quick print and a few mins for installation.

🔥 The Build (Again) #
Now that I had completed the base build and I was happy with the performance, I wanted to move on to the next phase of the build which would be all the new additions Voron Design have made to the v2.4. These would include:
- Stealthurner
- Clockwork 2
- Tap
- CanBus w/ 2 part toolhead PCB
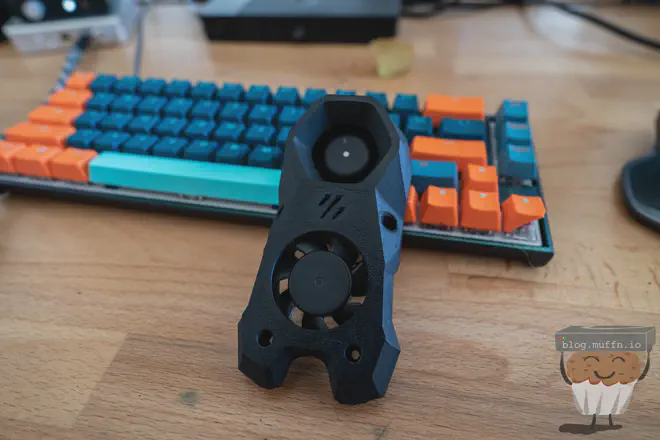
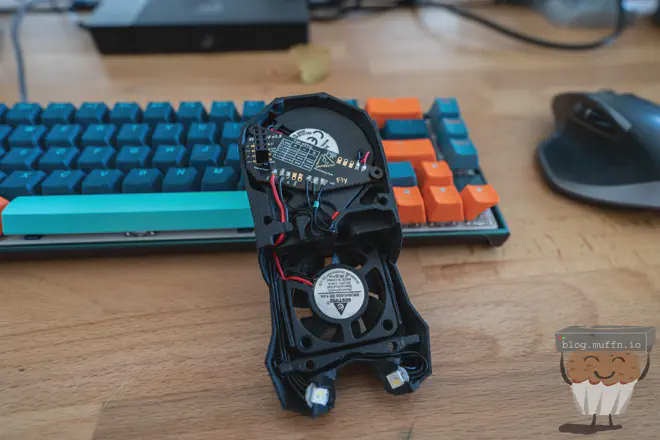
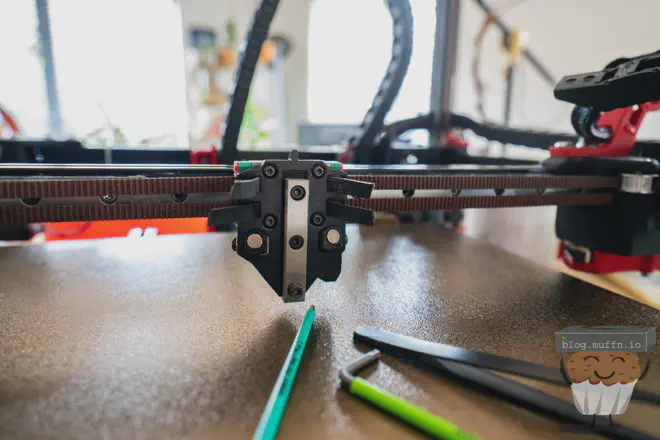
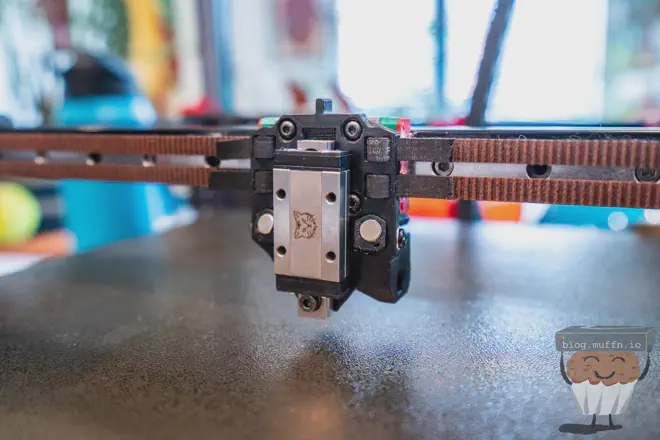
Stealthburner, Clockwork 2 & Tap #
Now I was confident in printing with the printer I got to work printing everything I required for the Stealthburner, Clockwork 2 and Tap.
I did end up buying a fresh set of Bondtech BMG extruder gears to go into the Clockwork 2. I was having no issues with the gears supplied in the Siboor kit but wanted the best quality available, I thought it best to obtain parts I knew for a fact were genuine for such a crucial mechanism. I grabbed an LDO NEMA 14 stepper motor for the CW2 build as required also.
For tap I purchased a kit from a UK vendor which had everything I needed bar the printed parts, this was the best way and very reasonably priced.
🤯 CANbus #
So I had a whole thing here with multiple chapters about all my CANbus issues intending to have a successful ending where everything paid off eventually. That didn’t happen.
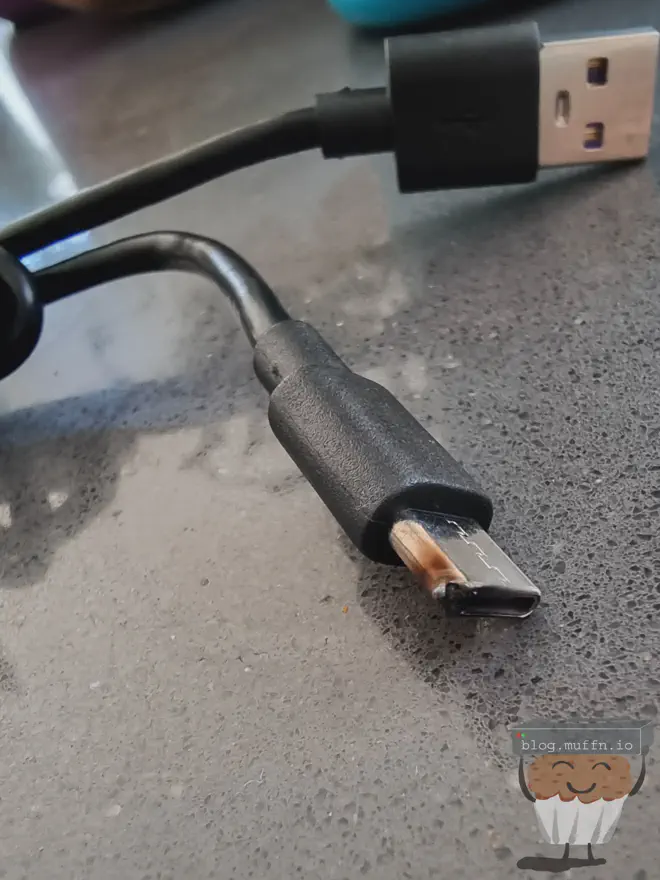
I went through 3 different toolhead boards (I blew some stuff up), 5 different USB to CAN adaptors in desperation, 3 different wiring harnesses and a load of other tweaking but, ultimately, could not get a stable system.
In my testing I was able to complete a lot of tests without issue, for example resonance testing using the toolhead ADXL which is notorious for being very demanding on CAN, but anywhere from 10 minutes to 4 hours into a print I would get disconnections.
After many months of banging my head against a wall and reading as much as I could on the topic I eventually decided it was best for my sanity to switch back to hard wiring until maybe the solution is more mature, or at least I would be fresh going back into it.
I’d easily spent over £200 on just CANbus at this point and it had to end.
Here are some pictures of some of this process though.
My first attempt with a Fly-SB2040.
Blowing up my CANbus toolhead board, CAN converter and MCU.
Months of sitting like this awaiting new boards from China.
Buying a Linneo CAN harness in an attempt to solve communication issues. This cable is made of Fluorinated Ethylene Propylene which is ‘aerospace/military grade’ wiring - didn’t help though.

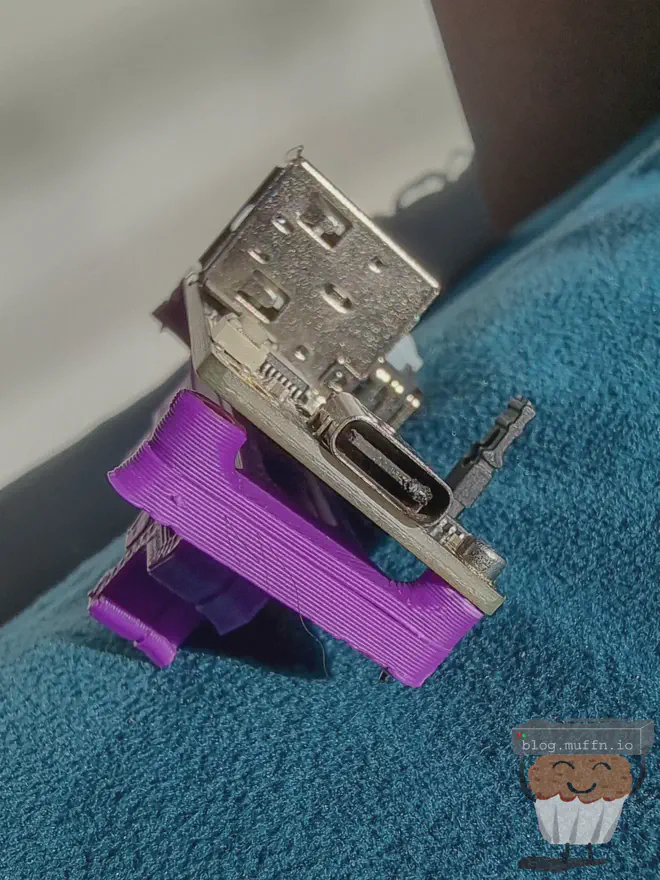
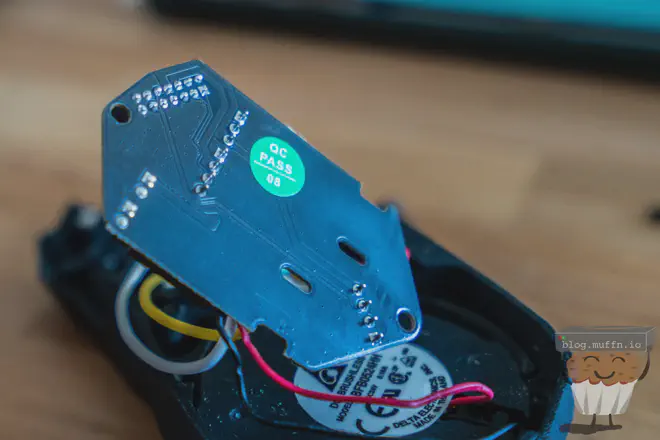
Receiving and wiring up the SB2209 after it finally arrived.
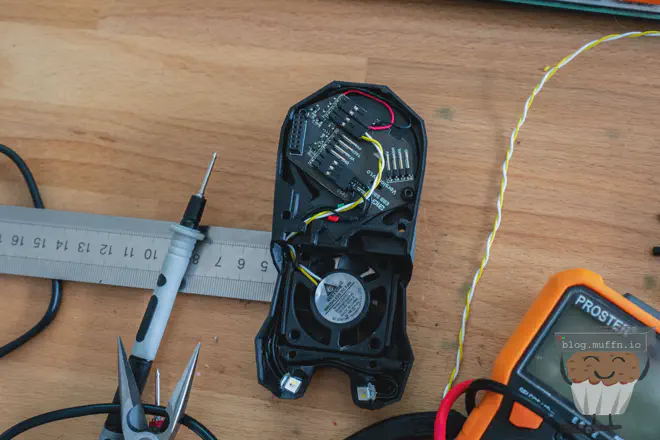
Tip: Make sure to check the clearance of pins on the back of these boards as all the boards I tested needed their legs trimming as it was causing clearance issues.
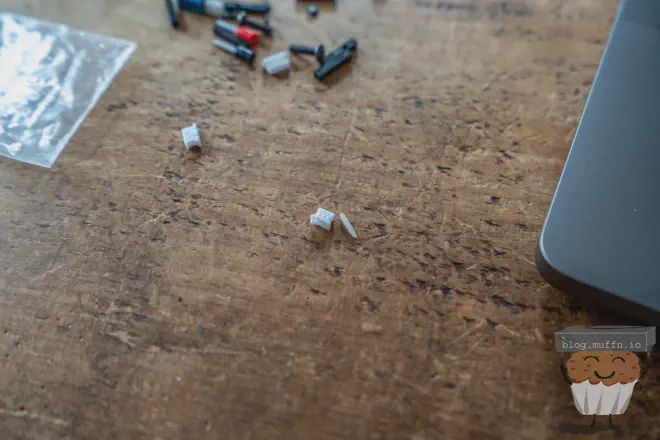
Comparing the connectors on the SB2209 to a freggin grain of rice. In fact, the grain of rice is larger than the connector. These made my life so difficult and it’s annoying that it was ultimately all pointless.
After all of this and a lot more, I finally admitted failure and bought a hartk 2 piece PCB rev 4 to accommodate the 5v required for Tap and rewired in the jumble of cables back into the chains to the Octopus MCU I now had after kind of blowing up the USB chip on my original Spider MCU.
With everything now finally working again and being able to get through an entire print without failure, it was back to tuning.
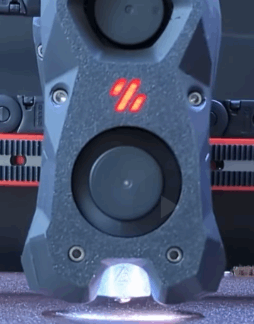
👇 Tap #
Voron Tap is very cool and I knew I wanted to do this as soon as I could. It was released just before I started my build so I skipped Klicky entirely.
Microswitch probe with magnetic attachement, primarily aimed at CoreXY 3d printers
Not having to deal with Z offset constantly is a huge win in my book. Unfortunately, the setup of tap was tricky for me. When I was using it with CAN I had no issues, however, after moving back to hardwiring my readings were all over the place and it would sometimes take 4-5 retires to complete a QGL.
After disassembling and reassembling everything with new printed parts the accuracy got much better. I’m saying this just to drill in that the tolerances needed for tap to function as designed is no joke.
The tap rail I have is sweet as fuck too. I ended up re-doing my belts when I reinstalled tap as the first time I did it wasn’t the most scientific because I am far too impatient.
This time I cut the belts to exactly the same length and counted teeth coming out of the toolhead.
GIF courtesy of Maple Leaf Makers.
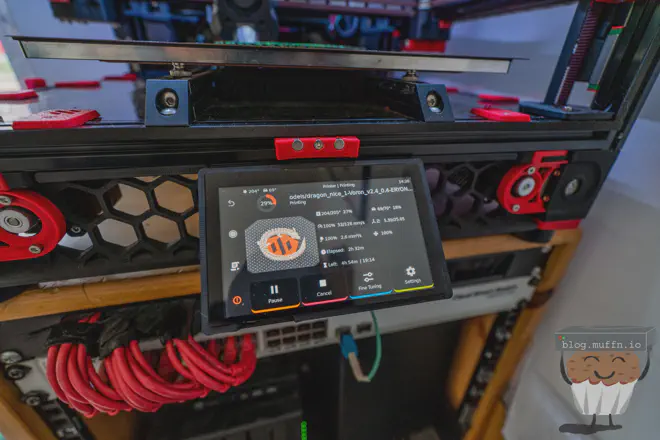
📺 KlipperScreen #
Some people say there is no need for a screen because Mainsail/Fluidd is all you need, and to that I say

BigTreeTech makes some good hardware and what I opted for was a BTT TFT50 as there were good mounts readily available. I had this screen purchased for a while but only wanted to install it once I was sure the build was done as it makes moving the machine about a bit of a delicate task.
A touchscreen like this is a godsend for quick actions and being able to see at a glance stats and progress for prints, especially long prints. Sometimes I just want to walk into the office and see how things are going without using my laptop/phone.
The software that makes this possible is the amazing KlipperScreen.
GUI for Klipper
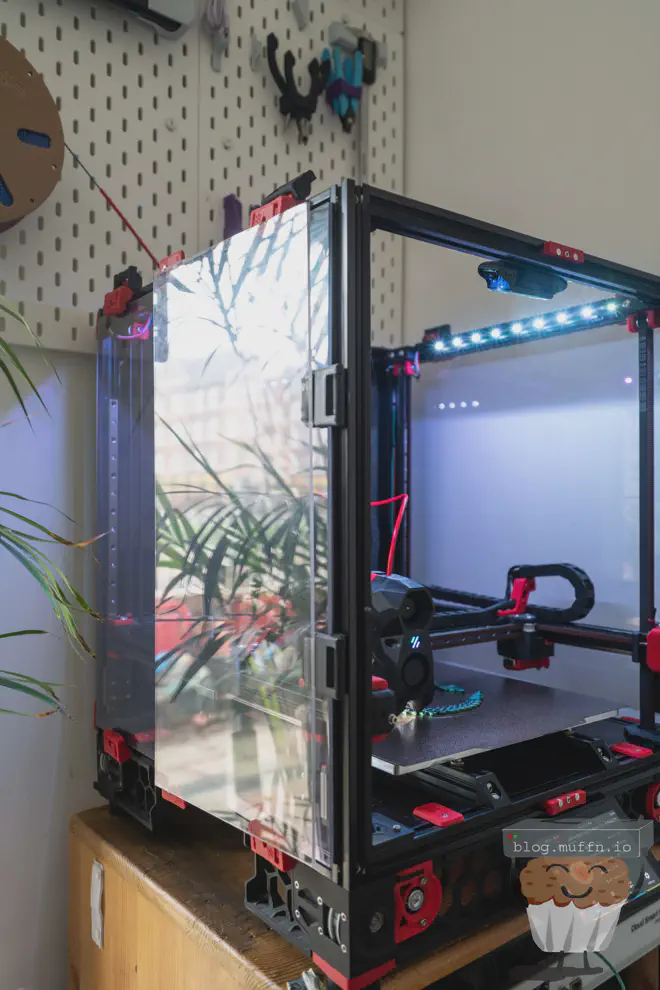
🎉 Completed - Modified Build #
Finally, months after my initial build I was back up and running, and better than ever.
But how does it print?
Well, it prints like a Voron, so very well.
🪛 Advanced Tuning #
I am planning to do input shaping once I have broken in the printer again in its new configuration. I did configure input shaping with my CAN setup but it was useless as I couldn’t print in that configuration.
I’m not going to go through this here as at the time of writing this my printer has only been functional for about a week, and I want to print some things before tuning it to go fast.
Input shaping and things such as volumetric flow rate calibration will come soon and I will see how far I can push my machine.
🤔 Siboor, Worth it? #
Yes. #
This is all of course my personal experience and I can’t say that their other kits are the same quality, or even that the same kit will be as mine was; but if it is then I would 100% buy this again.
Almost all the issues I faced were self-inflicted and had I just settled with the base build shipped by Siboor there would be nothing to complain about.
I haven’t seen anything online to indicate that the quality of the kits varies and mine wasn’t cherry-picked. They did not know I would end up writing this and I do not get anything from recommending them. I just see this as an amazing value proposition if you’re in the market for a Voron 2.4 and want to save some money over the other well-established kits and/or want the convenience of very passable printed parts.
Truth be told, I do get frustrated when I read reviews of cheaper alternatives to things and people are somehow surprised things are not as good as the competition which are 1.5x the price, or are disappointed x and y are not included.
If you’re going to be cheaping out, expect that saving to have come from somewhere. If you want/expect LDO quality, then buy an LDO kit.
The support was great and the company seem to take in recommendations by people to improve themselves. The offer to send me a whole new set of printed parts for example is a very promising sign.
The bottom line is, this kit has everything required to build a Voron 2.4 to spec, and that’s what matters, even an SBC in the dark days of Raspberry Pi unavailability.
I have a Discord friendo who has since ordered a 2.4 kit based on my recommendation and he had the following to say when asked about his experience, good or bad:-
Siboor have been amazing with contact and information during the entire order process and do a great job accomodating questions. Packaging was well done and all parts arrived safely.
There are some questions regarding cabling done that had me wondering why they didnt include all cables ready made since they do provide 95% oob ready but this could be due to either needing to lengthen/shortening motor wires.
The heating pad was a bit poorly labeled but a quick chat on the Discord cleared that up but kinda odd given it’s mains powered, this should have been clear from beginning for safety.
Build experience was good, no real questions on this.
The one issue I’ve experienced is likely probe related or wiring harness related, either I have a bad probe or one of the leads is broken, I’ve not had time to troubleshoot this yet, but im currently waiting on a replacement part for a PCB I damaged due to my own negligence.
All in all im impressed with the kit for the price, any small questions I’ve had has been handled swiftly.
My 2 very small gripes would be that I’d like to see a better wiring harness given the importance of it. And I’d also like to see premade motorcables.
The parts needed to fix these are all included in the kit, with tools, to sort oneself, so this final one is a minor!
So, if you’ve actually read this entire thing and were previously thinking about getting a Siboor kit, then I would honestly say go for it, things have improved already from when I purchased mine.
Join their Discord if you’re interested.
💻 Configs #
If you’re interested in seeing my configs for some reason, you can find my ~/printer_data in my git repo. I use kiauh to manage Klipper and its addons.
Klipper configuration for my Voron 2.4
Klipper Installation And Update Helper
👀 What Now? #
Voron Plans #
I don’t want to do anything major for a long time now. My plans are to print a lot. There are a lot of materials I want to try and there should be little required in terms of mods to achieve this. I’ll just keep tweaking and tuning till I get everything perfect.
The only modifications I want to do reasonably soon are:
- Complete set of ACM panels to replace the acrylic.
- Replace the deck acrylic panel with an aluminium composite panel.
Other 3D Printer Projects #
So, remember when I said I had an Ender 3 Pro? 👀
Building a Switchwire using as much from the E3P as possible would be a fun project, and should result in another very capable printer, but that’s for a while from now …I hope.
This is a full conversion of the popular Ender 3 Pro/V2 to a Voron Switchwire.
For now, it’s time to design and print. 👏
🍻 Fin #
Thanks for reading 😸.